
Web weather data
Overview
The Table below shows a table with a list of some of the royal palaces in the United Kingdom, along with their post codes, and MET Office Codes

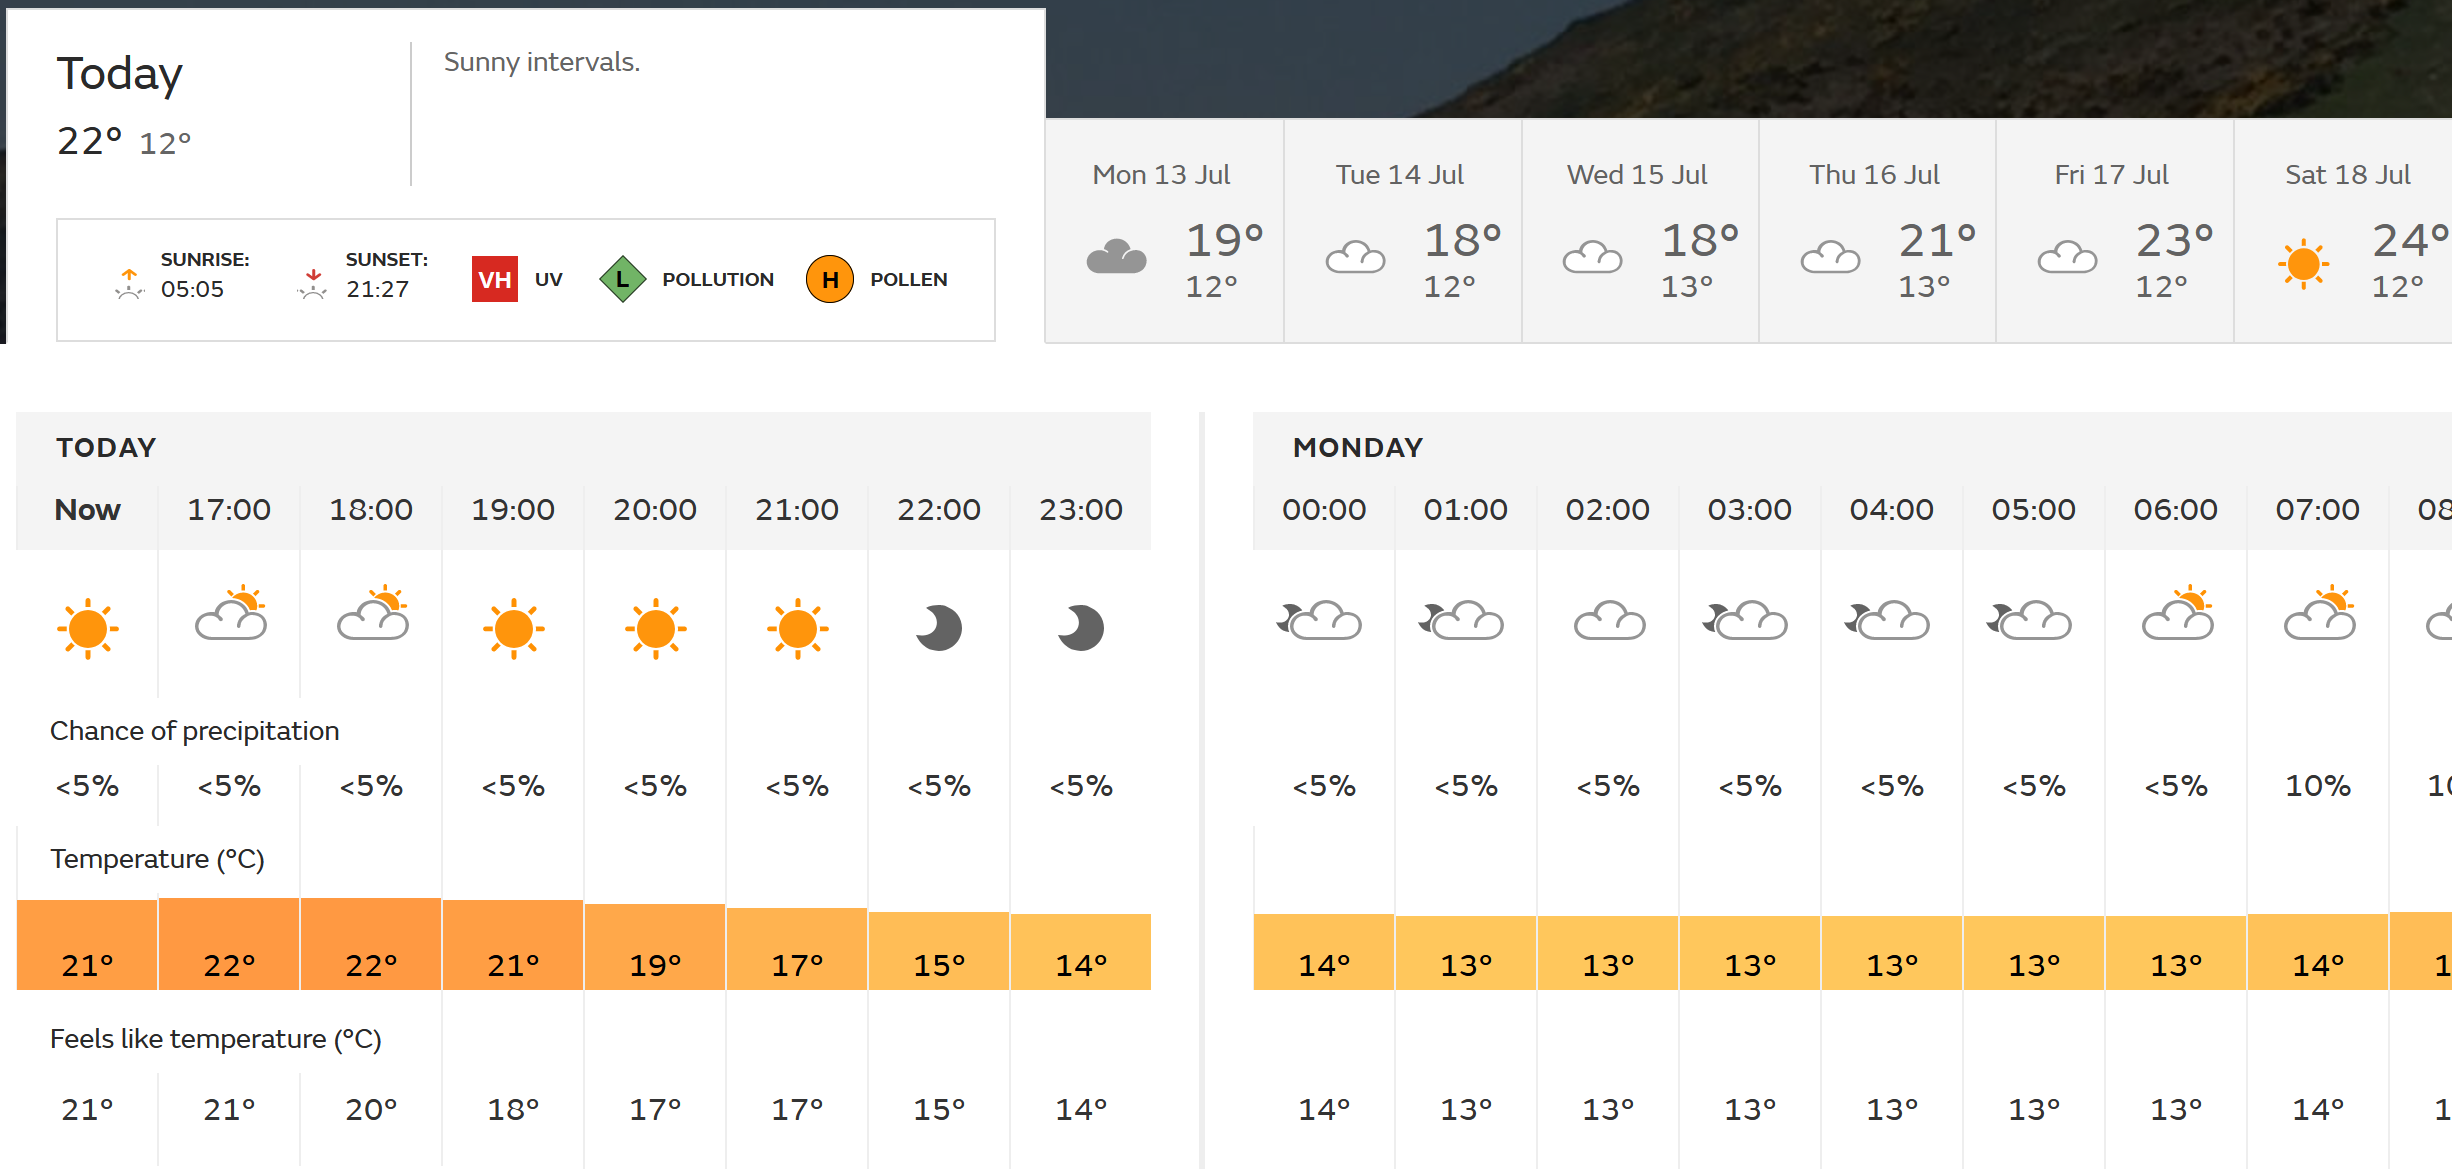
You can look up the weather for any post code in the UK on the MET Office weather web site. For example, the weather for the post code SW1A 1AA can be found by typing its post code into the Find a Forecast box at https://www.metoffice.gov.uk/weather/forecast/; The output is shown below:
The URL for this page contains MET office code for this post code, for example https://www.metoffice.gov.uk/weather/forecast/gcpvhbpyk.
This article explains how to scrape the weather forecast for all of the palaces shown in the first Table above, and then combine the results into a single table.
Steps
1. Scrape data from web and create Query
Here, you need to create two queries.
The first will be a function that can be used to scrape the weather forecast data from the web page (as shown earlier).
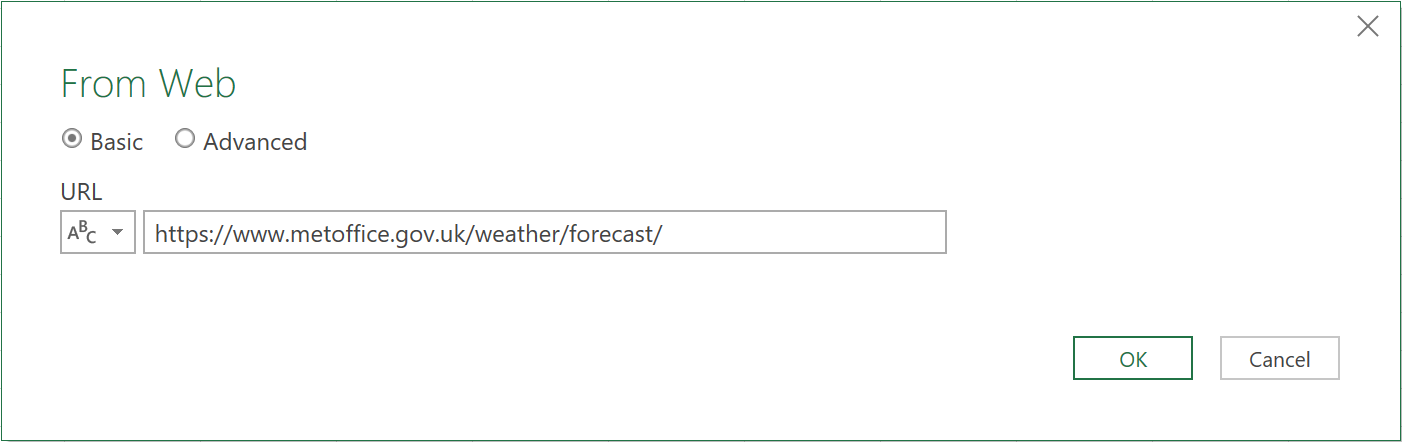
- Click the From Web button in the Data tab in the Excel, and enter the URL https://www.metoffice.gov.uk/weather/forecast/gcq0k18t5 in the From Web dialog (shown below)
When you click OK, the Navigator pane on the right-hand side of the screen will display the names of all of the tables on the page.
- Click ‘Table 0’ to select it, and then click the Transform Data button at the bottom of the Navigator pane. The Query Editor will open.

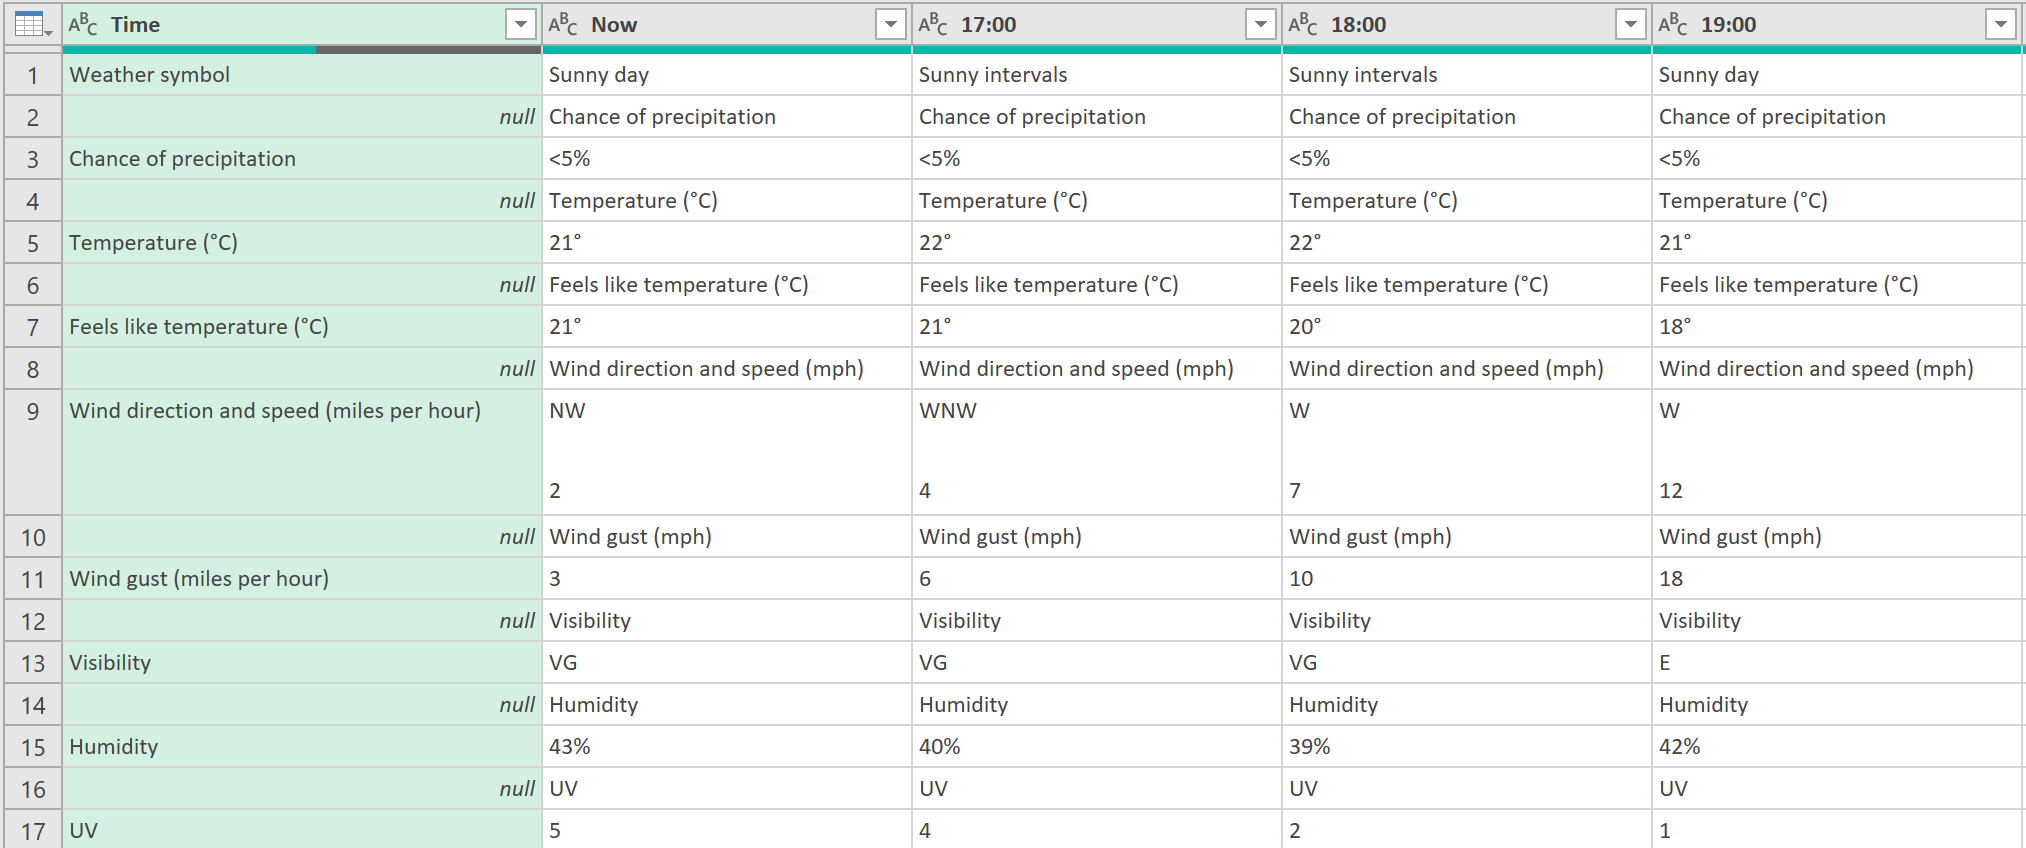
When the Query Editor opens, it will display the forecast for the rest of the day, as shown below.
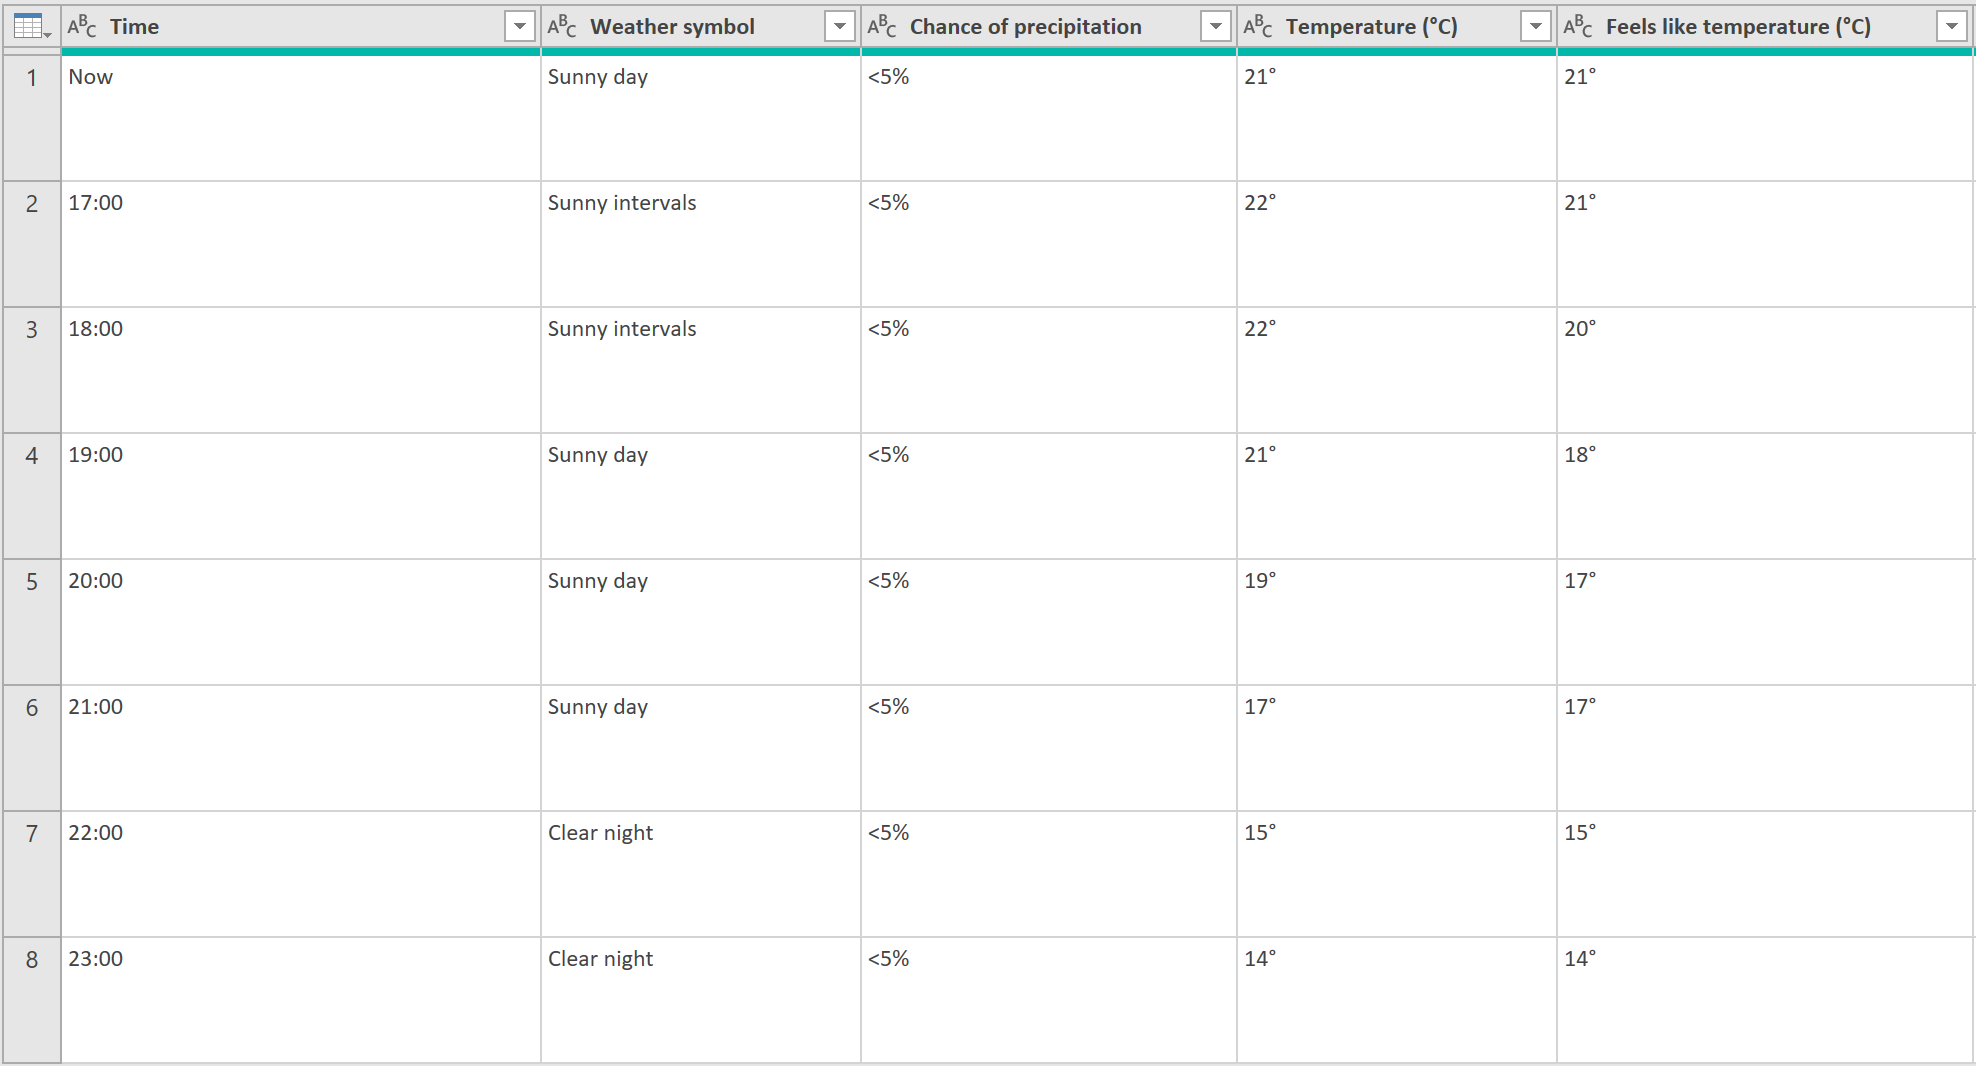
- Transform the data into a more user-friendly format, like so:
2. Convert query to function
You now need to convert this query into a function that can return the forecast for any post code area.
- To do this, click the Advanced Editor button on the View tab in the Query Editor toolbar to open the Advanced Editor. At this point the M code for the query should be something like this:
let
    Source = Web.Page(Web.Contents("https://www.metoffice.gov.uk/weather/forecast/gcq0k18t5")),
    Data0 = Source{0}[Data],
    #"Demoted Headers" = Table.DemoteHeaders(Data0),
    #"Transposed Table" = Table.Transpose(#"Demoted Headers"),
    #"Removed Columns" = Table.RemoveColumns(#"Transposed Table",{"Column3", "Column5", "Column7", "Column9", "Column11", "Column13", "Column15", "Column17"}),
    #"Promoted Headers" = Table.PromoteHeaders(#"Removed Columns", [PromoteAllScalars=true]),
    #"Changed Type2" = Table.TransformColumnTypes(#"Promoted Headers",{{"Time", type text}, {"Weather symbol", type text}, {"Chance of precipitation", type text}, {"Temperature (°C)", type text}, {"Feels like temperature (°C)", type text}, {"Wind direction and speed (miles per hour)", type text}, {"Wind gust (miles per hour)", Int64.Type}, {"Visibility", type text}, {"Humidity", Percentage.Type}, {"UV", type text}})
in
    #"Changed Type2"
- Edit the code as shown below (the changes to the original code are in bold type).
let
    GetWeather = (MetCode as text) as table =>
let
    Source = Web.Page(Web.Contents(https://www.metoffice.gov.uk/weather/forecast/&MetCode)),
    Data0 = Source{0}[Data],
    #"Demoted Headers" = Table.DemoteHeaders(Data0),
    #"Transposed Table" = Table.Transpose(#"Demoted Headers"),
    #"Removed Columns" = Table.RemoveColumns(#"Transposed Table",{"Column3", "Column5", "Column7", "Column9", "Column11", "Column13", "Column15", "Column17"}),
    #"Promoted Headers" = Table.PromoteHeaders(#"Removed Columns", [PromoteAllScalars=true]),
    #"Changed Type2" = Table.TransformColumnTypes(#"Promoted Headers",{{"Time", type text}, {"Weather symbol", type text}, {"Chance of precipitation", type text}, {"Temperature (°C)", type text}, {"Feels like temperature (°C)", type text}, {"Wind direction and speed (miles per hour)", type text}, {"Wind gust (miles per hour)", Int64.Type}, {"Visibility", type text}, {"Humidity", Percentage.Type}, {"UV", type text}})
in
    #"Changed Type2"
in
    GetWeather
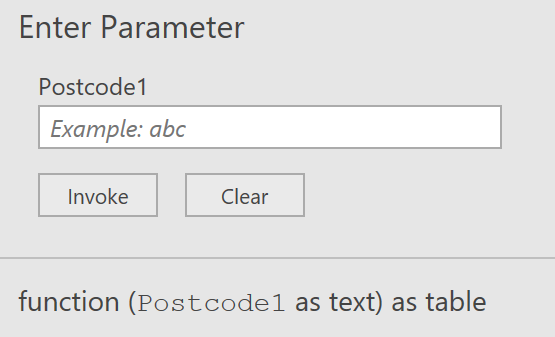
At this point the Query Editor should show the name of the new function and its parameters, as shown below. Rename the query fnGetWeather.
- Click the Close & Load button on the Query Editor toolbar to close the Query Editor.
3. Create query on search table
- Next, click inside the table with the information on the palaces
- Click the From Table / Range button on Data tab in Excel.
- The Query Editor will open and a new query will be created showing the data from that table.
4. Link the function query to search query
You now need to call the function you created earlier for each row in this table.
- Click the Insert Custom Column button on the Add Column tab in the Query Editor toolbar
- Call the new custom column Forecast, and use the following expression:
= fnGetWeather([Met Office Code])
- Click OK to close the Custom Column dialog. The output will be as shown below:

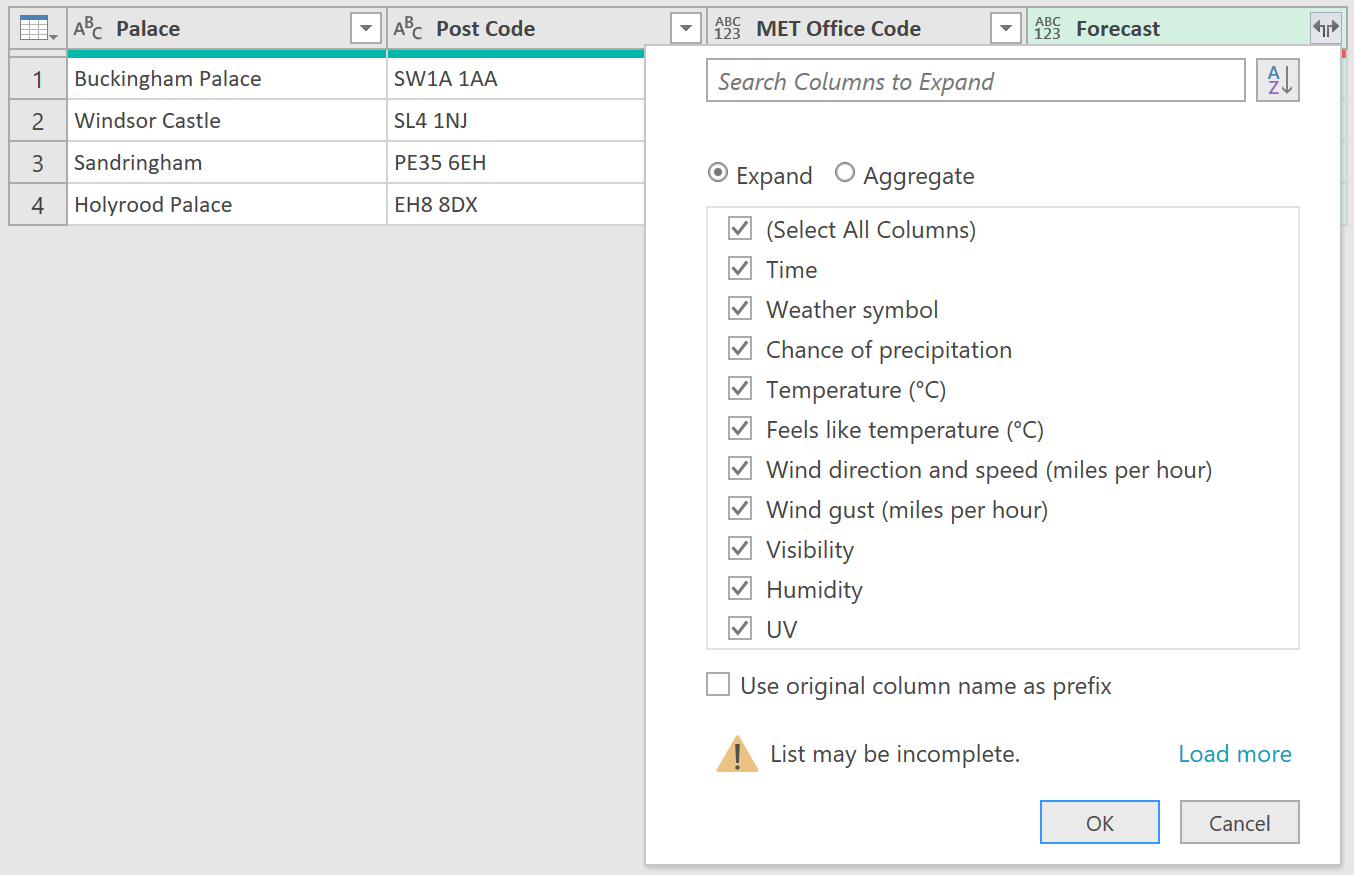
- Click the Expand icon in the header of the Forecast column
- Then, in the fly-out menu, click OK to expand all the fields, as shown below:
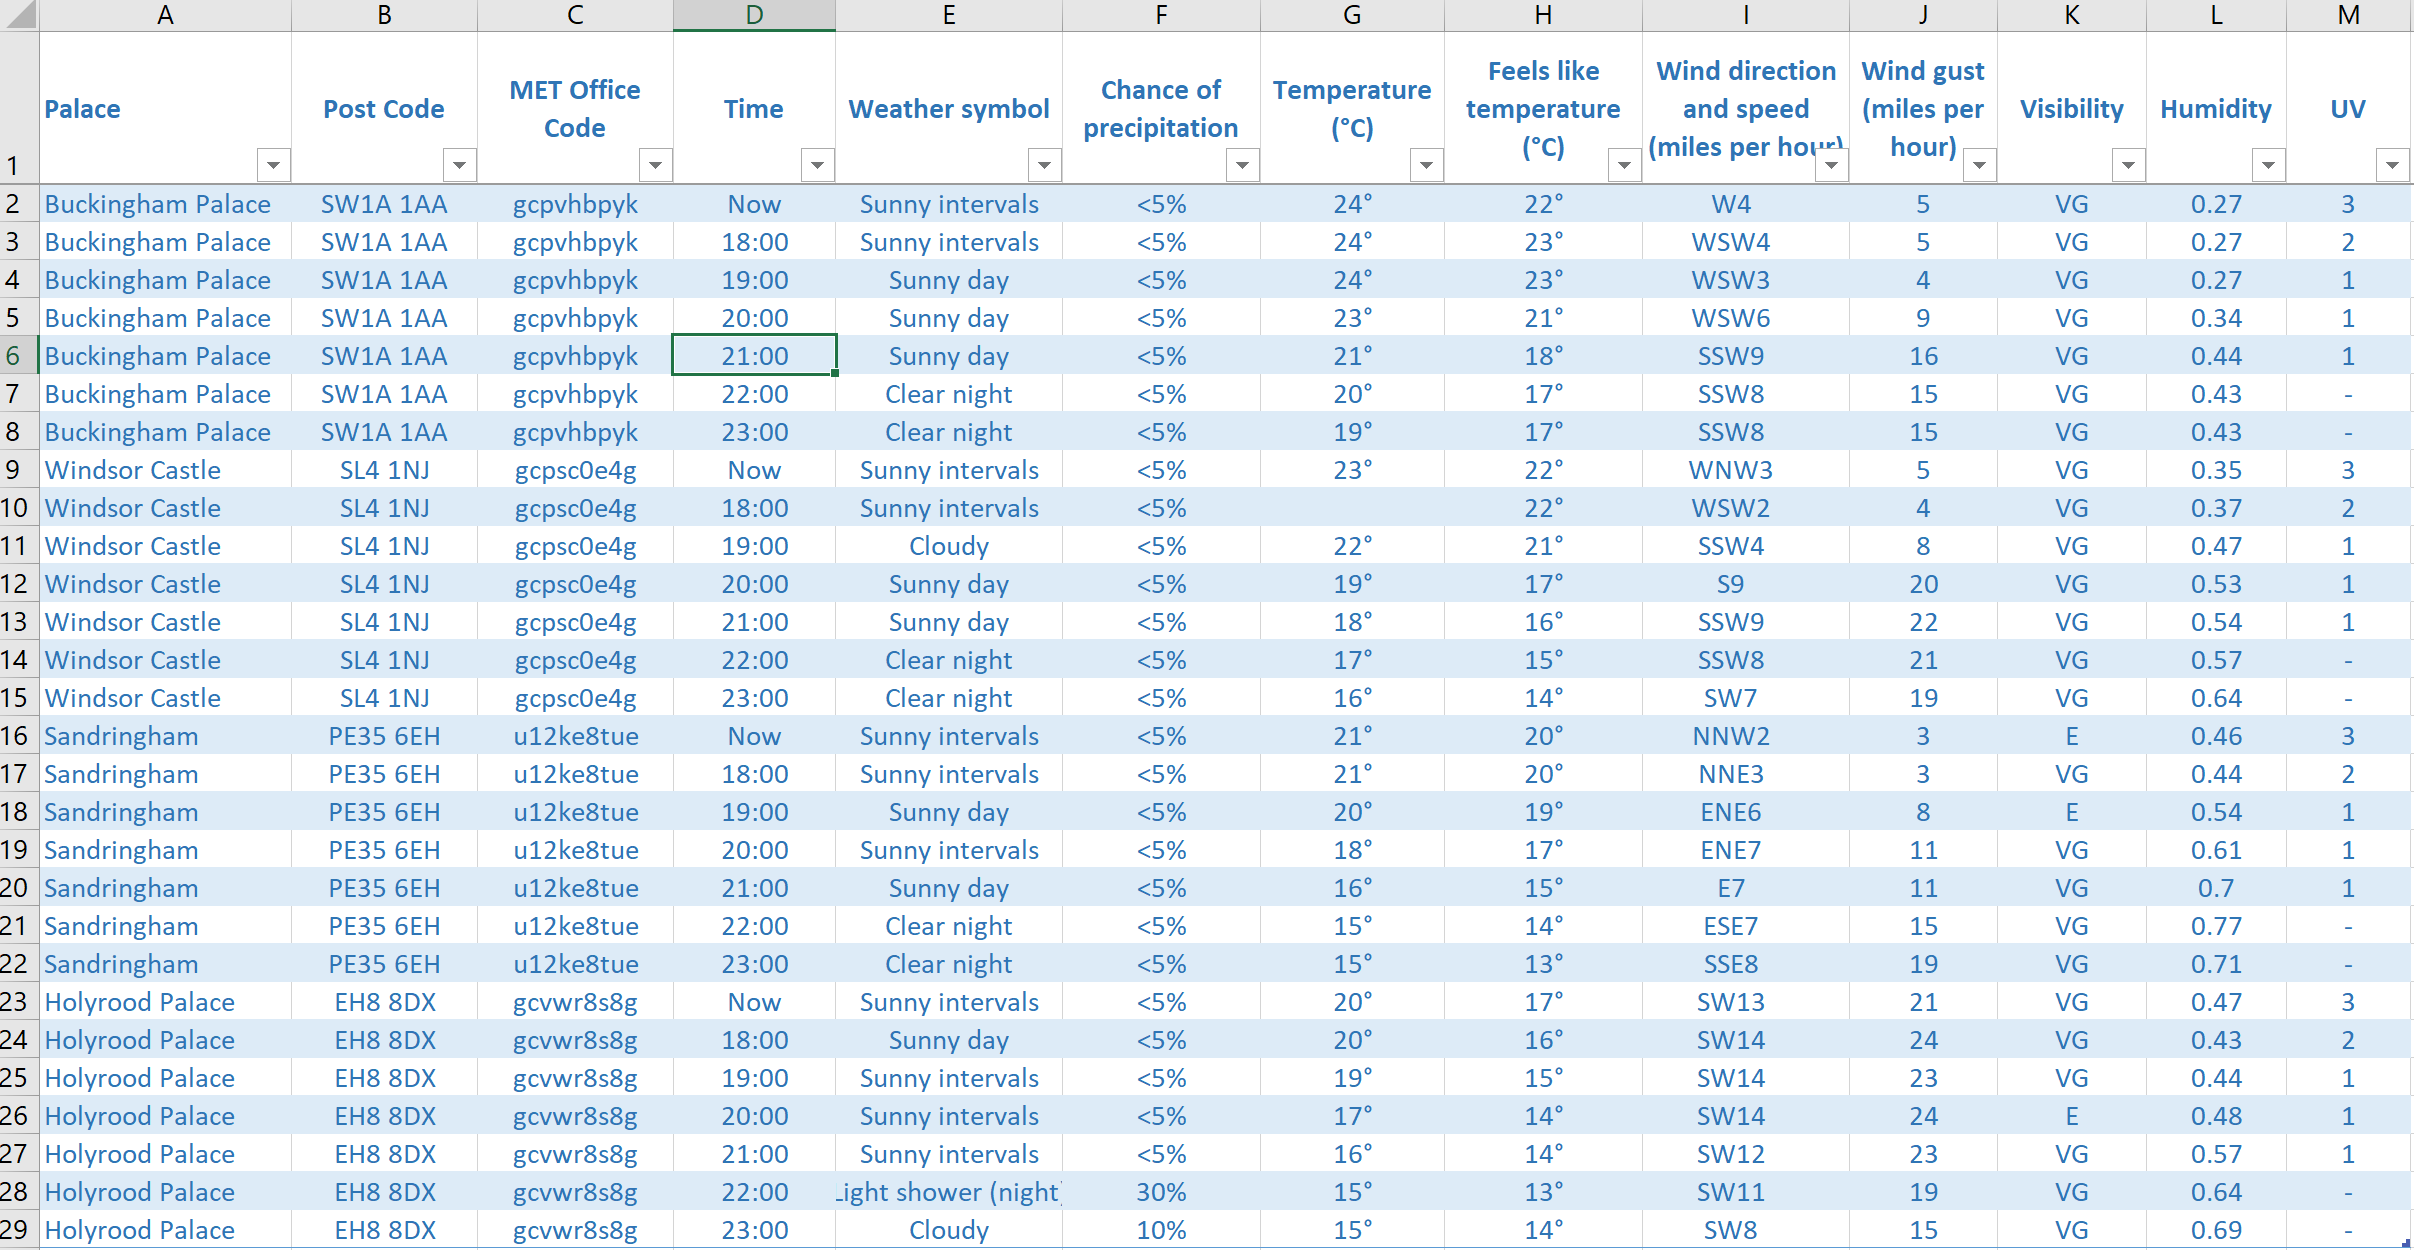
Once you have done this, you will see the weather forecast data for each palace. The final output of the query should, when loaded to Excel, look something like this:
5. The ‘M’ code
The M Code given above already gives the full M code for the fnGetWeather function. Here is the M code for the query that calls this function for each of the palaces in the Excel table.
let
    Source = Excel.CurrentWorkbook(){[Name="Palaces"]}[Content],
    #"Changed Type" = Table.TransformColumnTypes(Source,{{"Palace", type text}, {"Post Code", type text}}),
    #"Added Custom" = Table.AddColumn(#"Changed Type", "Forecast", each fnGetWeather([MET Office Code])),
    #"Expanded Forecast" = Table.ExpandTableColumn(#"Added Custom", "Forecast", {"Time", "Weather symbol", "Chance of precipitation", "Temperature (°C)", "Feels like temperature (°C)", "Wind direction and speed (miles per hour)", "Wind gust (miles per hour)", "Visibility", "Humidity", "UV"}, {"Time", "Weather symbol", "Chance of precipitation", "Temperature (°C)", "Feels like temperature (°C)", "Wind direction and speed (miles per hour)", "Wind gust (miles per hour)", "Visibility", "Humidity", "UV"})
in
    #"Expanded Forecast"
Feedback
Submit and view feedback