Generating a Date table
Overview
When building models, you will almost always need a Date table. This is a special table where each row contains a date, and with several columns, each containing a particular value derived from each date, such as: the day name, the month, year, and so on.
Although many data sources contain a pre-built Date table, this article explains how Date tables can be generated dynamically, from scratch.
Steps
1. Create a list of dates
This query has no external data sources - all of the data returned by the query is generated in the table itself.
Create a Blank Query:
- Click on the Get Data icon under the Data tab in Excel ➔ From Other Sources ➔ Blank Query
This will open up the Query Editor.
- In the Formula Bar, enter the following expression as its first step:
= List.Dates(#date(2020,1,1), 365, #duration(1,0,0,0))
This expression uses the List.Dates() function to return a list of 365 dates starting from January 1, 2020, at increments of one day. The result should look as follows:
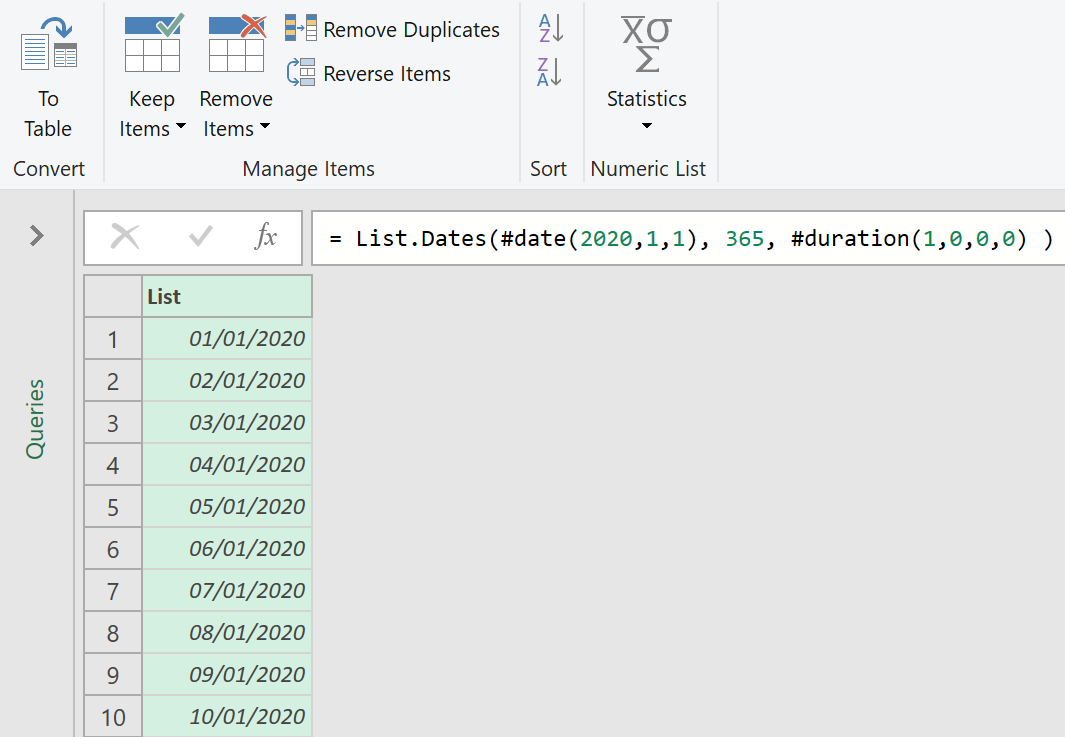
- Click the ‘To Table’ button on the List tab in the Query Editor toolbar to convert the list to a table.
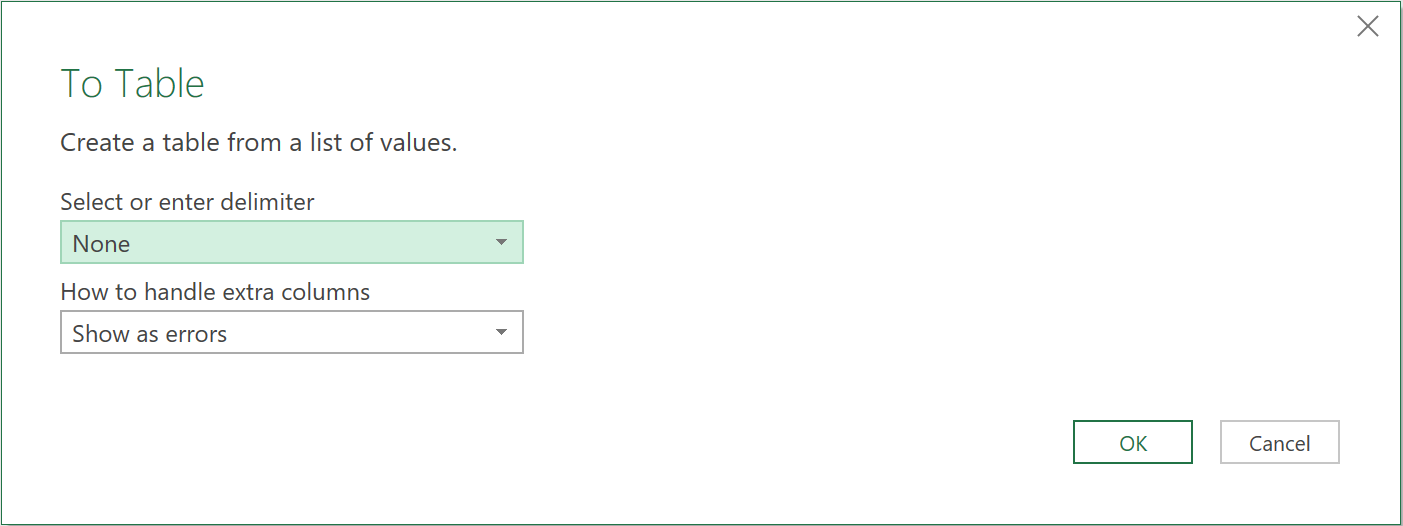
- In the ‘To Table’ dialog that appears, leave the default selections of ‘None’ for the delimiter and ‘Show as errors’ for How to handle extra columns, as shown below.
- Click OK.
- Rename the column in the resulting table, to ‘Date’.
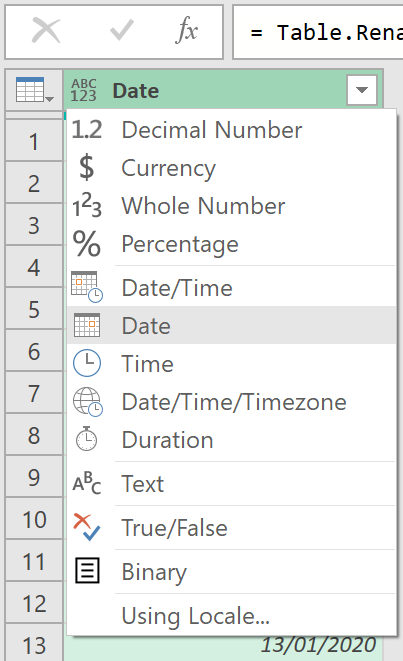
- Select the ‘Date’ column in the table and convert the data type Date.
2. Create Year, Month, and Day columns
- Select the ‘Date’ column again. Then right-click and select Duplicate Column to create a copy of the column.
- Double-click the header of the new column and rename it ‘Year’.
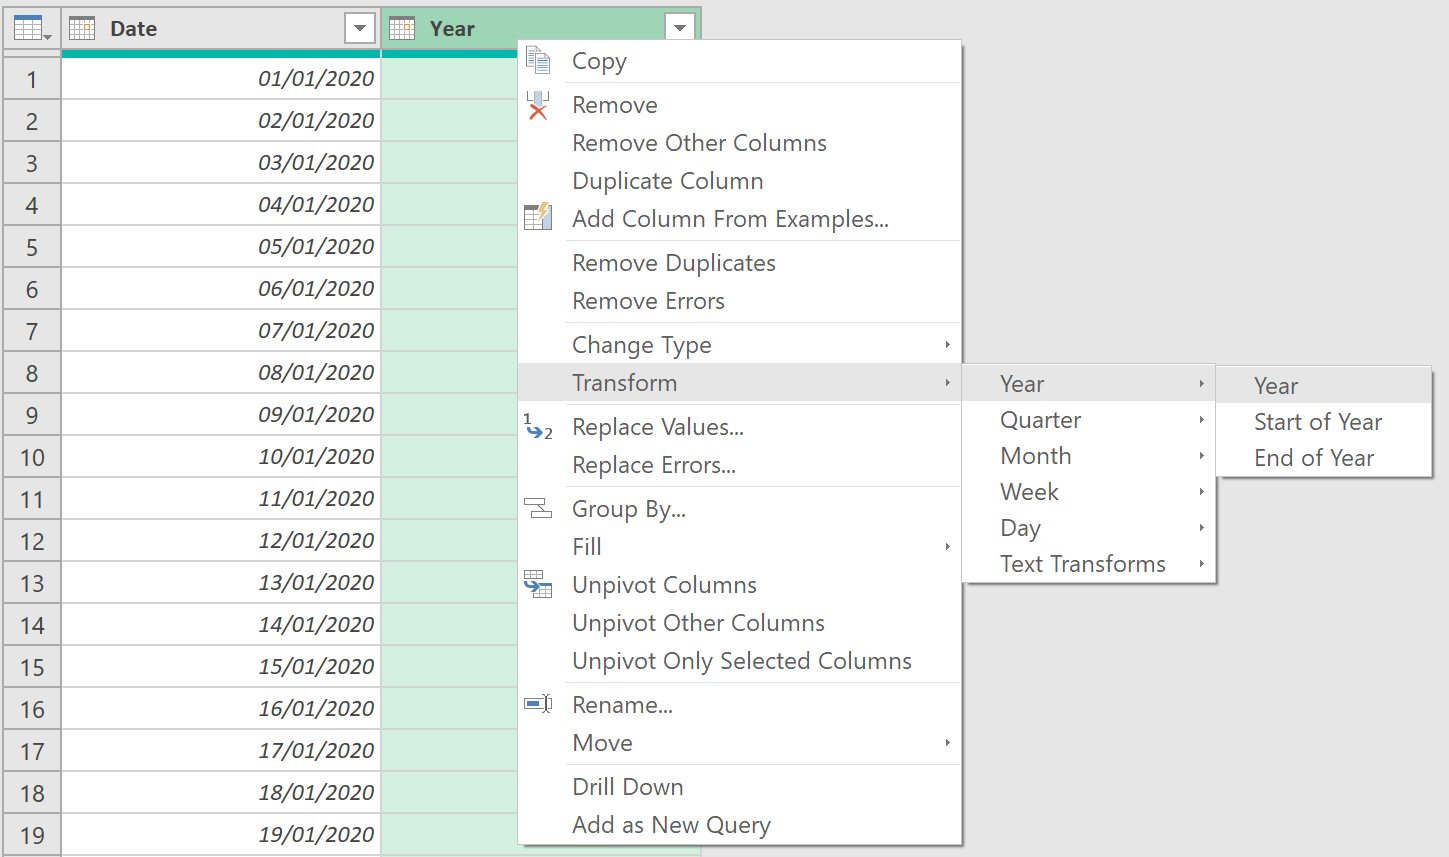
- Right-click the ‘Year’ column, then select Transform ➔ Year ➔ Year, as shown below, to replace the date values in that column with just the years.
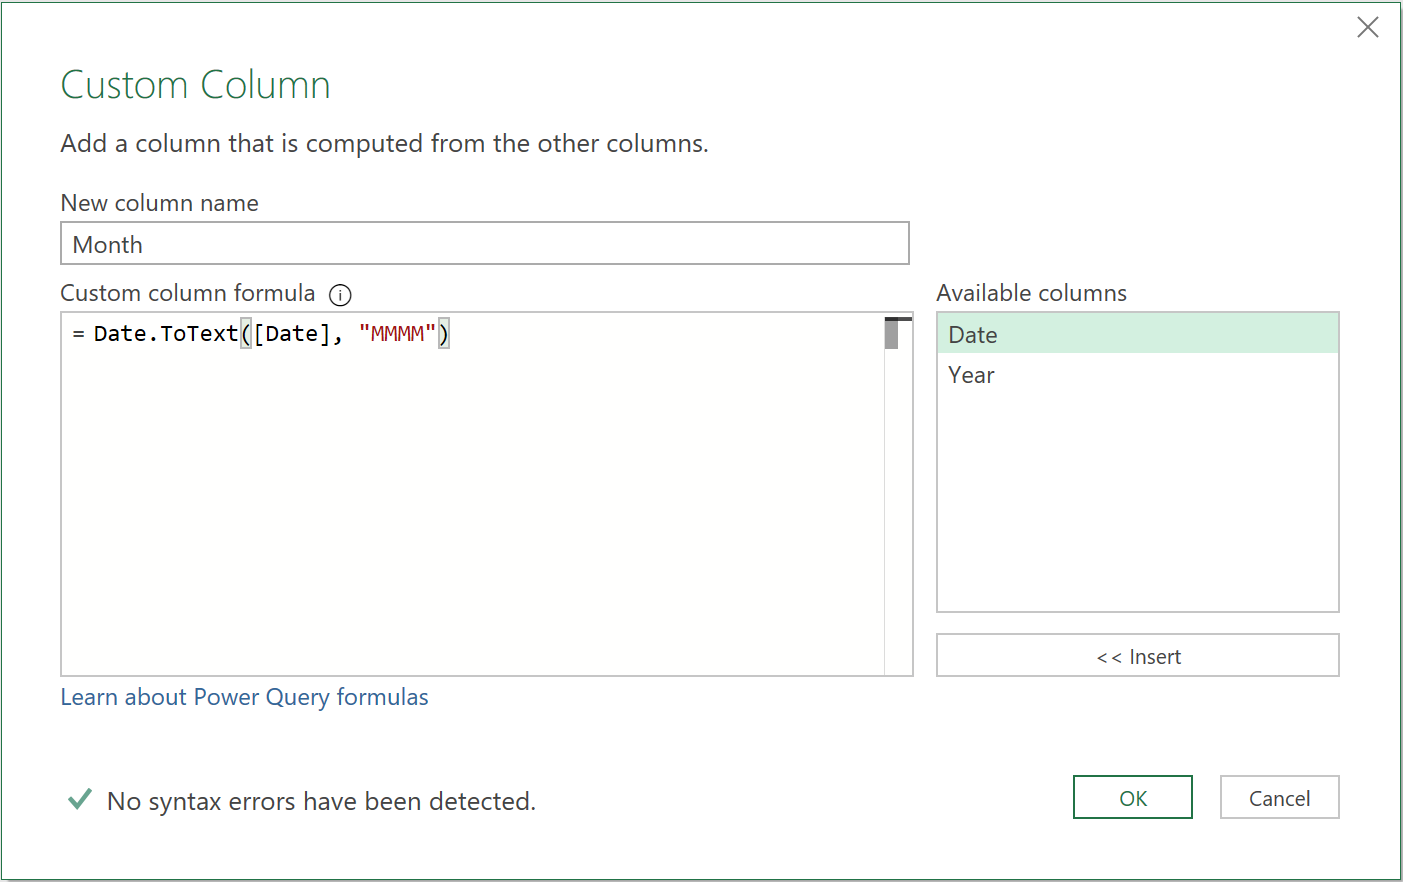
- Click the Custom Column button (located on the Add Column tab of the Query Editor toolbar).
- In the window that appears enter the following code:
= Date.ToText([Date], "MMMM")
- Call the new column ‘Month’
- Click the Custom Column button again to create another new column. Call the column ‘DayName’, and enter the following code:
= Date.ToText([Date], "dddd")
- Click the Custom Column button again to create another new column. Call the column ‘Week’, entering the following code:
= Date.WeekOfYear([Date])
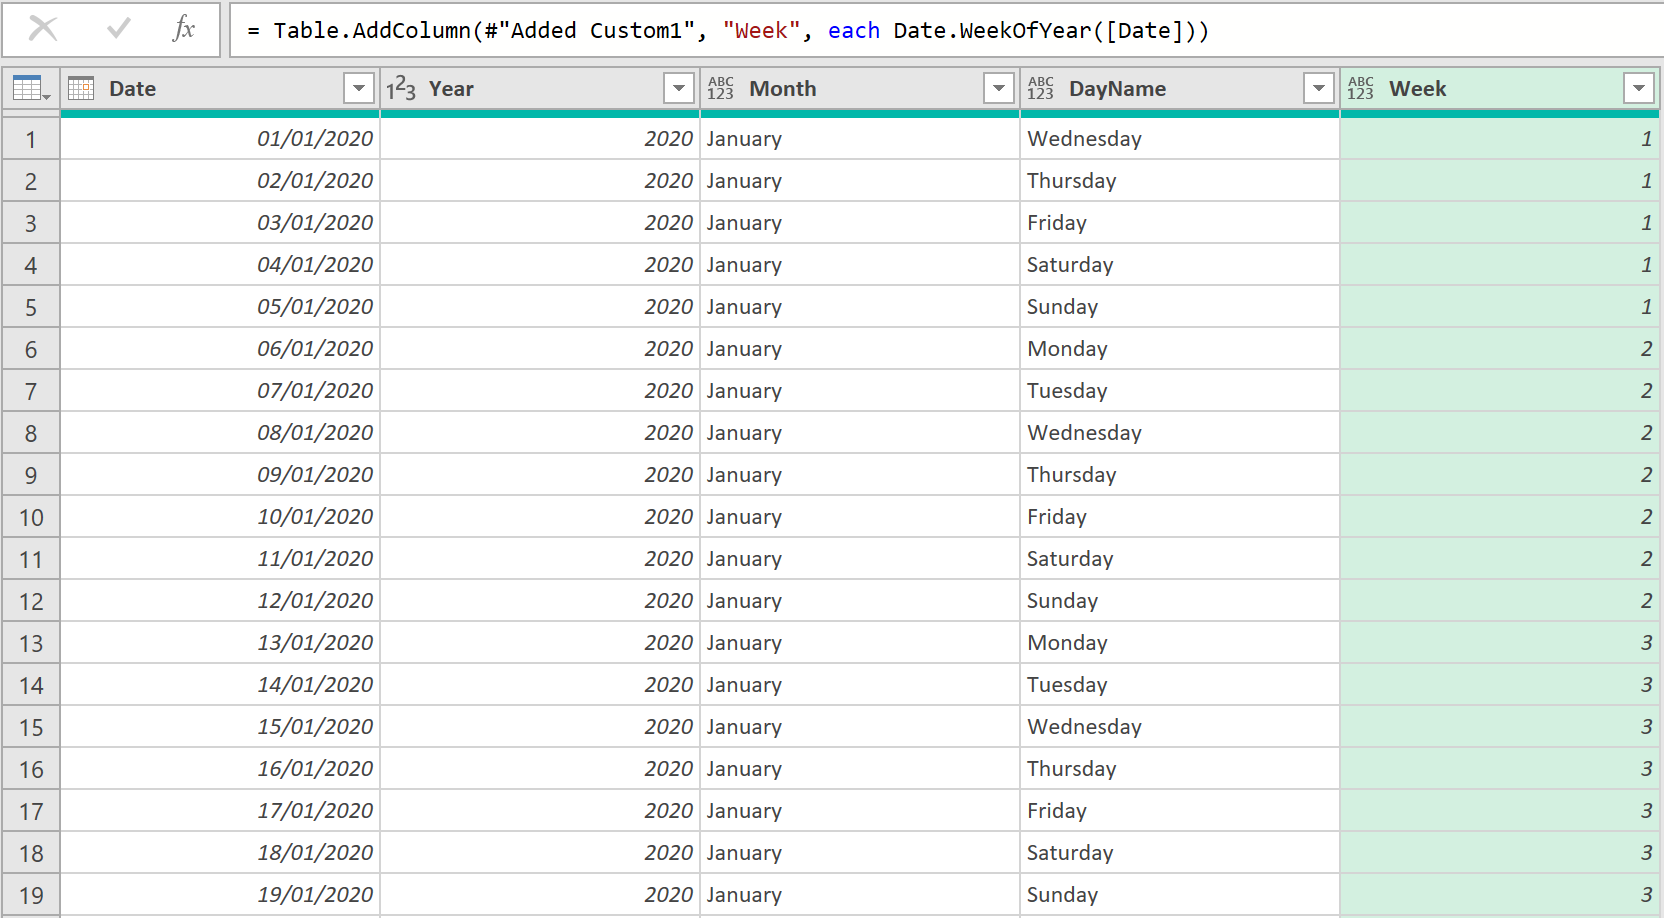
The final query, showing the desired output, should now look as follows:
3. Convert into a function
The query can now also be turned into a function with two parameters, start date and end date, so that any new table containing all dates between the start date and the end date, can be generated.
The ‘M’ code below shows how to modify the query into a function, so it can be re-used on different start and end dates.
let
DateFunction = (StartDate as date, EndDate as date) as table =>
    let
        // Find the number of dates between the start date and end date
        NumberOfDays = Duration.Days(EndDate-StartDate)+1,
        // Create a list of dates starting from the start date
        Source = List.Dates(StartDate, NumberOfDays, #duration(1,0,0,0) ),
        // Turn the list into a table
        TableFromList = Table.FromList(
                            Source,
                            Splitter.SplitByNothing(),
                            null, null,
                            ExtraValues.Error),
        // Rename the only column in the table to Date
        RenamedColumns = Table.RenameColumns(TableFromList,{{"Column1", "Date"}}),
        // Change the type of the column to Date
        ChangedType = Table.TransformColumnTypes(RenamedColumns,{{"Date", type date}}),
        // Duplicate the Date column
        DuplicatedColumn = Table.DuplicateColumn(ChangedType, "Date", "Copy of Date"),
        // Rename the duplicated column to Year
        RenamedColumns1 = Table.RenameColumns(DuplicatedColumn,{{"Copy of Date", "Year"}}),
        // Convert the dates in the Year column to years
        TransformedColumn = Table.TransformColumns(RenamedColumns1,{{"Year", Date.Year}}),
        // Add a custom column containing month names
        InsertedCustom = Table.AddColumn(TransformedColumn, "Month", each Date.ToText([Date], "MMMM")),
        // Add a custom column containing day names
        InsertedCustom1 = Table.AddColumn(InsertedCustom, "DayName", each Date.ToText([Date], "dddd")),
        // Add a custom column containing week numbers
        InsertedCustom2 = Table.AddColumn(InsertedCustom1, "Week", each Date.WeekOfYear([Date]))
    in
            InsertedCustom2
in
    DateFunction
Feedback
Submit and view feedback

