
Creating conditional columns
Overview
In this article, we explain how to create and use conditional columns, which can be quite important when building logical criteria within ETLs.
Using Conditional Columns
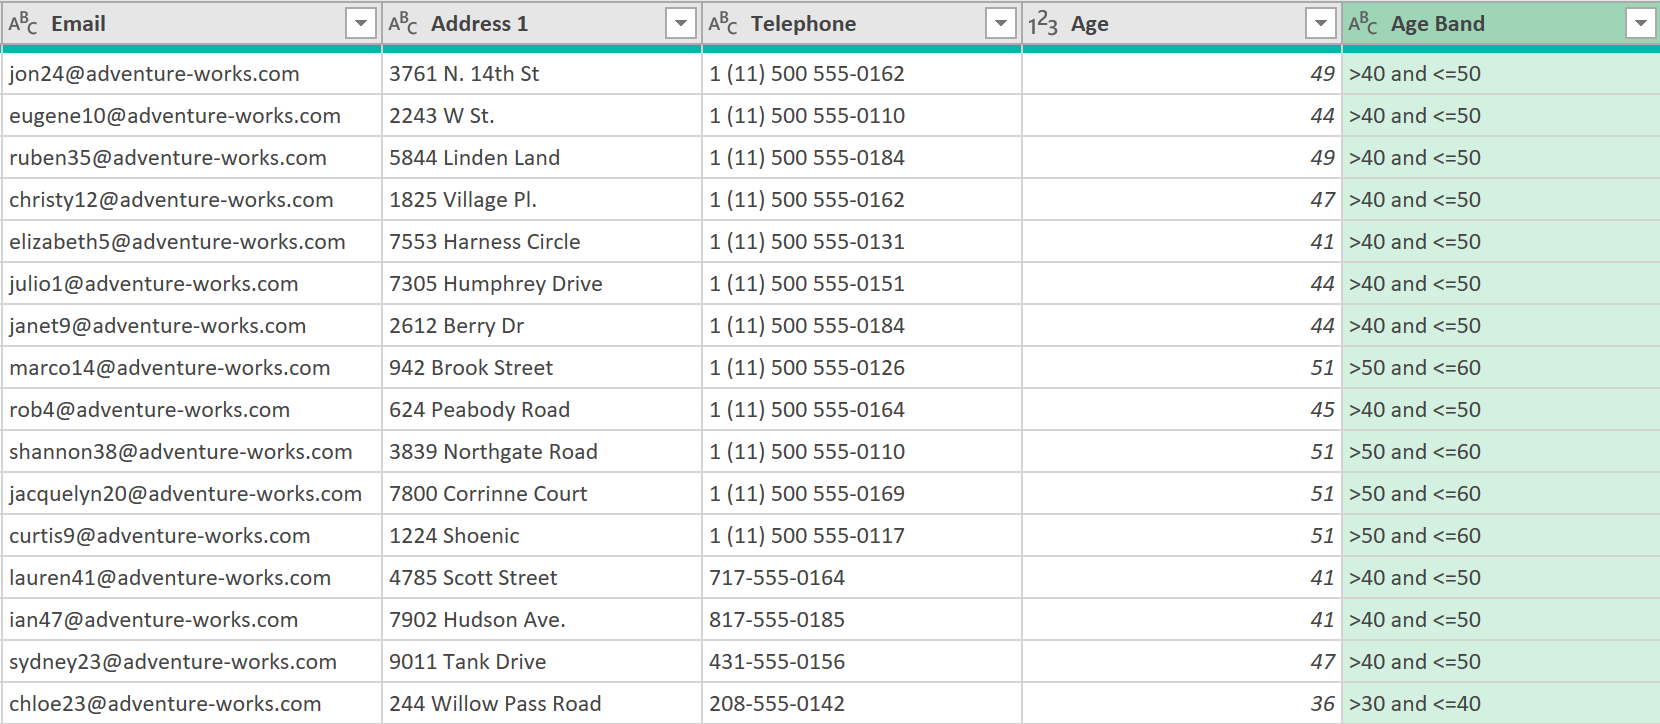
Creating banded columns using the conditional column feature in Power Query is now quite straight-forward. In this example, we add a new column of “age bands”, like shown below:
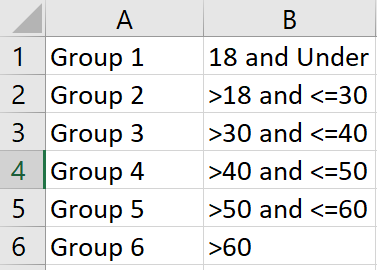
The column can then be used as a slicer to any subsequent data visualisations.
Steps
1. The Conditional Column Menu Item
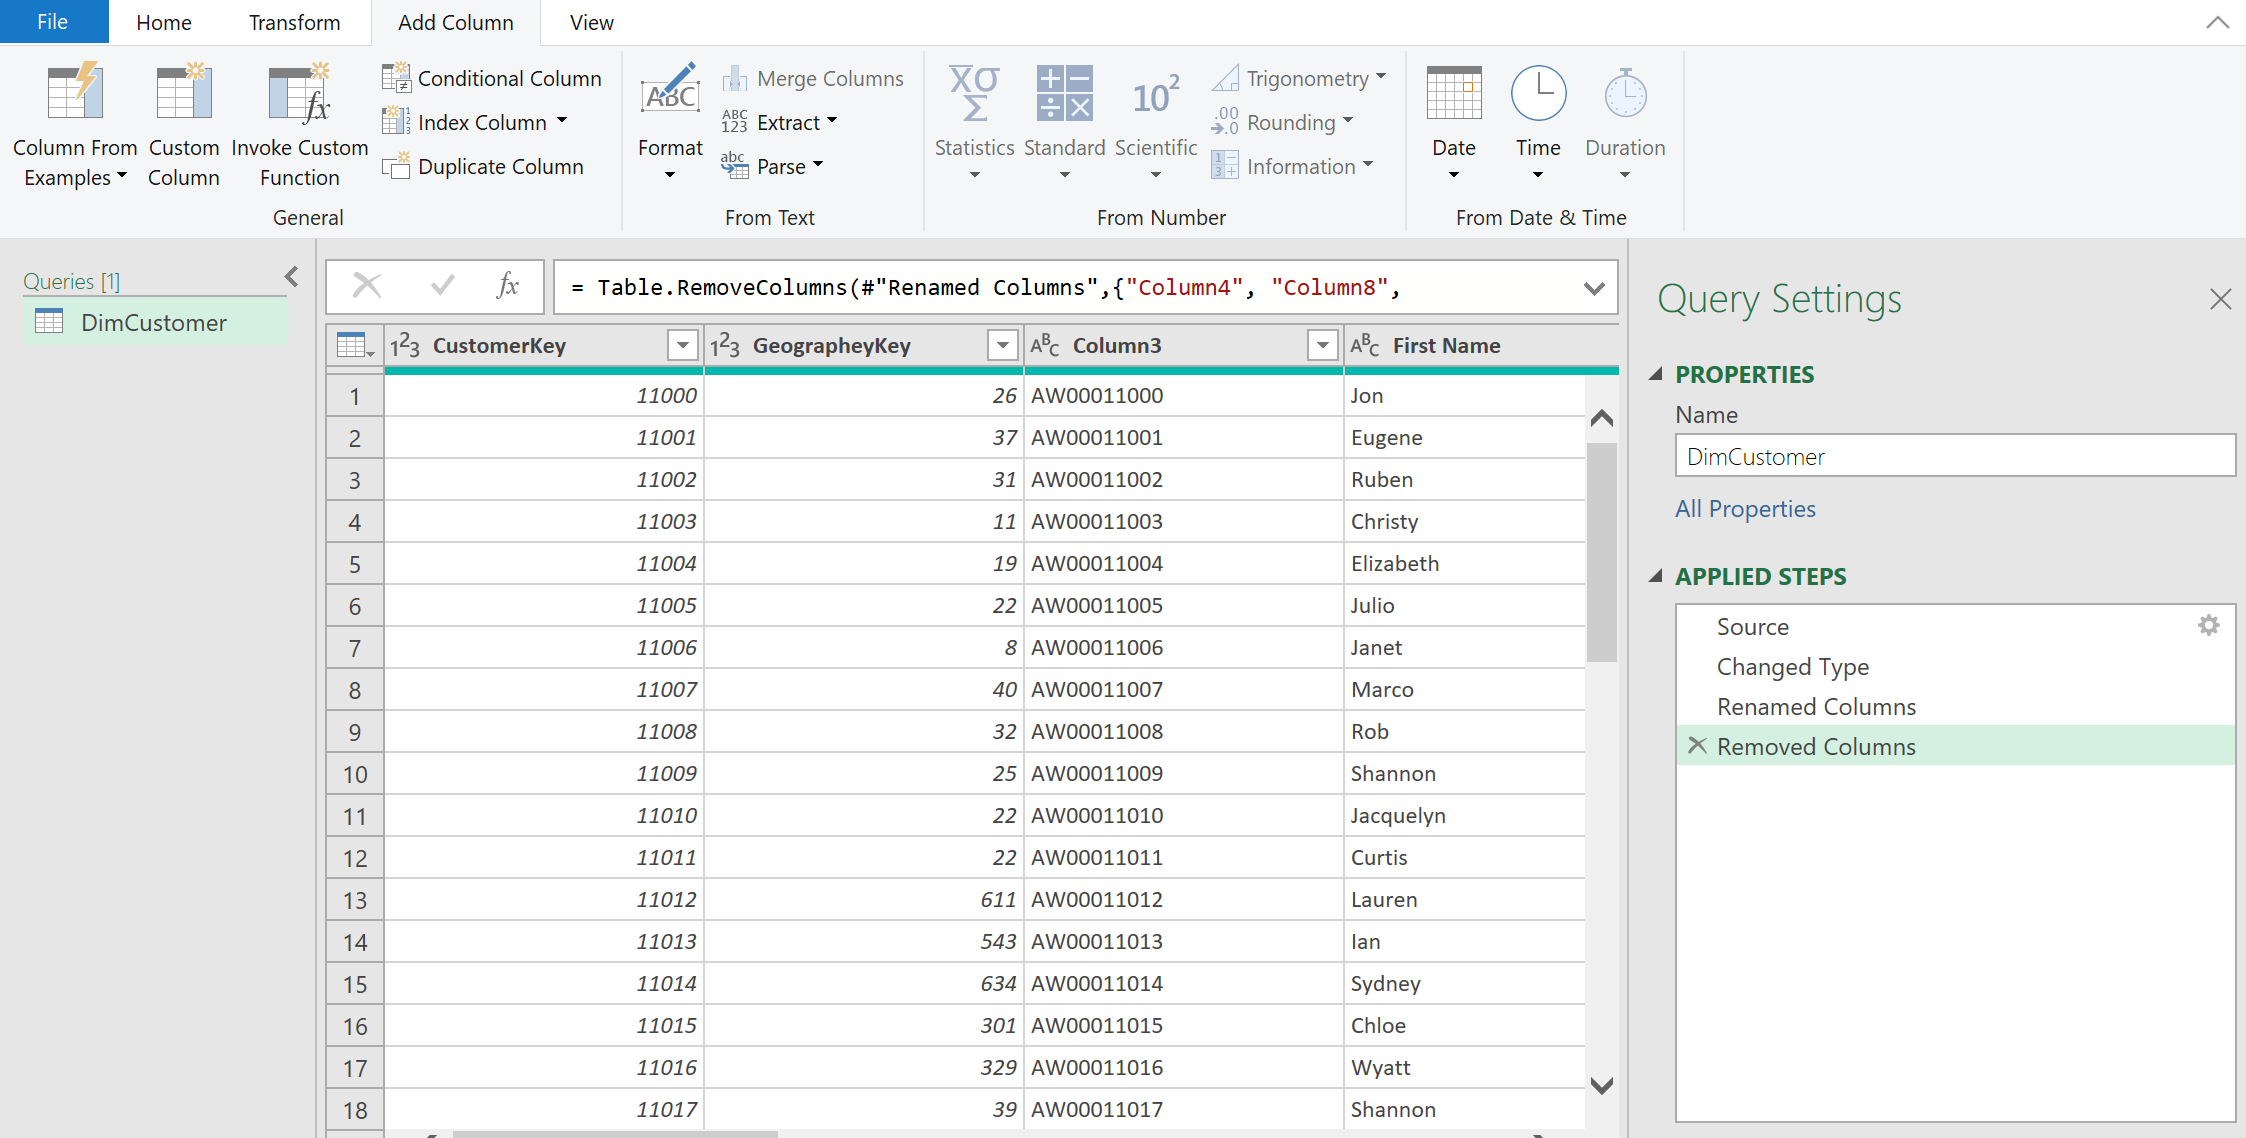
Here we use the Adventure works database (from Microsoft) and import the Customer table (shown below).
Note on the ‘Add Column’ tab, there is an icon called ‘Conditional Column’.
2. Add an Age Column
The first thing to do is create an Age column.
- Create a “Year of Birth” column by selecting the Birth Date column and then selecting Date ➔ Year ➔ Year, as shown in the picture below
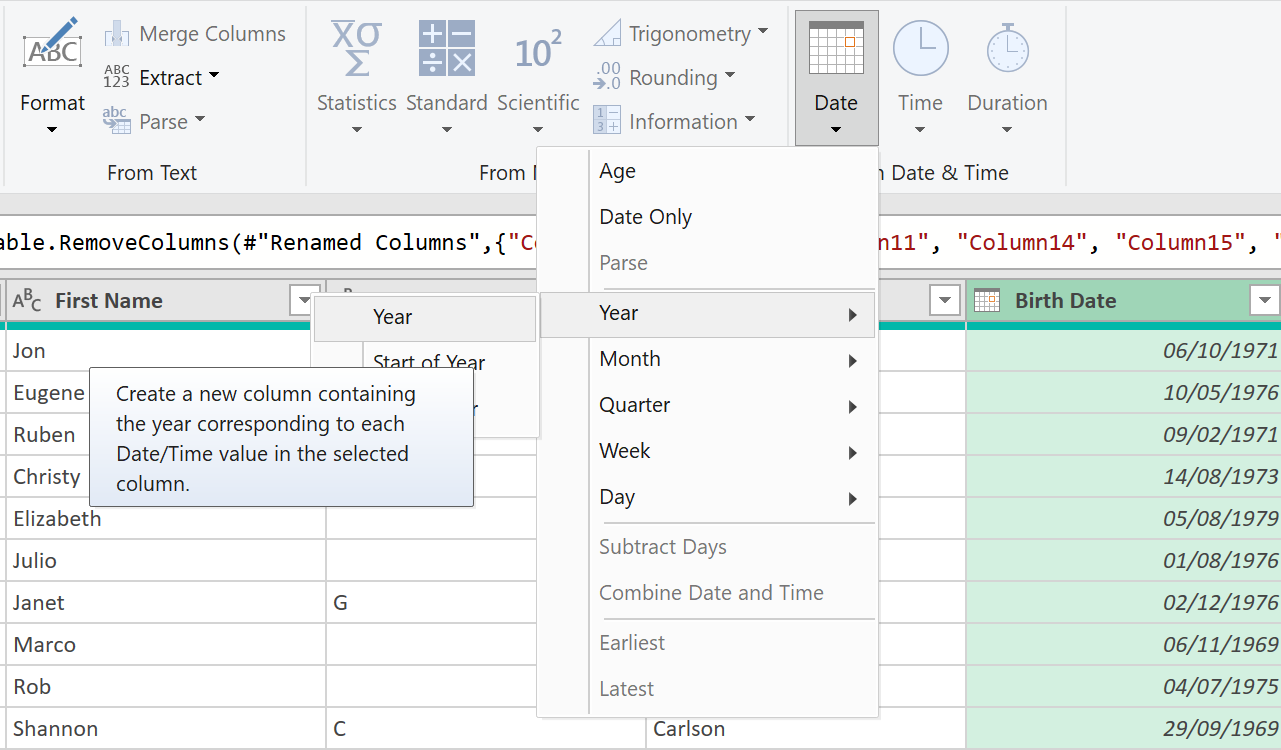
This will add a new column containing the year of birth (and will keep the original Birth Date column).
- Now edit the code created by Power Query directly in the Formula Bar
The original Code created by Power Query will have been this:
= Table.AddColumn(_Customers, "Custom", each Date.Year([BirthDate]), type number)
- Change the code directly in the Formula Bar to be like this:
= Table.AddColumn(#"Removed Columns", "Age", each Date.Year(DateTime.LocalNow()) - Date.Year([Birth Date]), Int64.Type)
This code approximates the age. It will not be 100% correct, but it is good enough for this example.
3. Add a Conditional Column
- Click the new Conditional Column menu button (shown earlier) and the following dialogue box will appear.

- Now, use the drop-down menu items to build the logic for the banded column using standard Boolean If/Else If logic.
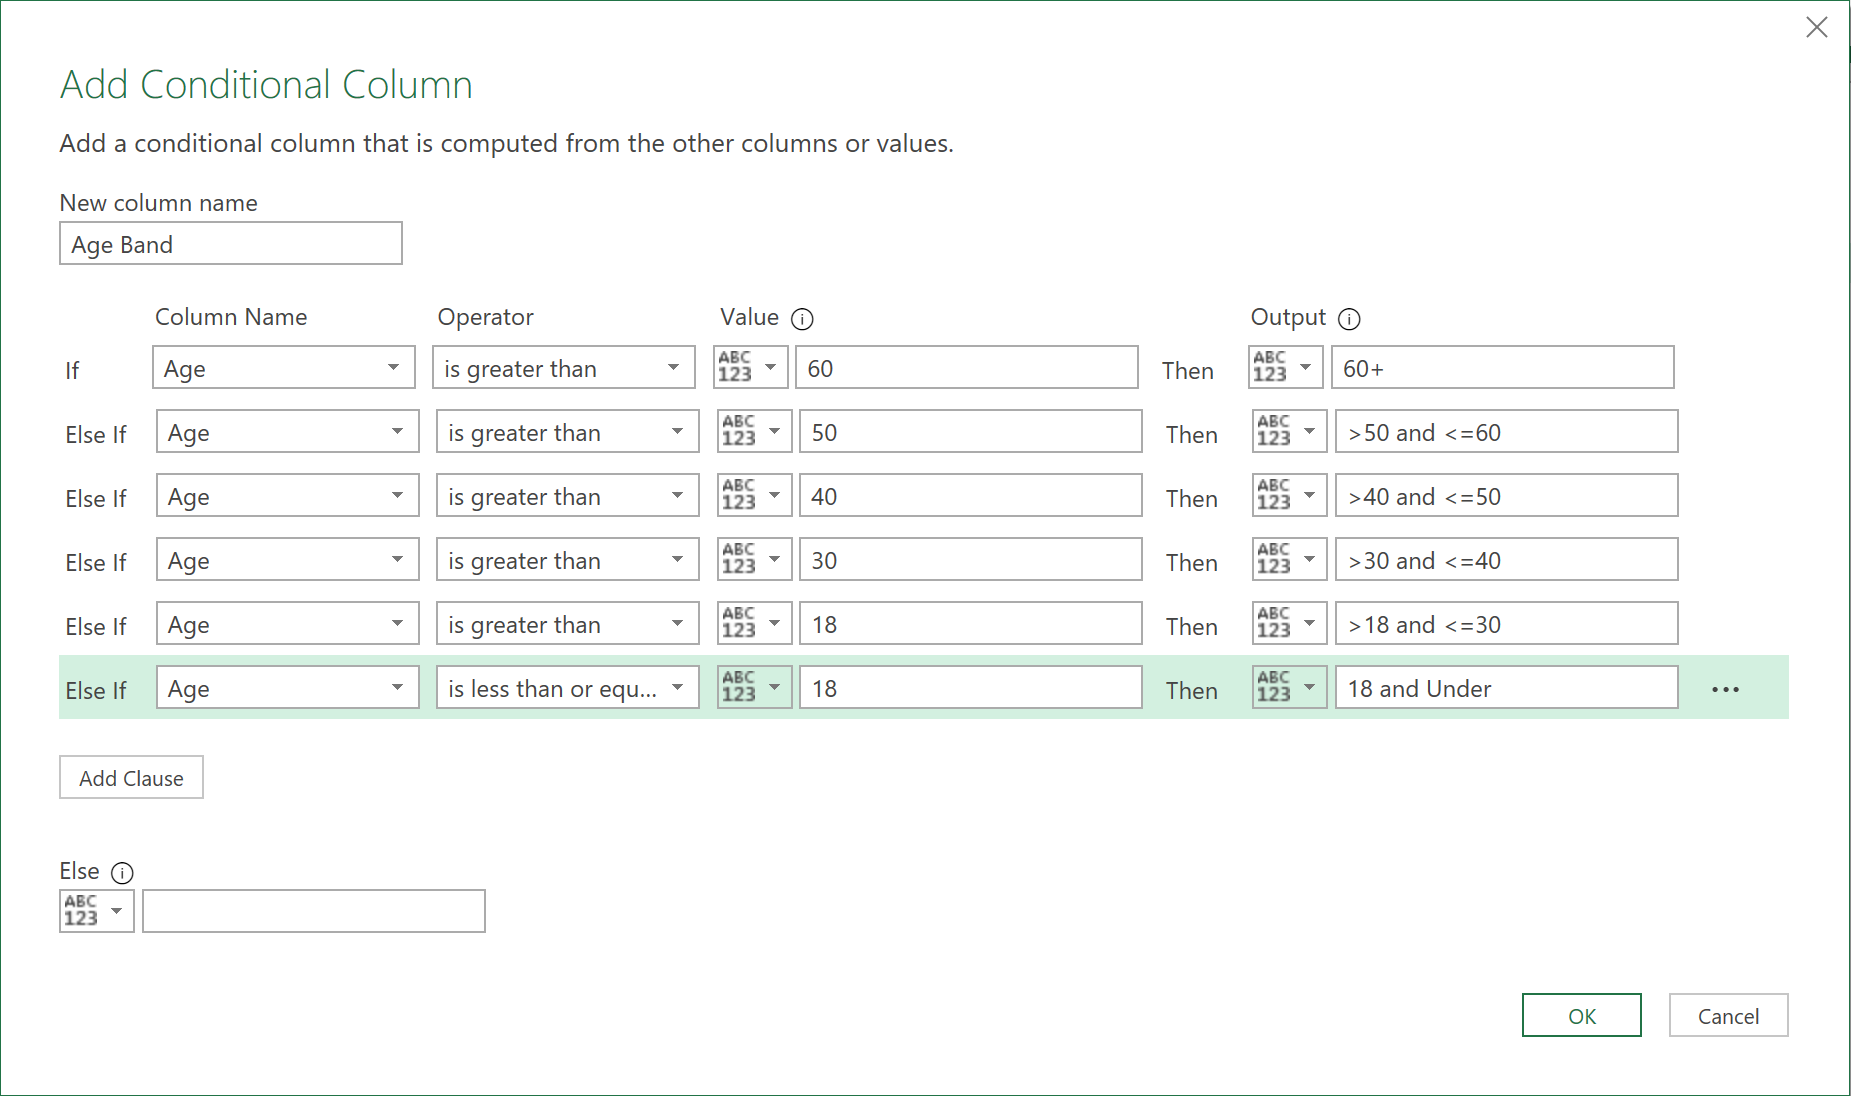
The main thing to note here is that you need to build the logic in a way that incrementally checks each step, with an exit from the logical test once the right band is found.
4. The Final Result
When you click ok, a new banded column should appear, as shown below:
It has always been possible to write this code using the “Add Custom Column” feature. But here, a better user interface helps the user write this custom column, without having to use Power Query’s ‘M’ language.
Feedback
Submit and view feedback