Dynamically removing columns
Overview
In this article we explain how to dynamically remove columns when passing data through a an ETL. This is particularly useful if column positions change, or the dataset expands over time with new columns.
Imagine we have defined the following data as a named range in Excel:
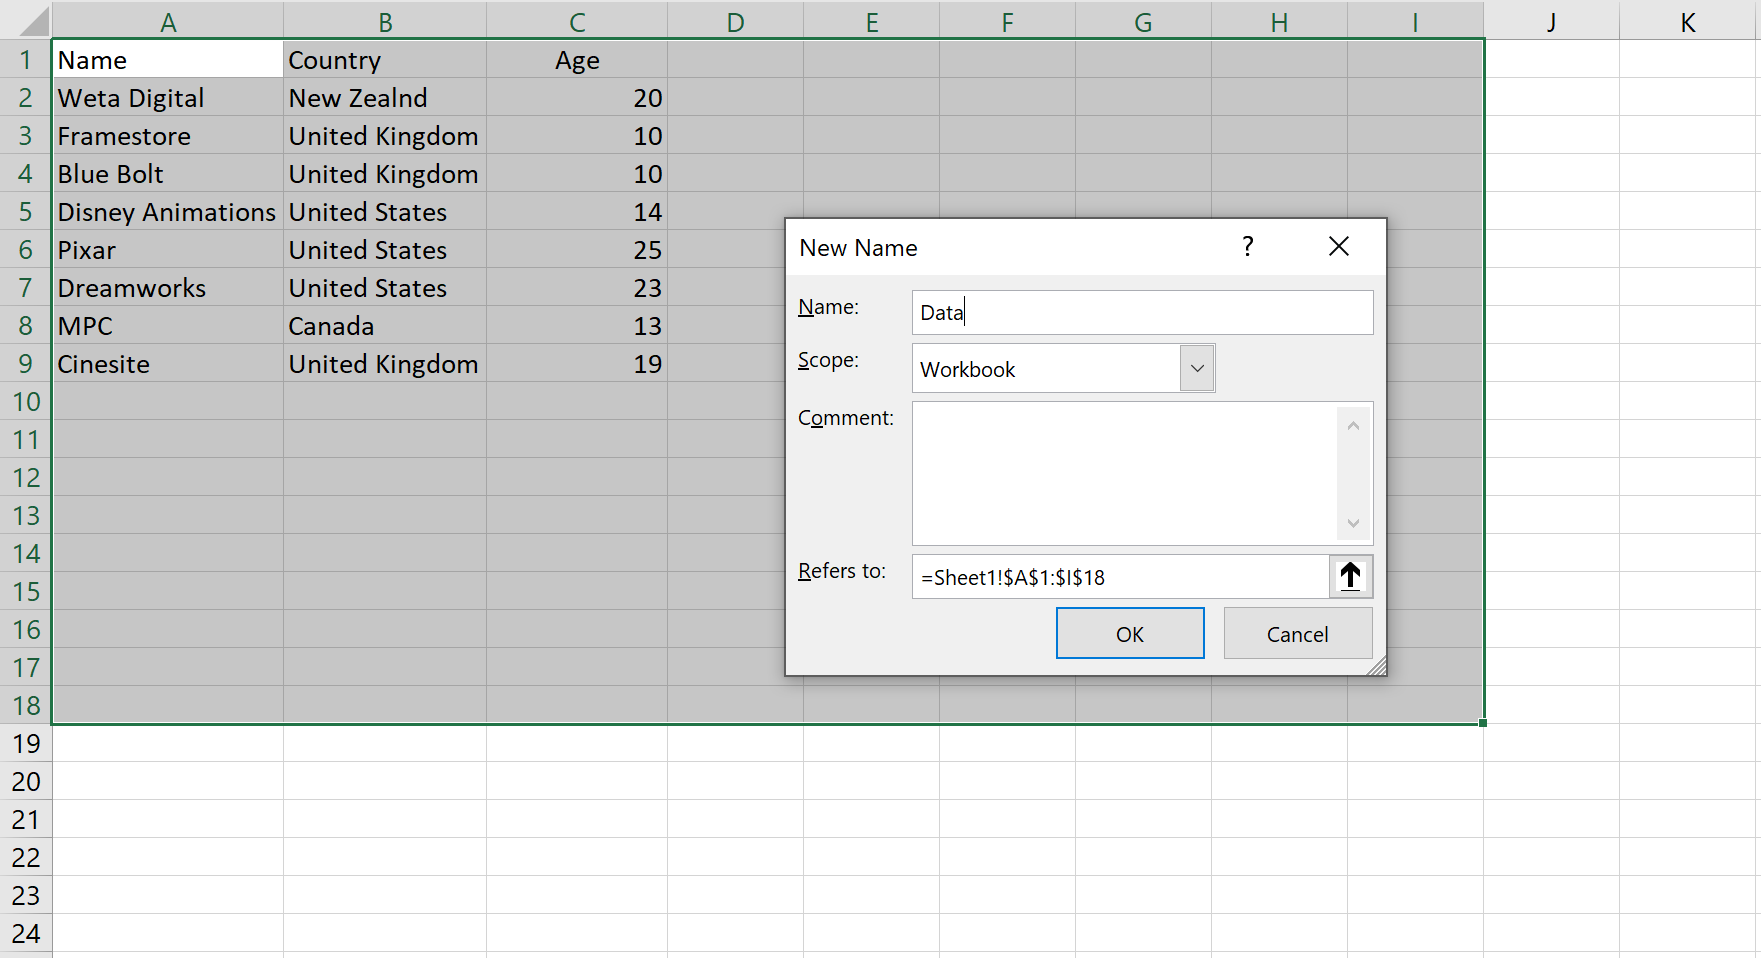
Click to view large-sized image
When the named range is loaded to Power Query, it will look something like this:
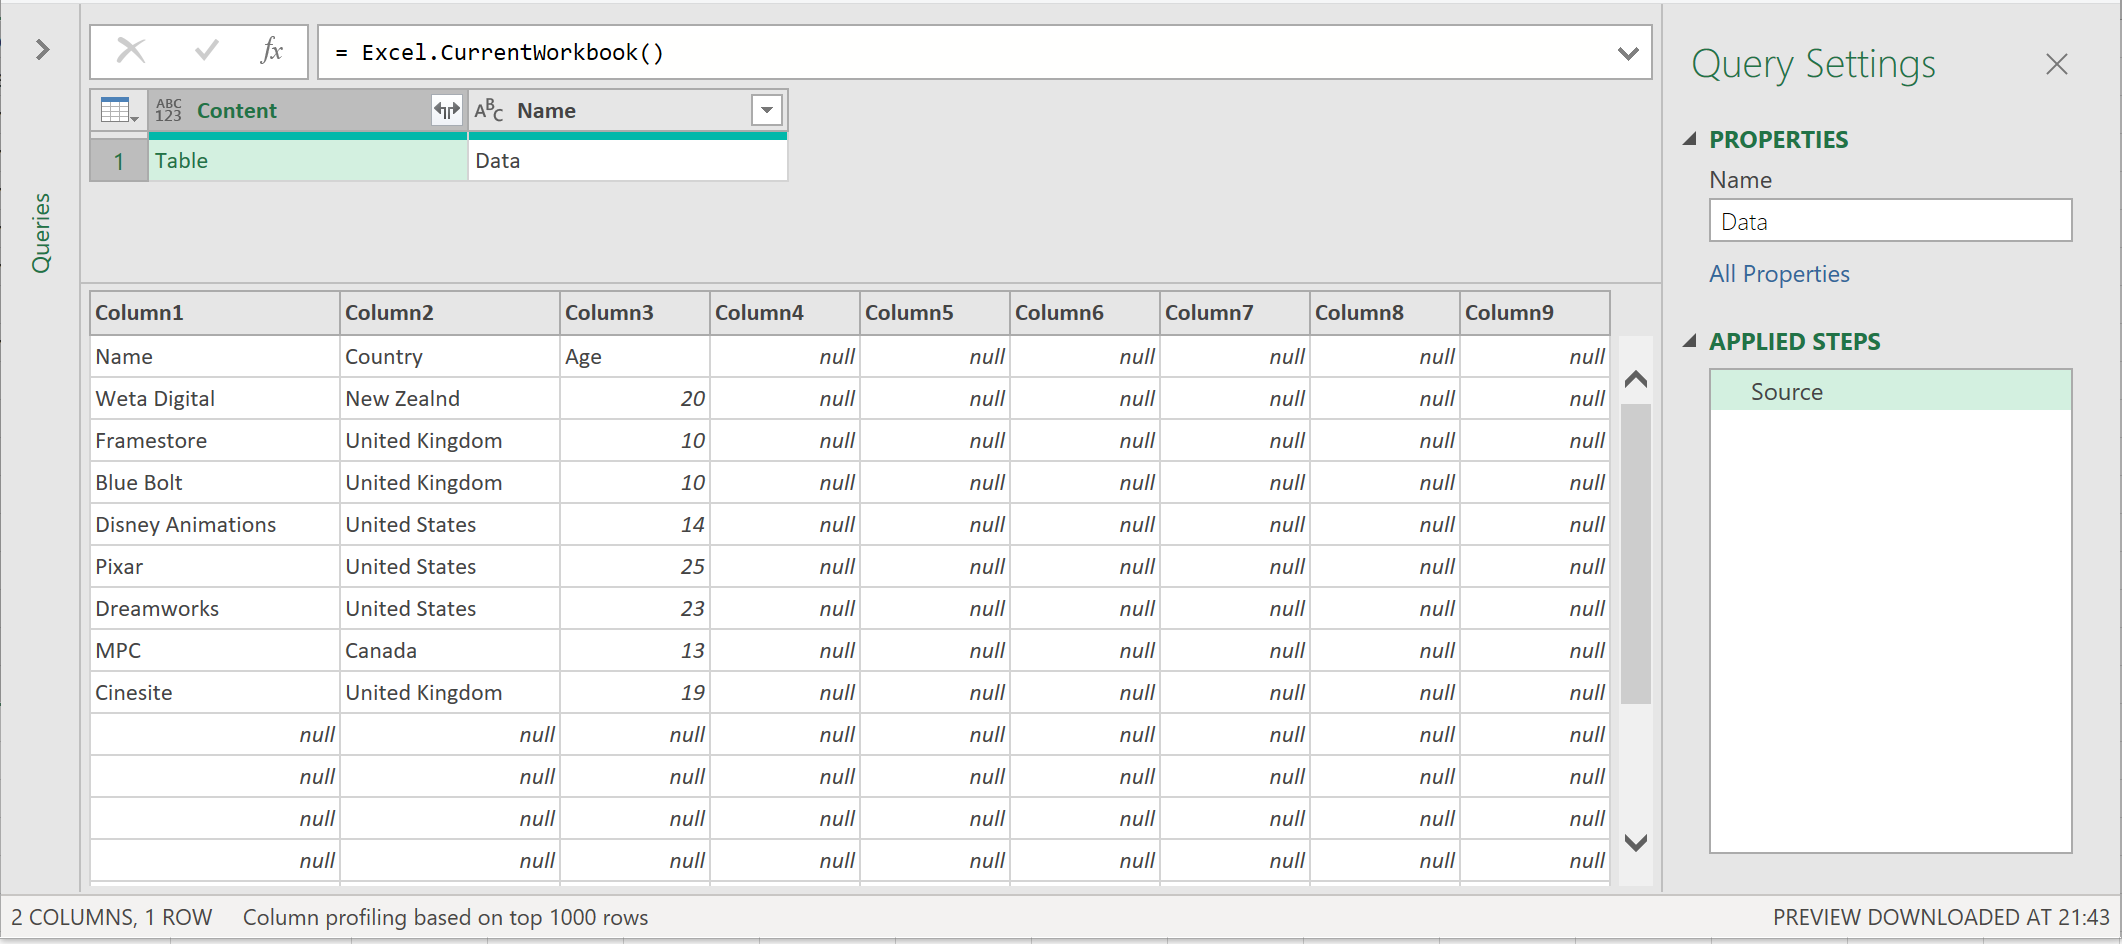
Click to view large-sized image
Here, the first three columns are needed, the others are not. You could use just the Table.SelectColumns function to select only the first three columns. Doing this, however, will hardcode the column names, “Column1”, “Column2”, and “Column3” into the query. So, if the position of the data columns later changes, the query will not work.
Use other Table functions
A better way would be to instead:
- Combine the tables in the column called “Content” using the function Table.Combine. This will expand all the data across all the tables - (in this case there is only one table to expand).
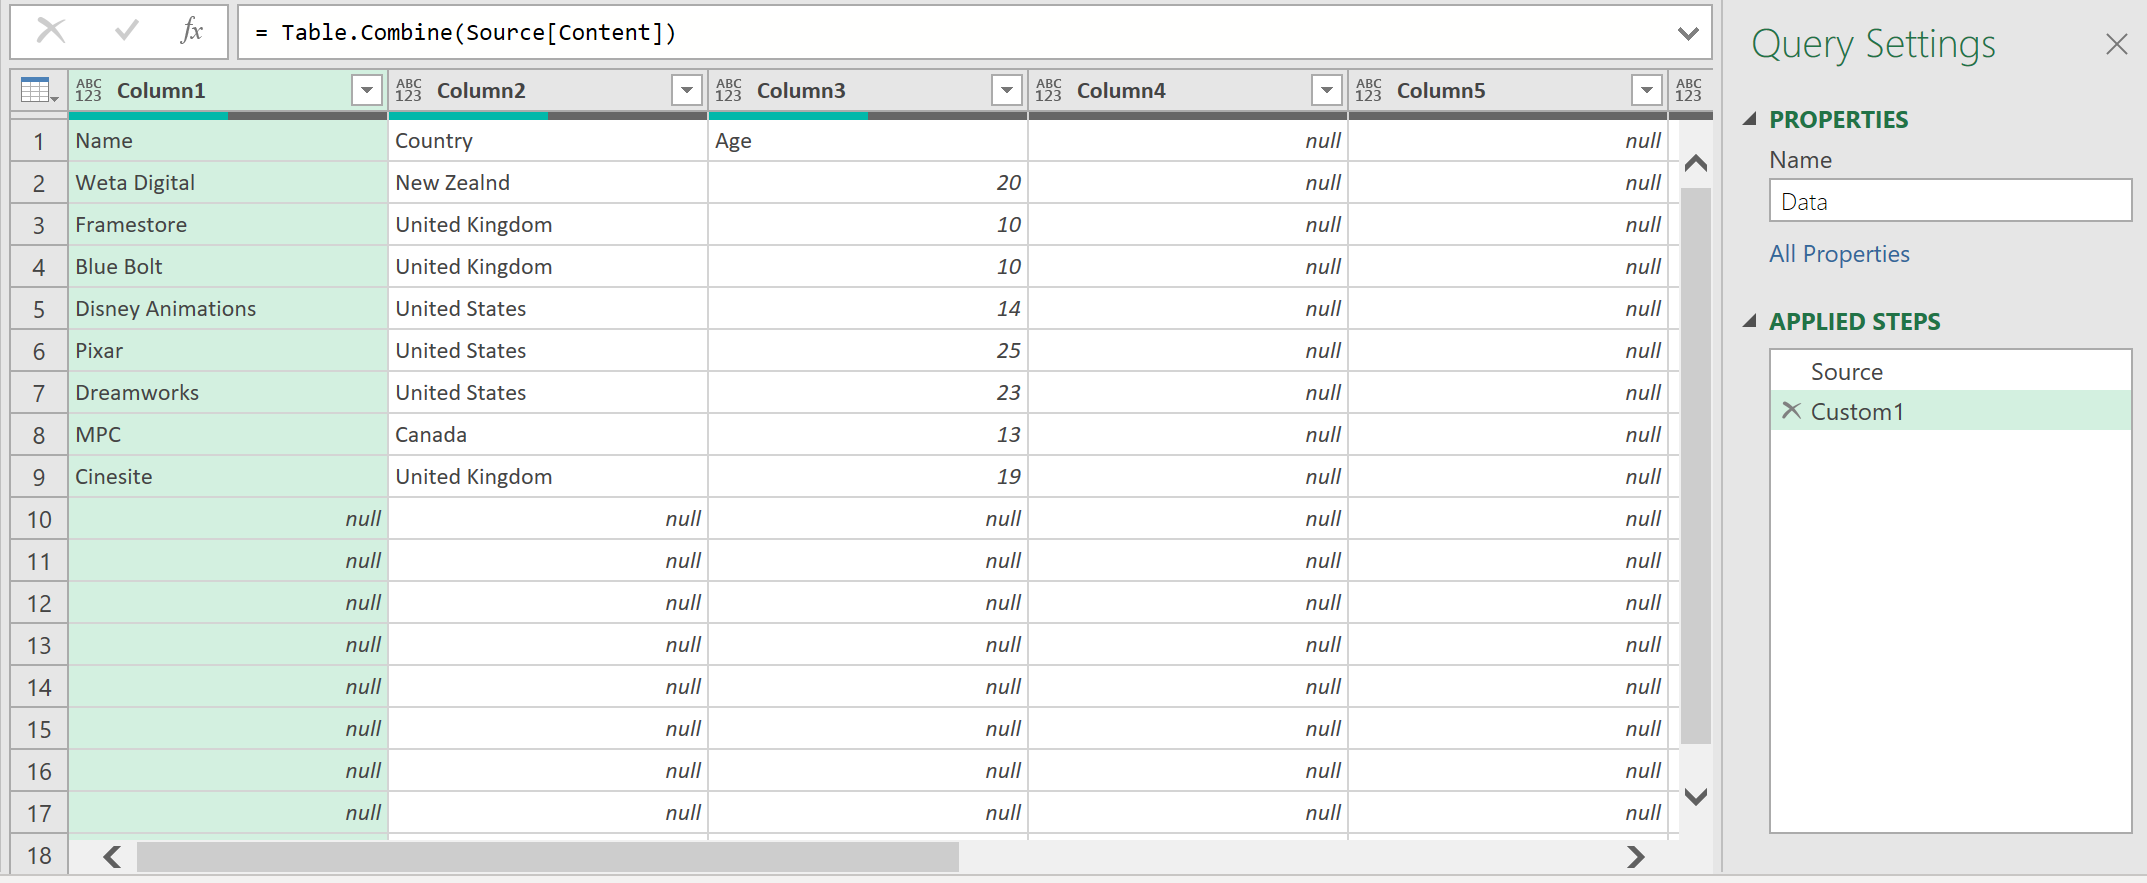
Click to view large-sized image
- Promote the first row to headers, using the function Table.PromoteHeaders
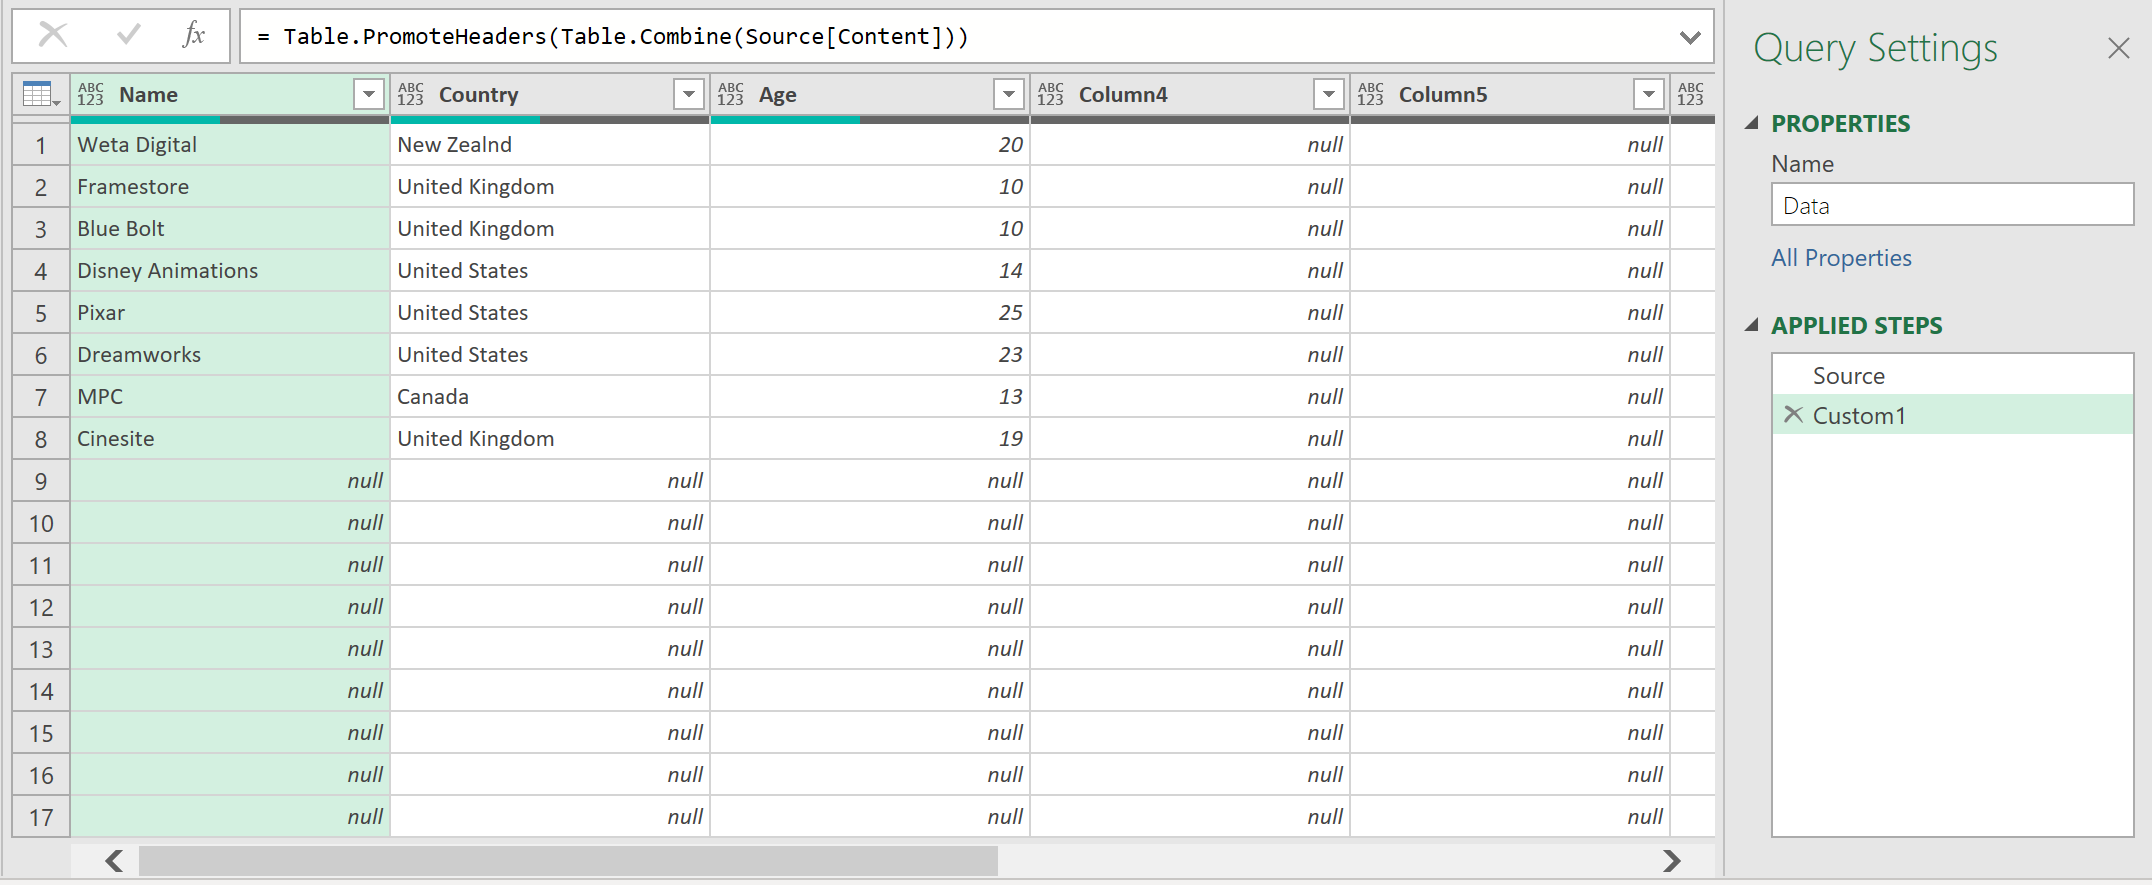
Click to view large-sized image
- Then, extract the headers only, using the function Table.ColumnNames. The headers will appear as a vertical list.
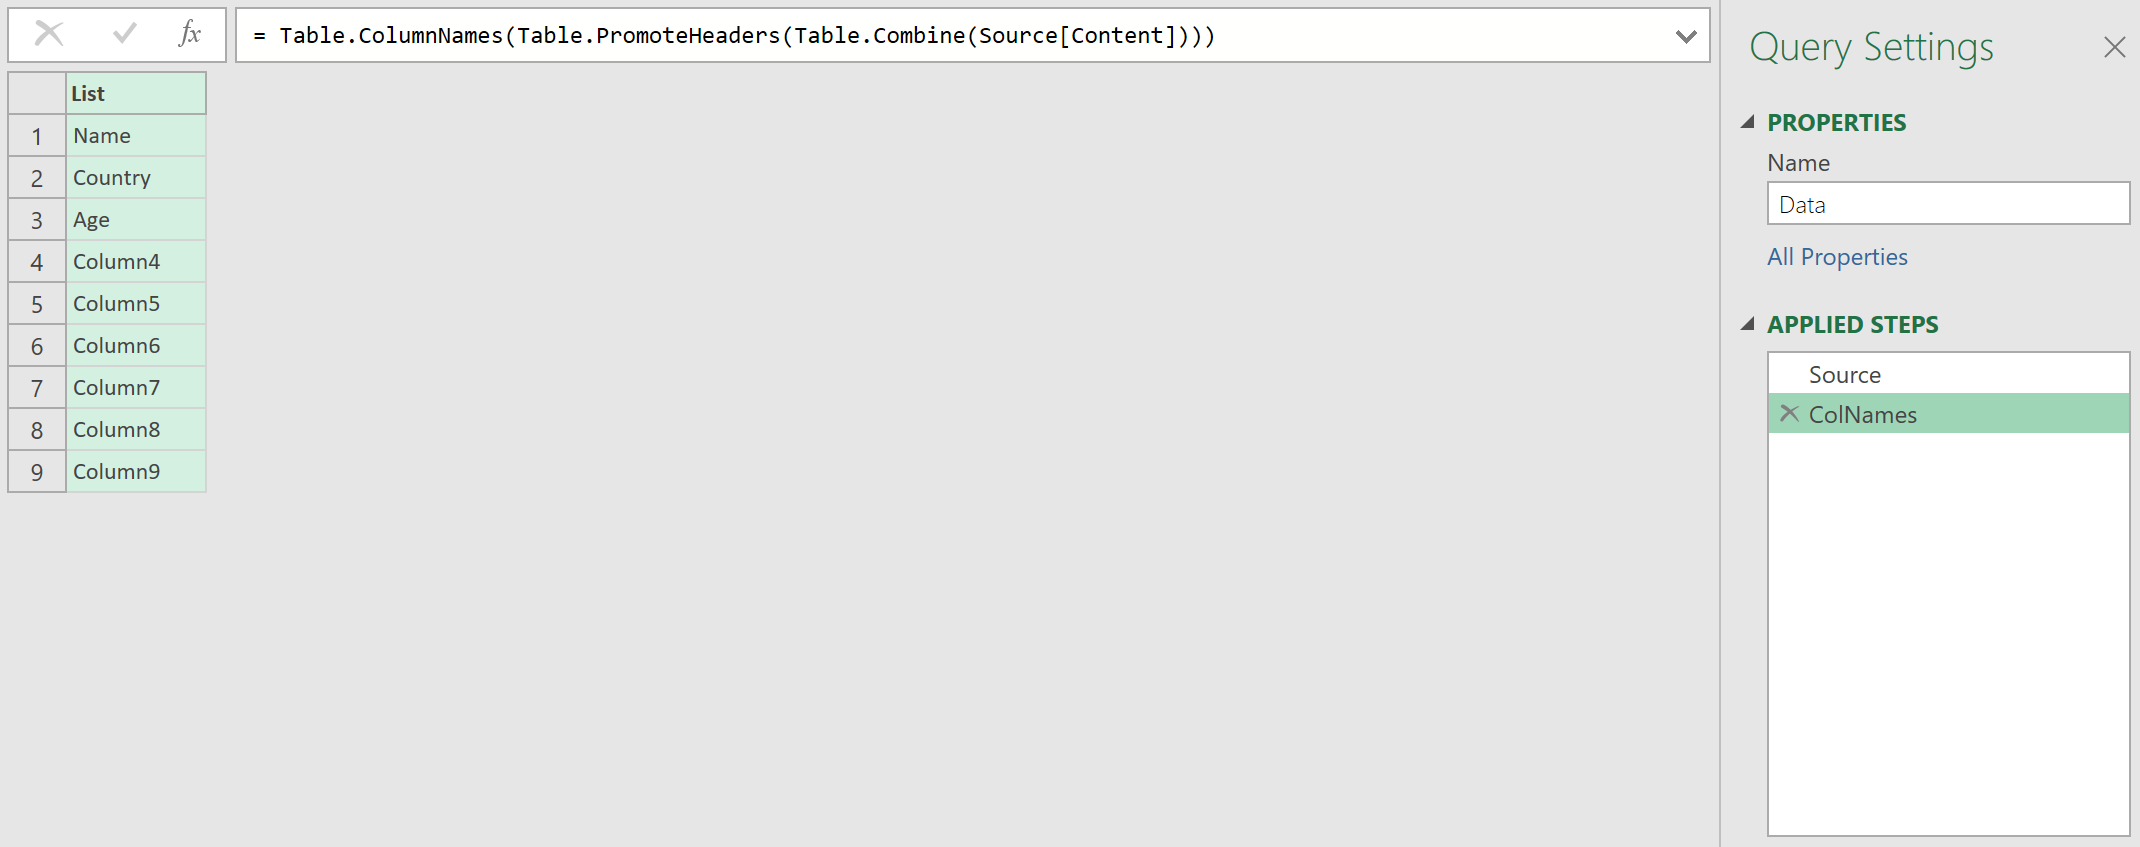
Click to view large-sized image
- Next, remove any items with the name “Column”, “ “, “”, or a null in them. You can use any filtering criteria here you like.

Click to view large-sized image
- Once the list is filtered, you can then, but not any earlier, use the function Table.SelectColumns – to restrict which columns are included, as defined in the list in the earlier step, FilteredCols
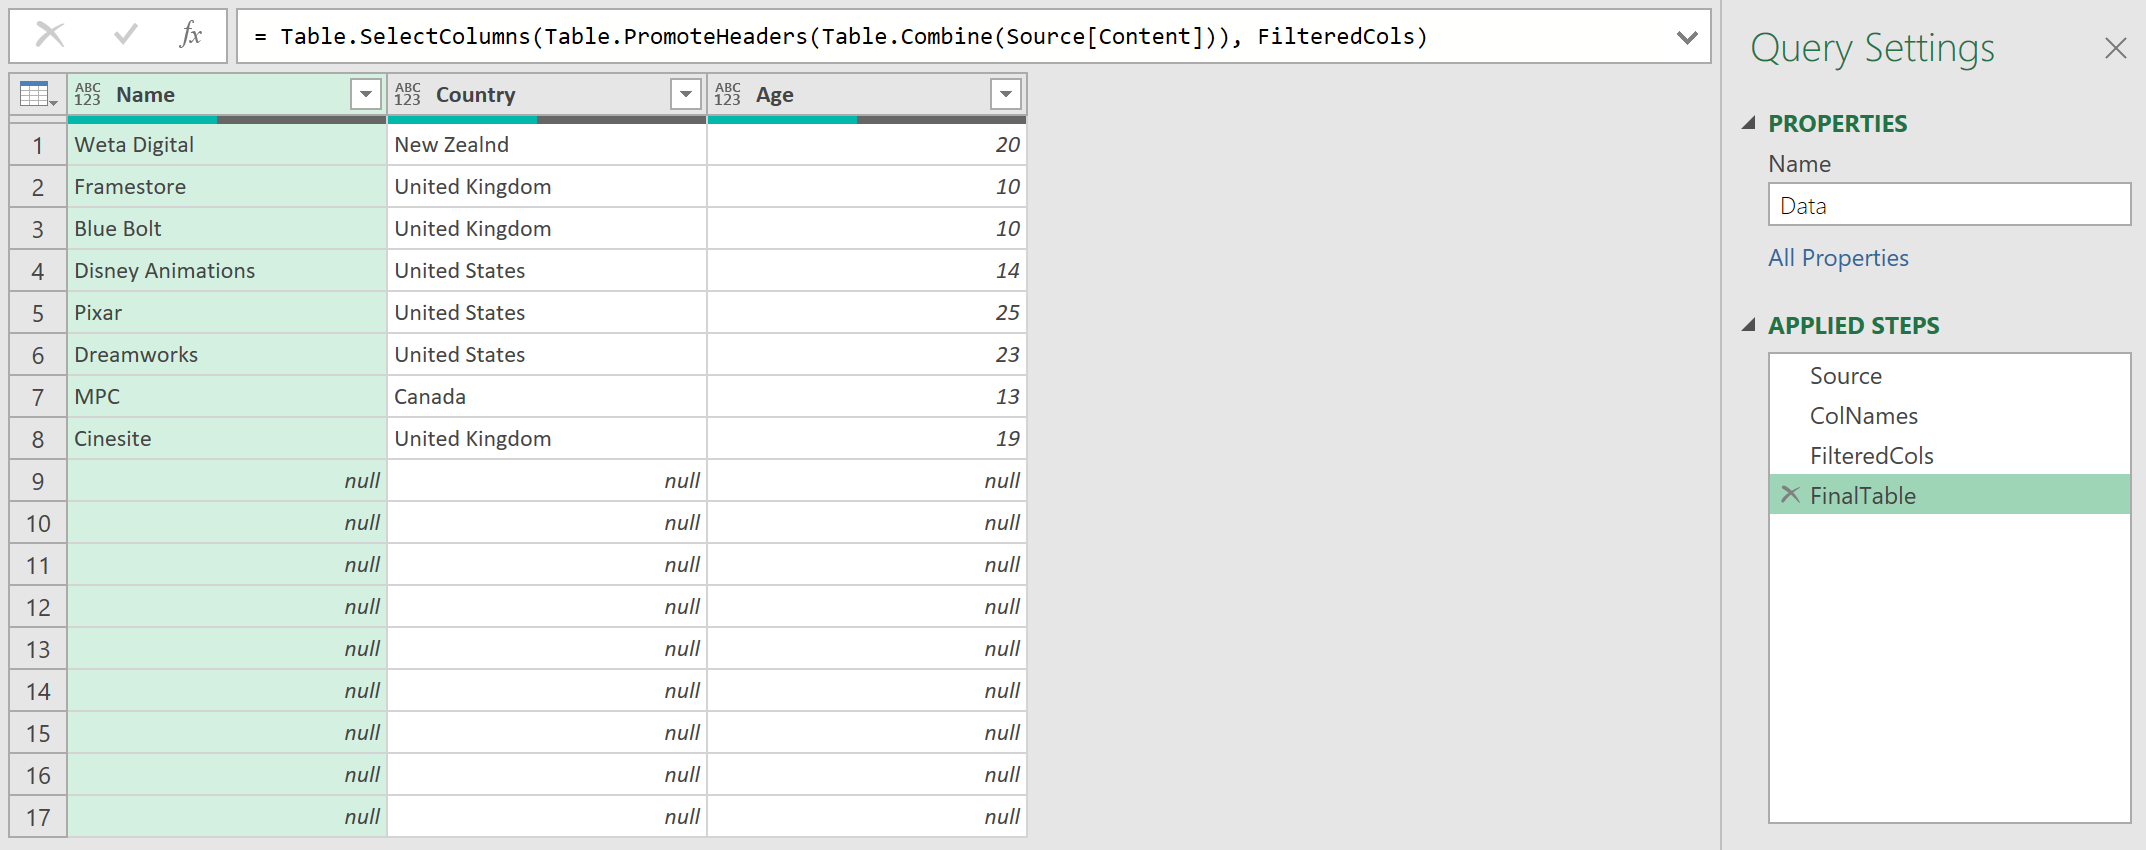
Click to view large-sized image
Add new column and re-test
Now, if you can add a new field to the data, like so:
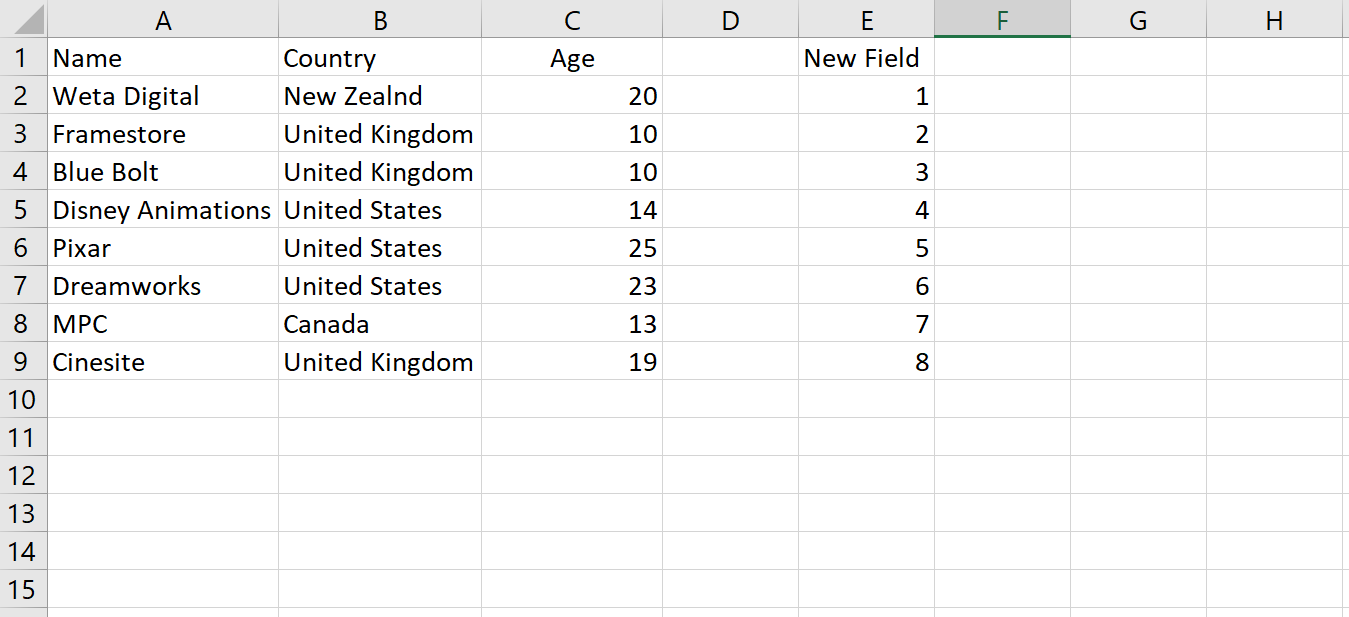
Click to view large-sized image
Without changing the query, the new data in column E should automatically appear in the query (but not Columns D, F, G, H or I).
This is indeed what happens! - the column ‘New Field’ is appended at the end - and not the blank columns.
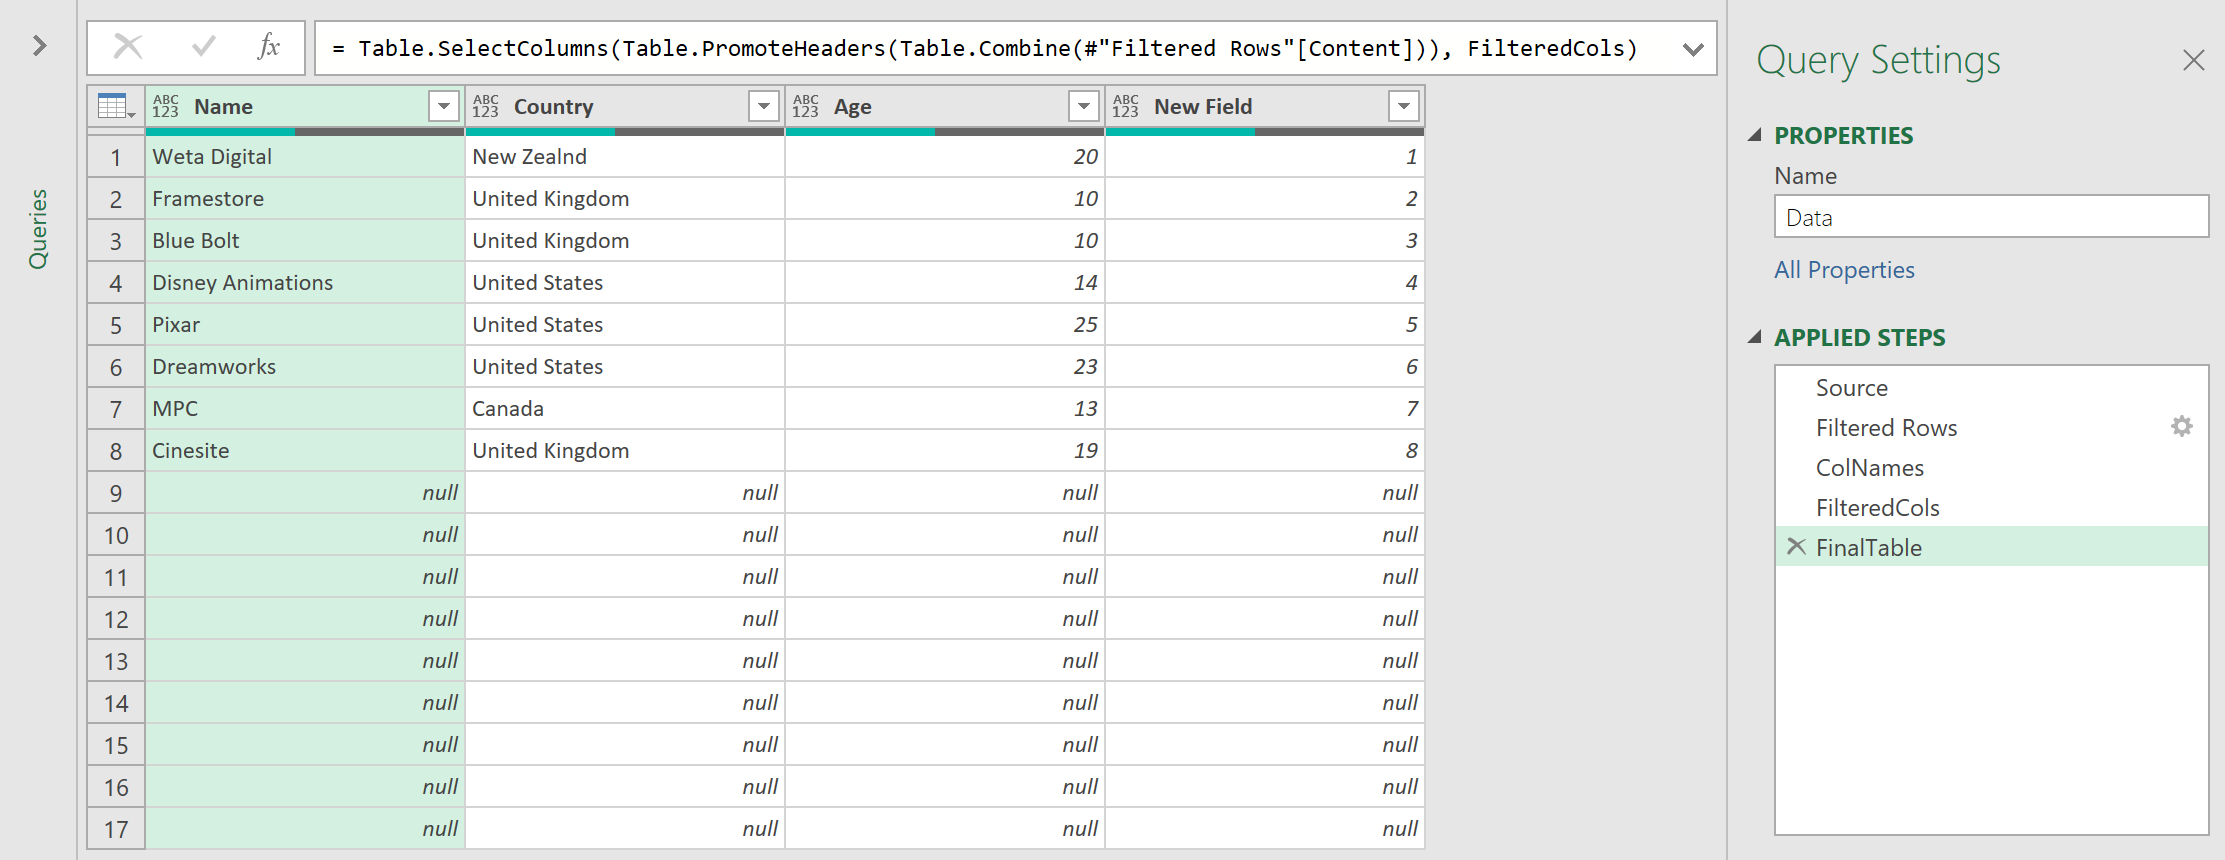
Click to view large-sized image
Note:
This query itself should be created in a separate file. If you loaded the query into the same file as the source data, you will likely have to modify the Table.Combine step so you do not accidently end up re-importing query output back into the query as a new table input, each time the query is run. If you did this, you would create a circular loop!
Feedback
Submit and view feedback

