
Using ‘M’ to dynamically filter rows
Overview
In this article, we explain how it is possible to filter data dynamically using the ‘M’ language
Dynamically filtering rows with M
Whilst mastering ‘M’, the reference language to Power Query, is not truly necessary, it does add some incredible power when handling complex scenarios, which you would not be able to do without some basic knowledge of ‘M’.
Before starting with this example, here is a list of special characters that you should probably be aware of when working with the ‘M’ language.
| CHARACTER | PURPOSE |
|---|---|
| (Parameters) | Surrounding function parameters |
| {List} | Surrounding list items |
| [Record] | Surrounding records |
| “Text” | Surrounding text |
| #”Step Name” | Referring to a step that contains spaces or other reserved characters |
| //comment | Commenting on a single line of code |
| /comment/ | Commenting multiple lines of code |
Scenario
Consider the following scenario where you have a text file that contains data like that shown below:
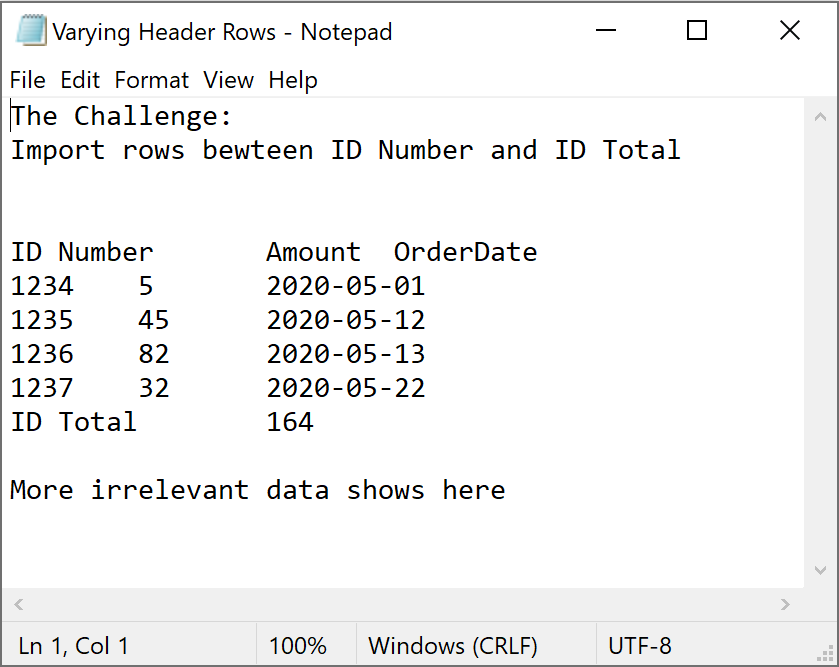
The data is not perfect, and has a few wrinkles. For example:
- The number of rows before ‘ID Number’ is variable. There could be 5 or 5,000 rows before the row that contains the text, ‘ID Number’
- The number of rows between and after the ‘ID Total’ row is also variable
The main challenge here is extracting rows from the middle of the dataset, dynamically.
We would also like to determine the number of days between each order date compared to the previous order.
Steps
1. Target the Upper and Lower bound rows
To begin with, you need to work out which rows you need. Start with the following steps:
- Open a blank excel workbook
- Create a new query ➔ From file ➔ From text ➔ Choose the relevant text file ➔ Transform Data
- Go to the Add Column tab ➔ Add Index Column ➔ From 0
- Filter Column 1 ➔ Text Filters ➔ Begin with
- Set the filter to Begins With ‘ID Number’ OR Begins With ‘ID Total’
The query should look as follows:
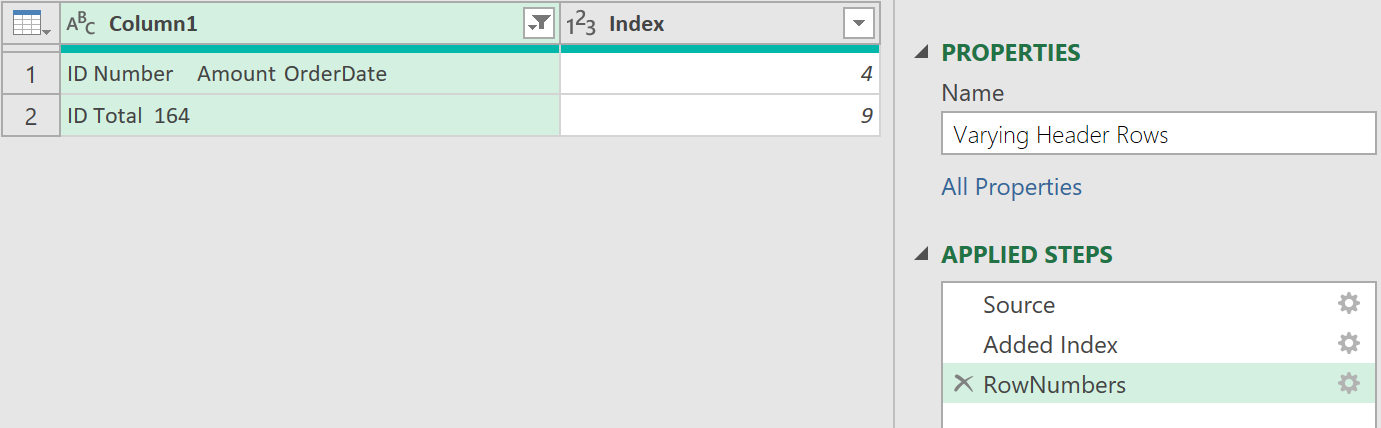
This above shows a very cut down view that shows the row numbers for both the ID Number and ID Total rows, but the detection is done dynamically. No matter how many rows precede, follow, or are in the middle, the steps taken should always identify the correct rows - which is just what is needed.
2. Combine M-code steps
To make the query shorter, go to the Home tab ➔ Advanced Editor
   #"Added Index" = Table.AddIndexColumn(Source, "Index", 0, 1),
   #"Filtered Rows" = Table.SelectRows(#"Added Index", each Text.StartsWith([Column1], "ID Number") or Text.StartsWith([Column1], "ID Total"))
Now substitute the text, #”Added Index”, in the #”Filtered Rows” step, and rename #”Filtered Rows” to RowNumbers
RowNumbers = Table.SelectRows(Table.AddIndexColumn(Source, "Index", 0, 1), each Text.StartsWith([Column1], "ID Number") or Text.StartsWith([Column1], "ID Total"))
3. Extract the necessary rows
With RowNumbers selected in the Applied Steps section, click on the fx icon.
This will create a new step, called Custom1, that refers to the previous step, with the following default ‘M’ code:
= RowNumbers
Change the formula to:
= Source
Now you want to restrict the data to just the necessary rows. To do this:
- Go to Home ➔ Keep Rows ➔ Keep Top Rows ➔ 9
You should get a filtered table that shows only the top 9 rows
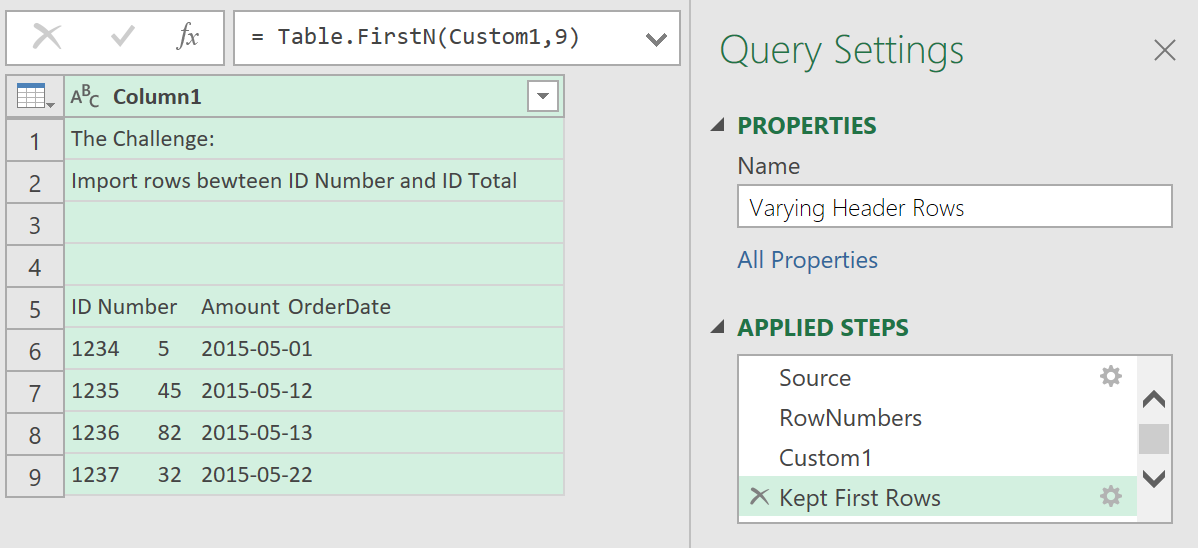
To make the code dynamic, change the code in the Keep First Rows step, from:
= Table.FirstN(Custom1, 9)
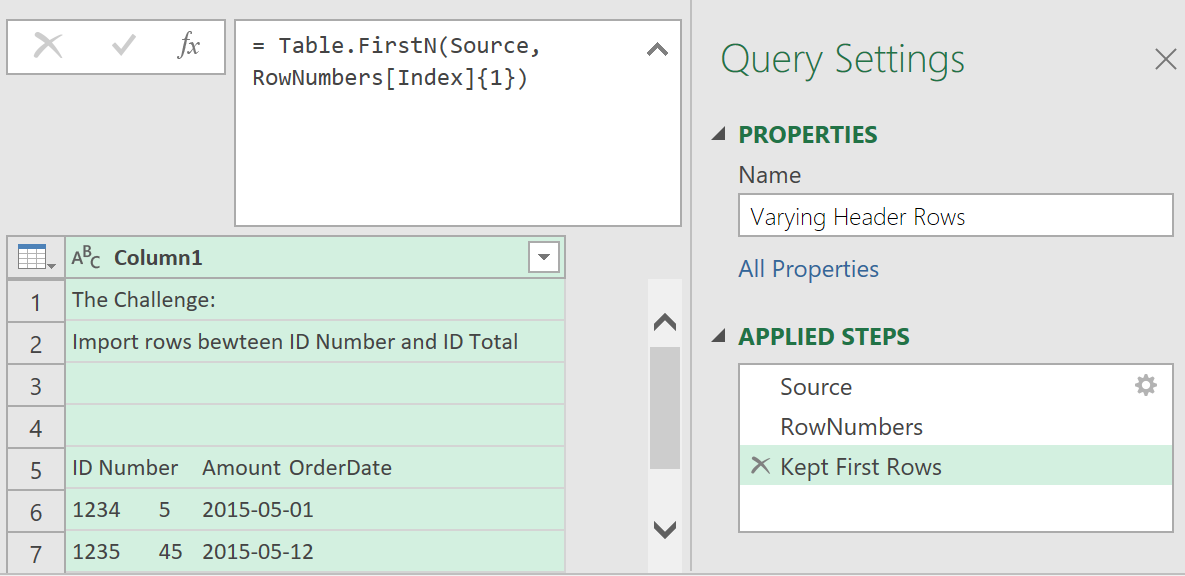
to:
=Table.FirstN(Source, RowNumbers[Index]{1})
As the code refers to the Source step, you can then delete the Custom1 step, so the query plan looks like this:
Now, add a dynamic filter to filter out the top rows as well:
- Go to Home ➔ Remove Rows ➔ Remove Top Rows ➔ 4 ➔ OK
- Update the formula bar from this:
= Table.Skip(#"Kept First Rows",4)
- To this:
= Table.Skip(#"Kept First Rows", RowNumbers[Index]{0})
Consolidate the last two steps to keep the code cleaner:
- Go to Home ➔ Advanced Editor
- Edit the following code:
   #"Kept First Rows" = Table.FirstN(Source, RowNumbers[Index]{1}),
   #"Removed Top Rows" = Table.Skip(#"Kept First Rows", RowNumbers[Index]{0})
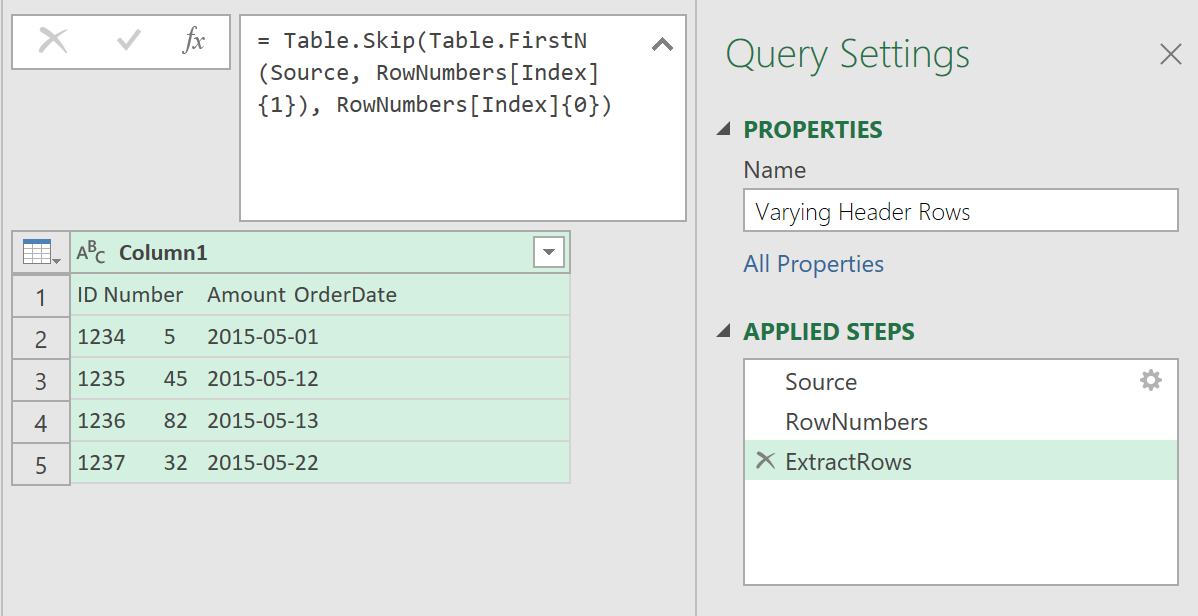
- By nesting the #”Kept First Rows” step into the second line, and renaming it to ExtractRows, as follows:
ExtractRows = Table.Skip(Table.FirstN(Source, RowNumbers[Index]{1}), RowNumbers[Index]{0})
- Click done
You should now have a shorter number of applied steps:
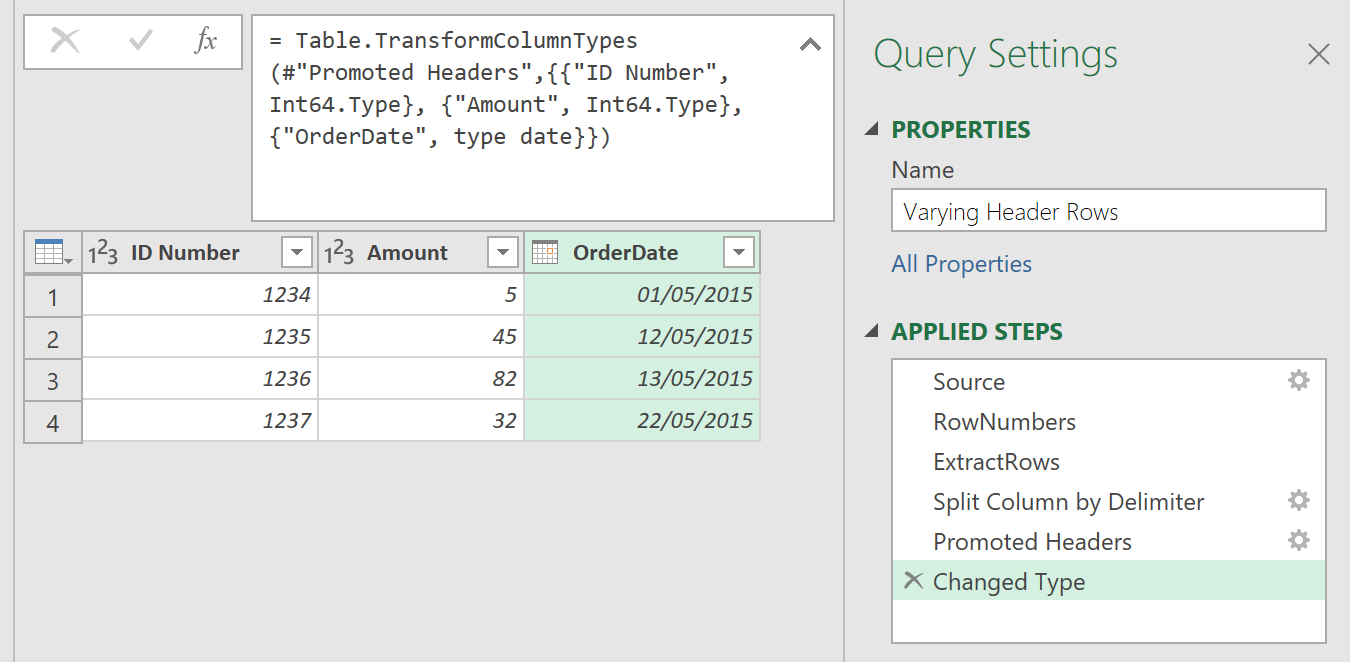
4. Split the Columns
Now, format and split the data into separate columns:
- Go to Transform ➔ Split Columns ➔ By Delimeter ➔ Tab ➔ At Each Occurrence ➔ OK
- Delete the automatically created Change Type step (it sets all columns to text, which won’t be accurate in the long term)
- Go to Transform ➔ Use First Row as Headers
- Right-click the ID Number column ➔ Change Type ➔ Whole Number
- Right-click the Amount column ➔ Change Type ➔ Whole Number
- Right-click the OrderDate column ➔ Change Type ➔ Date
The data should now be in a much better form:
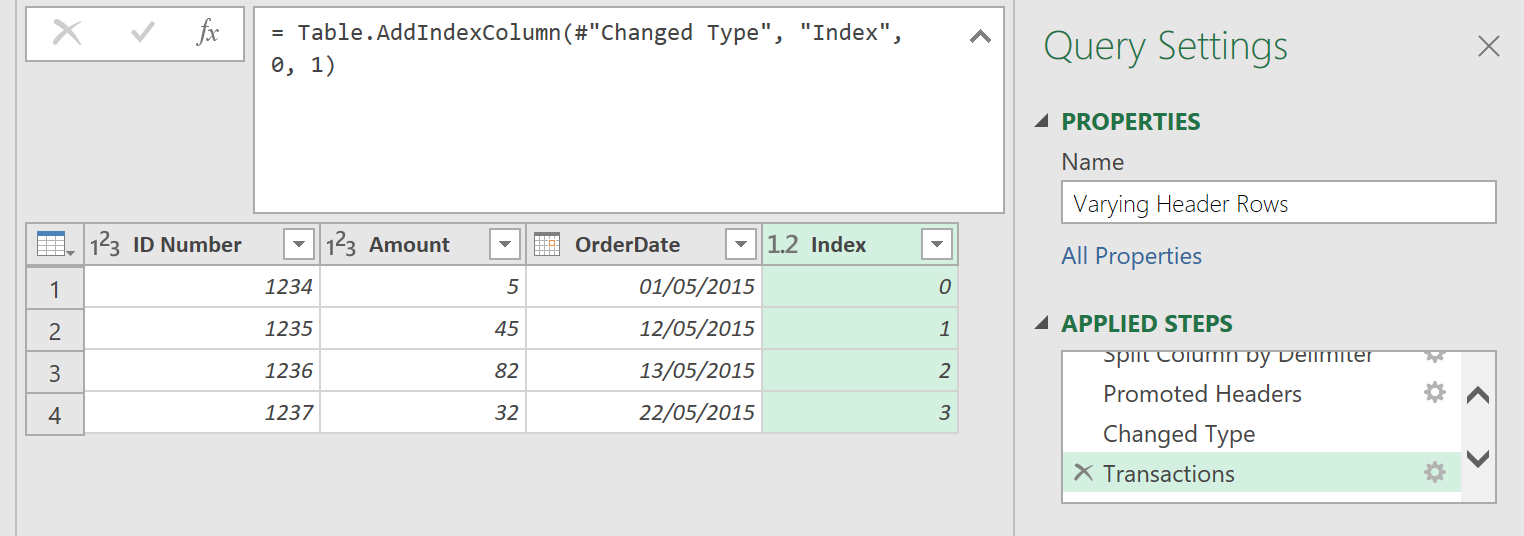
5. Refer to the previous row; Calculate the date difference
As a final step, you now need to work out the number of days since the previous order. To do this:
- Create an Index number for each row in the data set.
- Rename the Added Index Step to Transactions, as shown here:
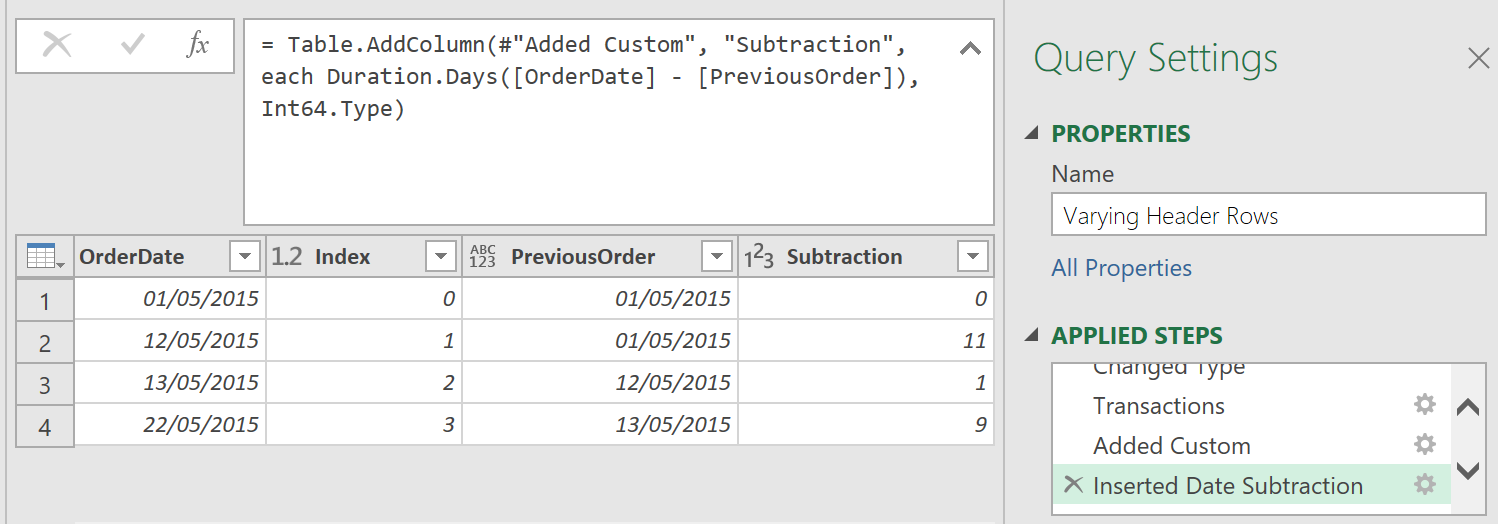
Now, add a new column:
- Go to Add Column ➔ Add Custom Column
- Name the Column PreviousOrder
- Enter the following formula:
= try Transactions[OrderDate]{[Index]-1} otherwise [OrderDate]
To calculate the number of days between the OrderDate and PreviousOrder columns
- Select the Order Date column ➔ hold down Ctrl ➔ select the PreviousOrder column
- Go to Add Column ➔ Date ➔ Subtract Days
Now the only thing left is the final cleanup:
- Right-click the Index column ➔ Remove
- Right-click the PreviousOrder column ➔ Change Type ➔ Date
- Right-click the Subtraction column ➔ Rename ➔ DaysSinceLastOrder
- Go to the Home tab ➔ Close & Load
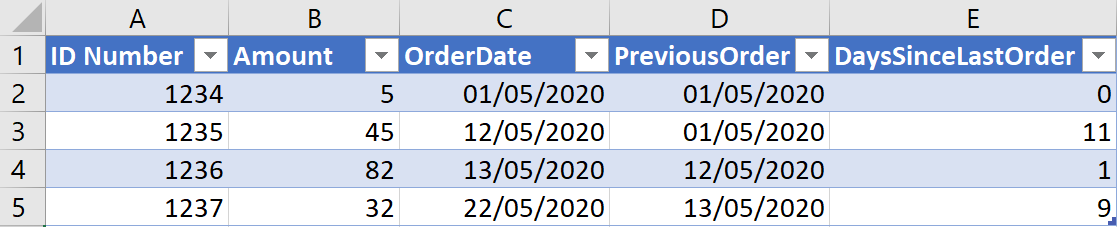
The final output should look as follows:
Feedback
Submit and view feedback