
Creating an Auditing Tool
Power Query as an Audit Tool
Let’s say you need to match of a list of data sent from a customer against some internal business data. This type of data matching is an audit process that ETL and Power Query is very capable of handling.
This article shows how you can create an ETL to fully automate this audit process!
Remittance Advice Scenario
Imagine you are a wholesale business, and you sell to multiple customers. Each customer has multiple invoices during a given month and the sales are all on credit. At the end of the month you send the customer a statement requesting payment for a number of invoices. The customer sends you a single payment for a batch of invoices along with a remittance advice (a list of what they are paying).
Your job is to check the invoices that have been paid against the accounts receivable system to make sure of the following:
- All the invoices have been paid
- Check for any invoices that have been paid that were not on this month’s statement (i.e. late payment from last month)
- Check for any variances in payment
In this example, there are 2 source files:
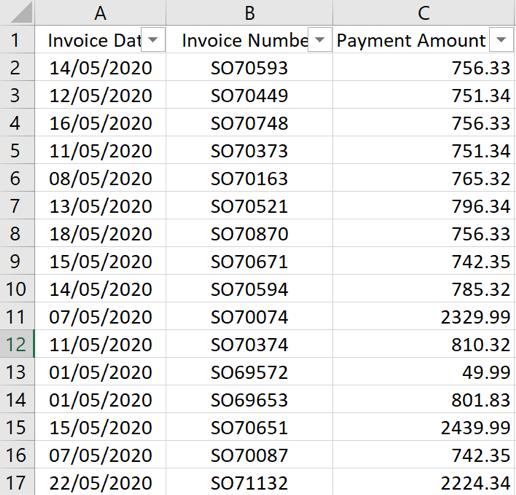
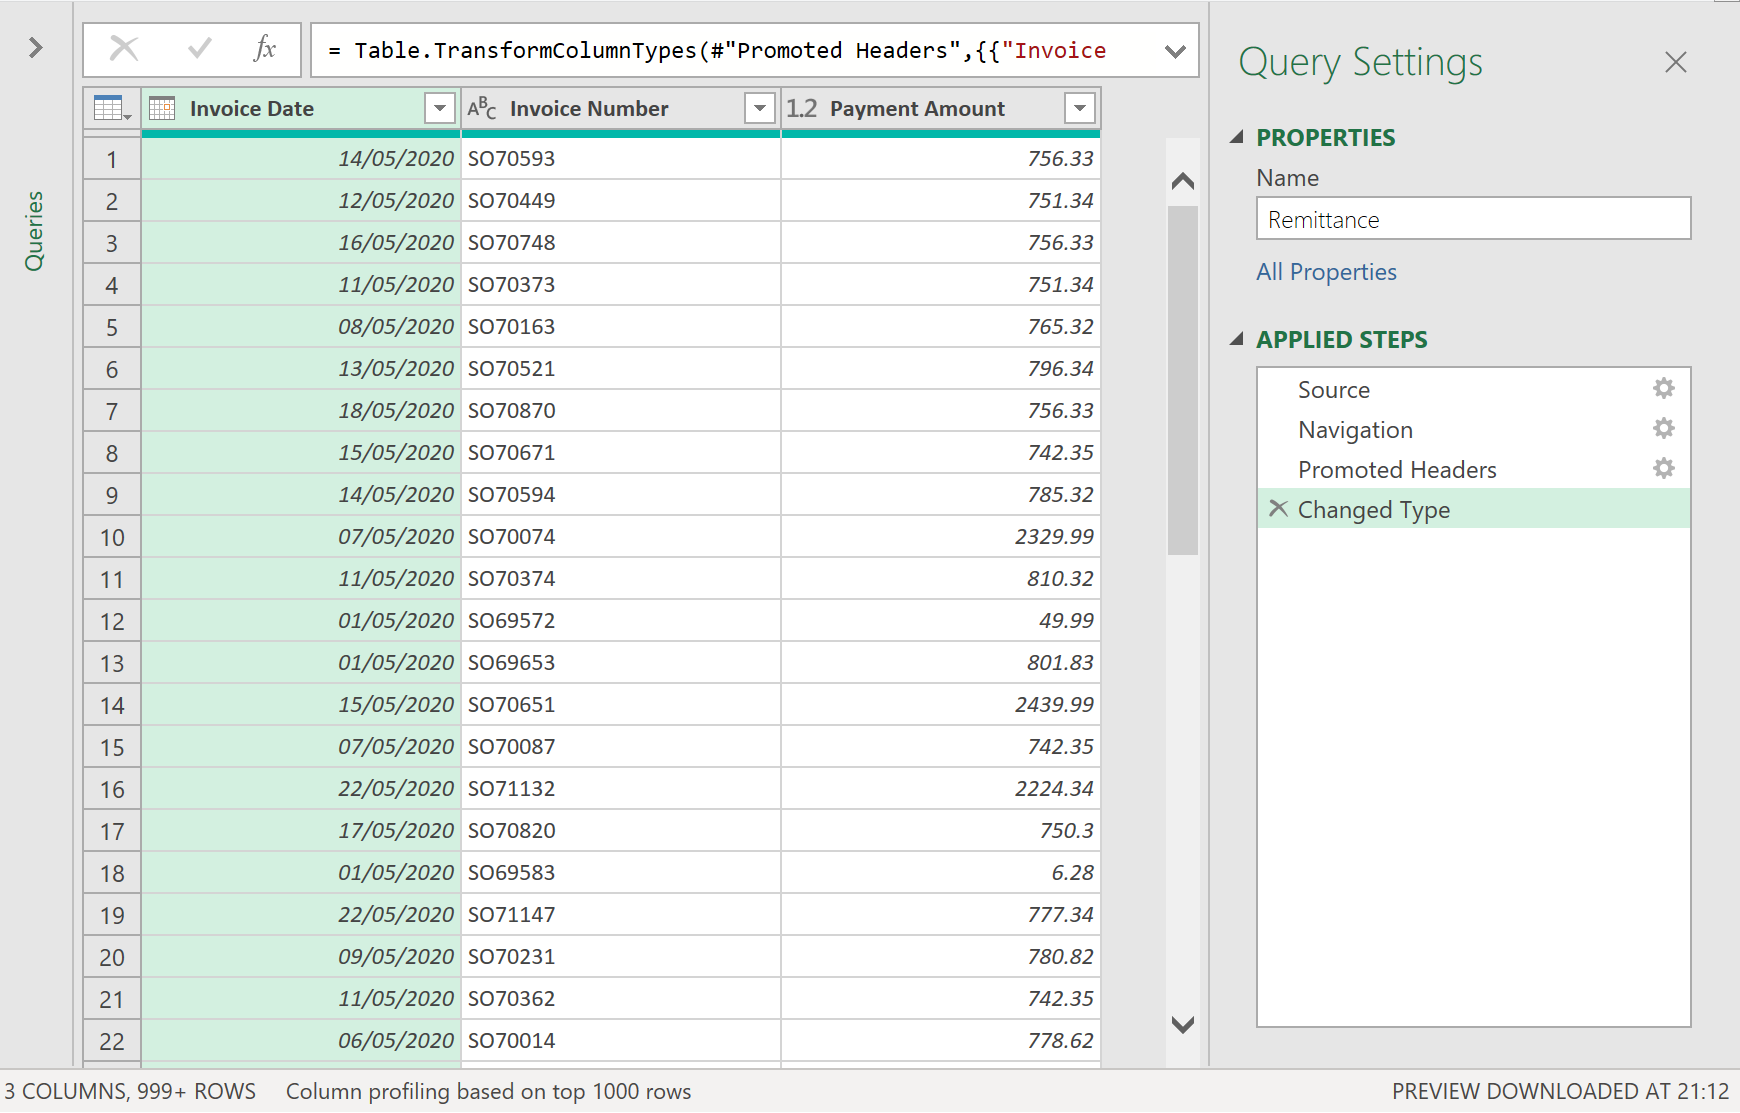
- A remittance file from the customer that looks like this.
-
This is the list of invoices and amounts the customer actually paid. The total of this remittance advice matches the total payment, but it does not match the statement you sent.
-
An extract from your Accounts Receivable (AR) system that looks like this.
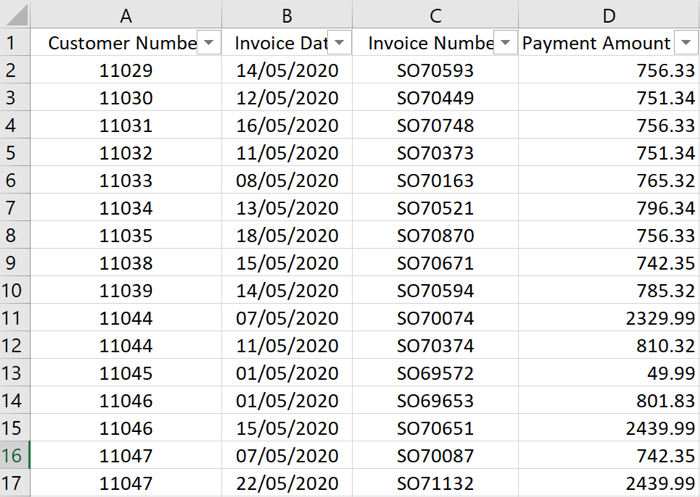
So basically, the files are in the same (or at least similar) in format. But your job is to match the customer’s remittance against your master AR records.
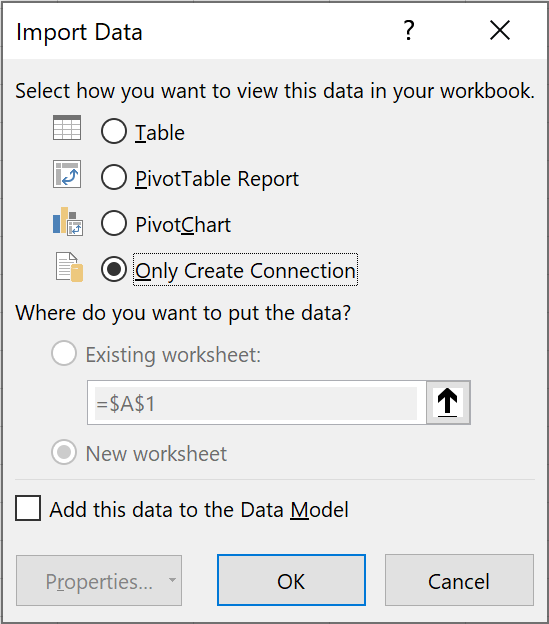
1. Create a new workbook and create a connection to both files
- First connect to the remittance advice.
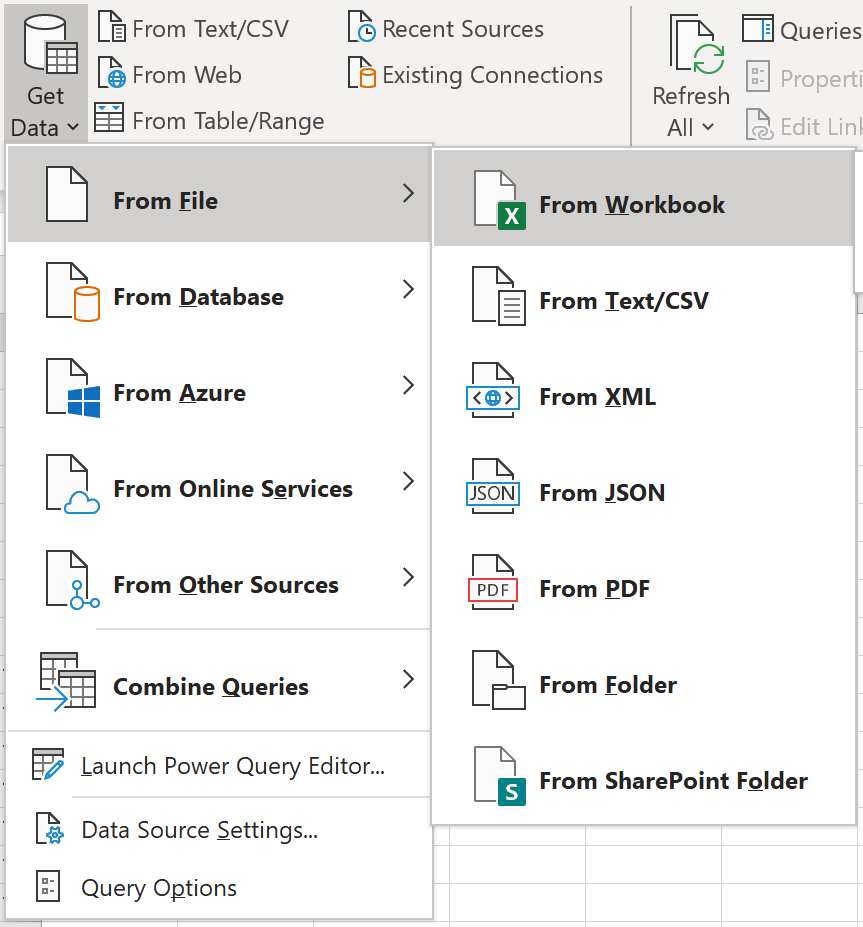
- Select the sheet, then select the Transform Data button.
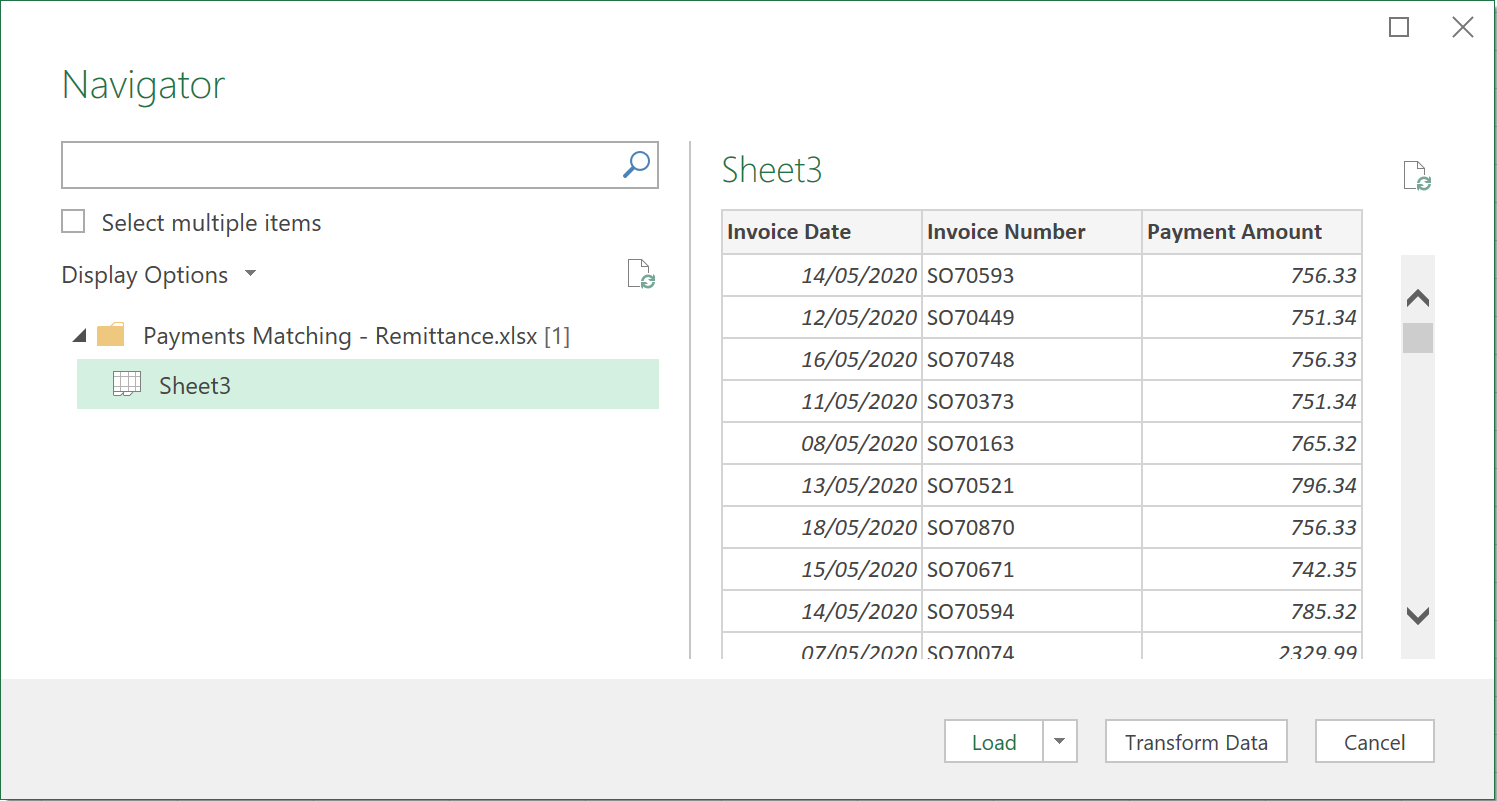
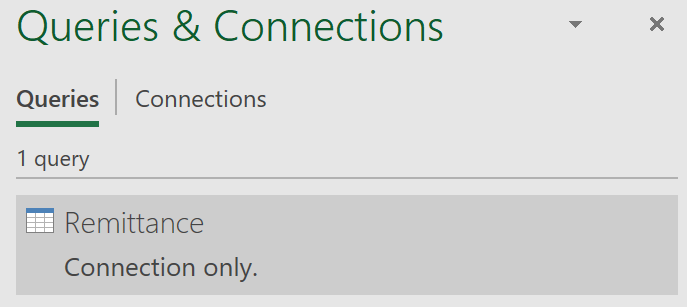
- In this case there is no need for any further transformation. However, you should change the name of the query to Remittance
- Next, proceed to select Close & Load as a Connection Only
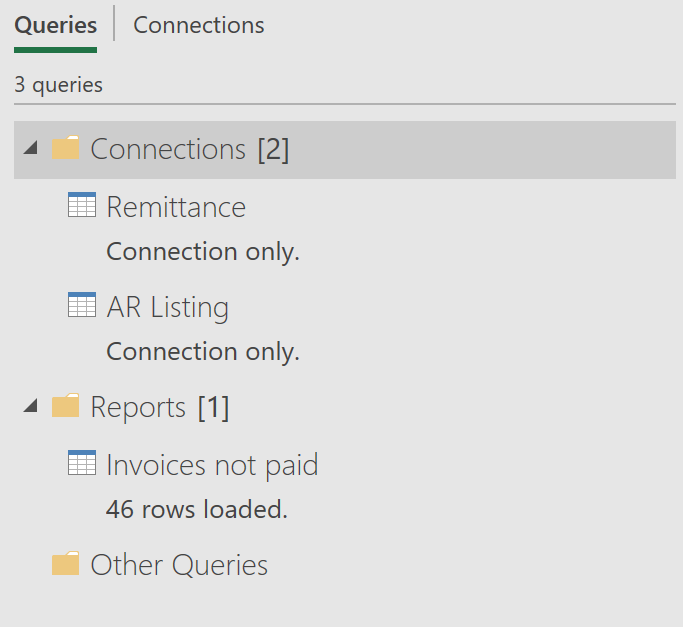
This creates a “connection only” to the file as shown:
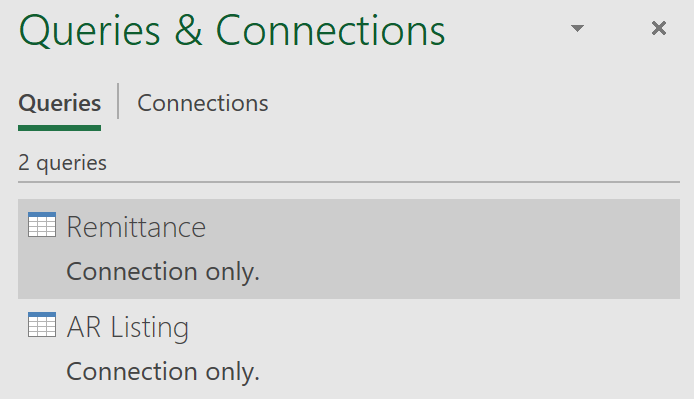
- Repeat the process for your AR Master data records, ensuring you give this second query a clear & logical name. You should end up with something like this:
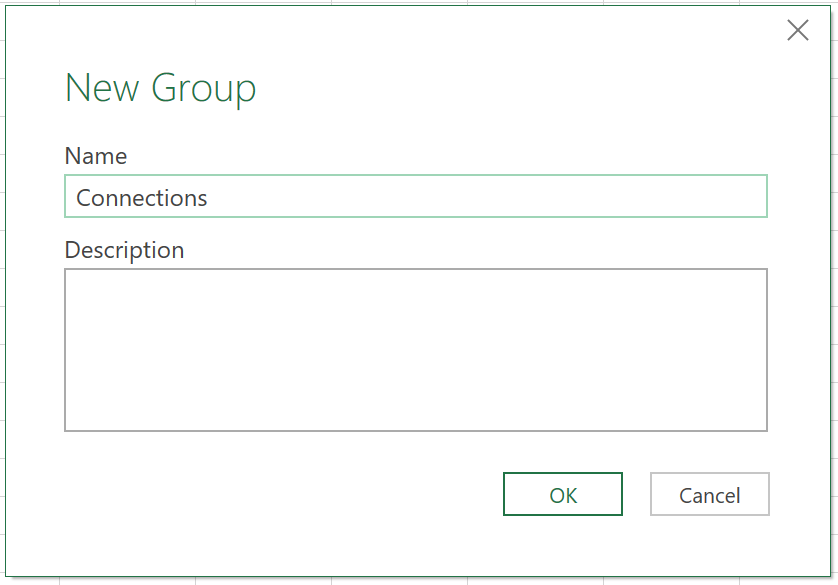
- It is a good idea to group your queries, so it is easier to work out what you have done. Right click on one of the queries, and select “Move to Group”, “New Group”
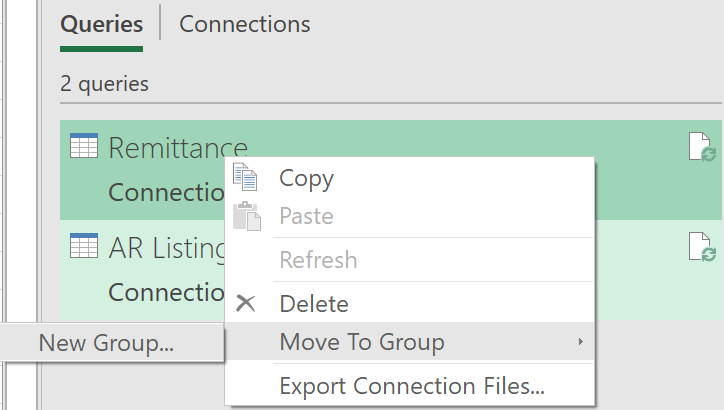
- Call the new Group “Connections” as shown:
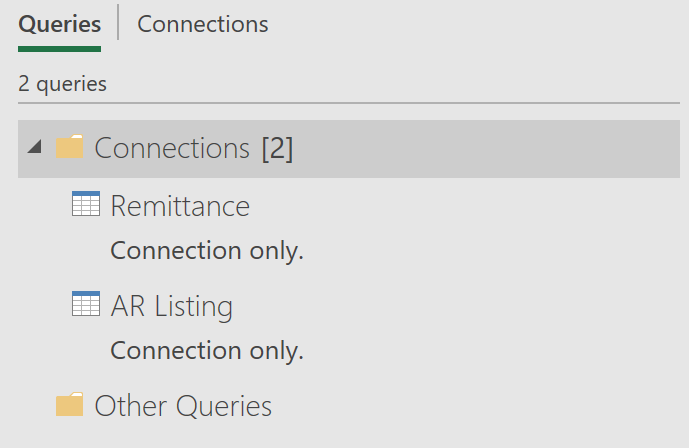
- Once you have the new group set up, you should see something like this:
Next, you will need to create 3 queries.
- Invoices not paid
- Invoices paid not on original statement
- Invoices paid with payment variance
Query 1. Invoices not paid
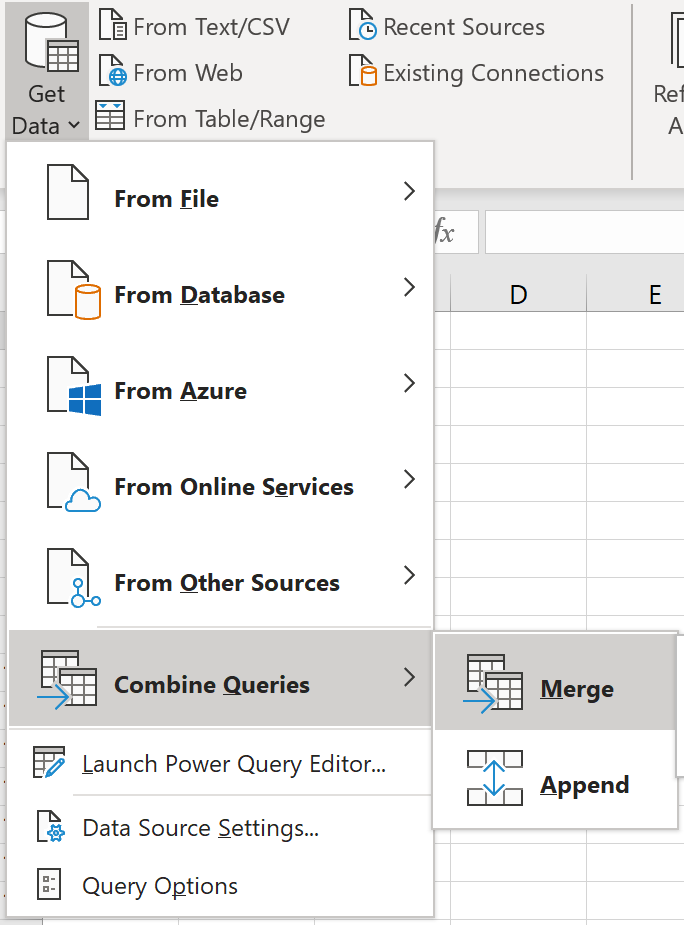
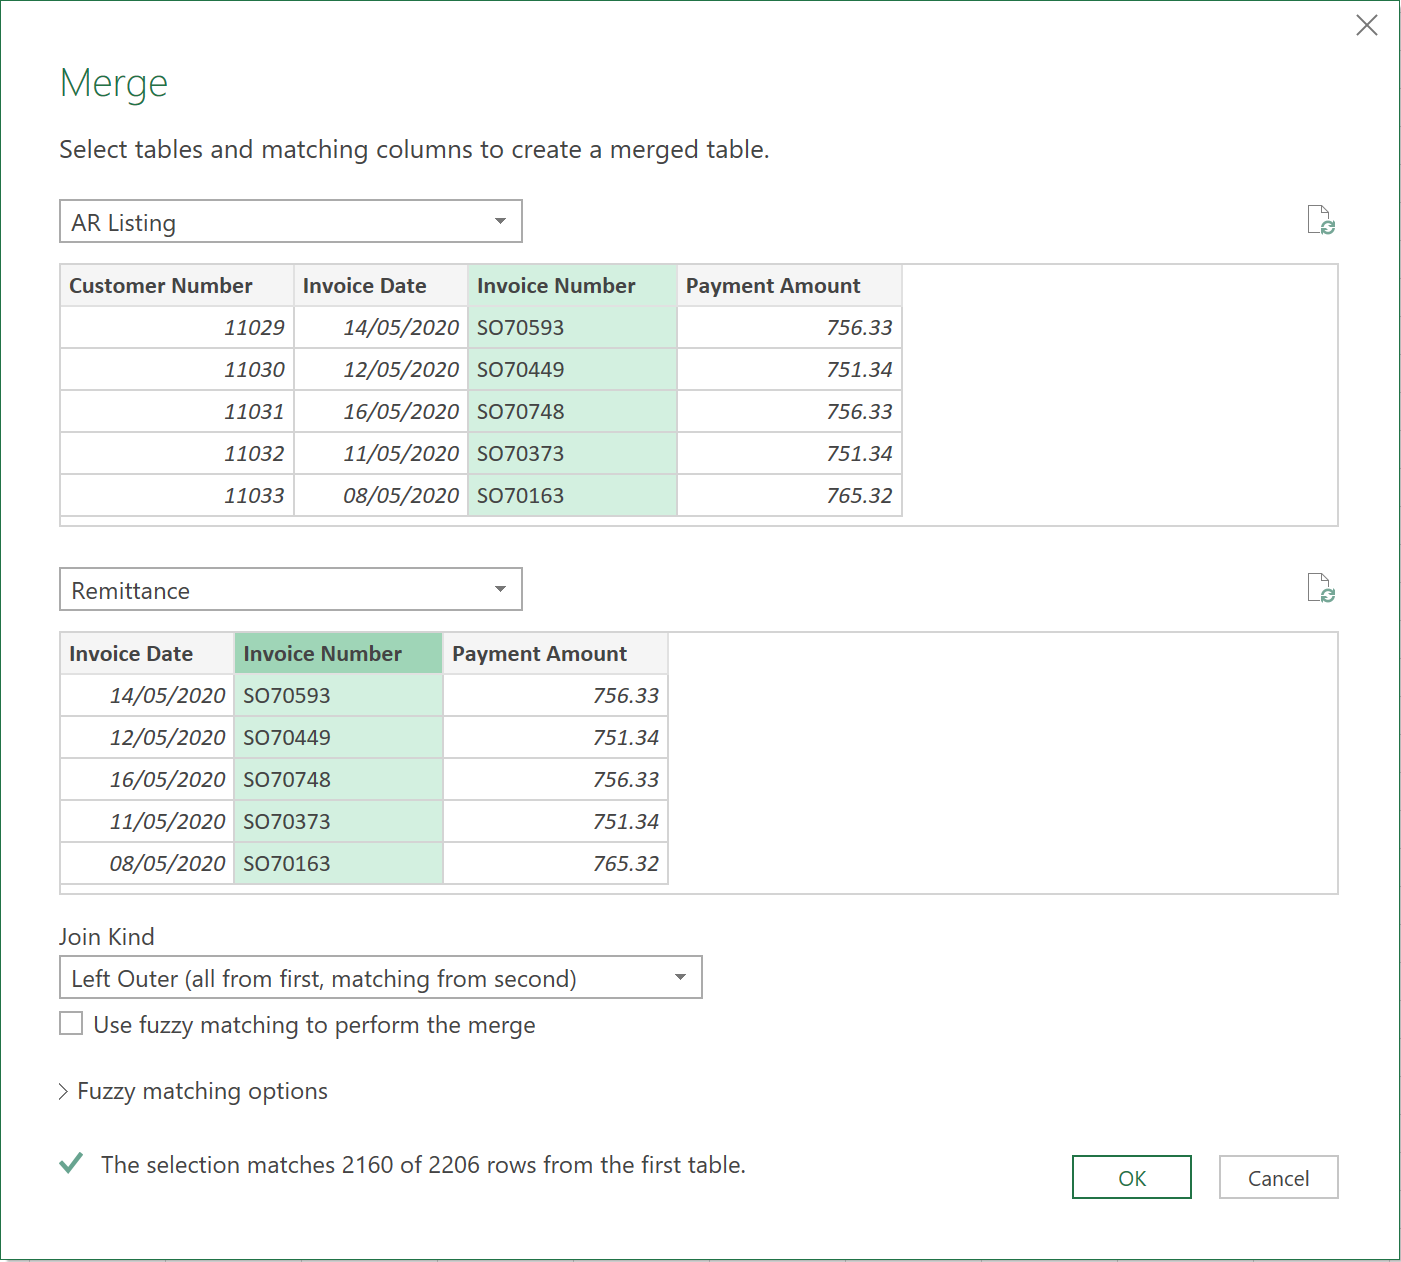
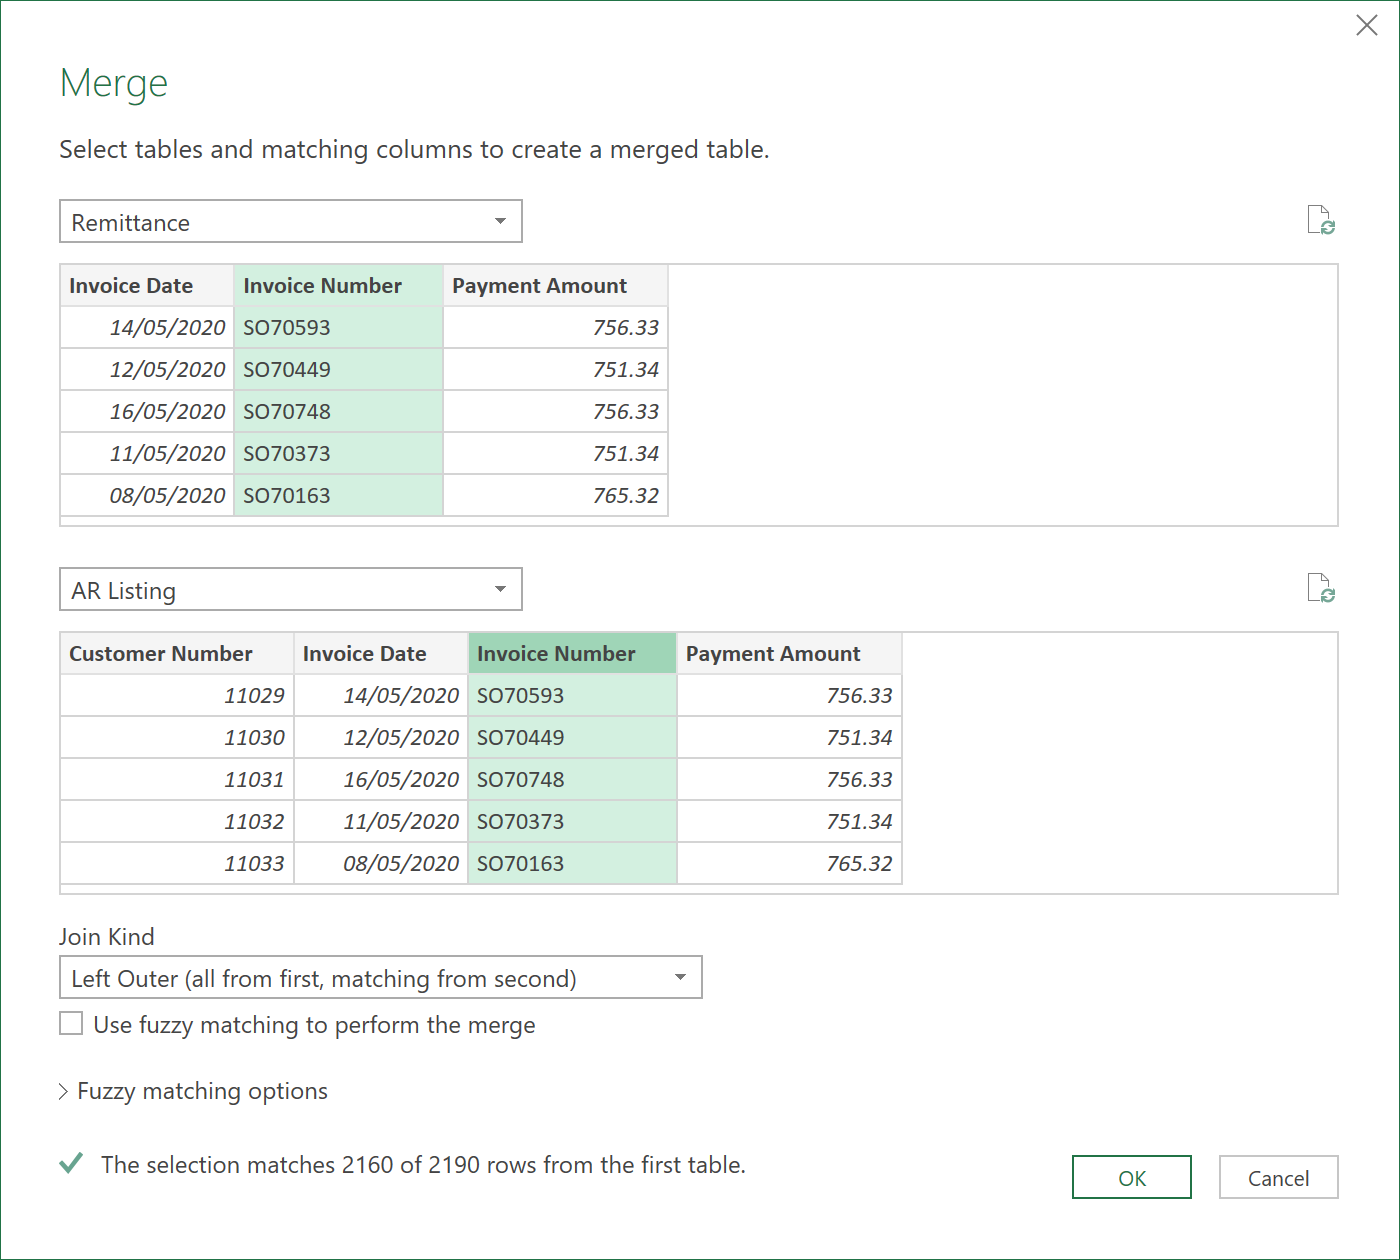
- From the Data menu, select “Merge”, as shown below:
- In this example, the AR listing is the “book of record”, so select that as the first table.
- Then select “remittance” as the second table.
- Click on the Invoice Number column in the top table, followed by the same data column in the second table.
- Keep the “Join Kind” to be “Left Outer Join”, as you want to know which invoices are not paid.
- Note that there are 2160 invoices paid out of a total of 2206 in the AR system
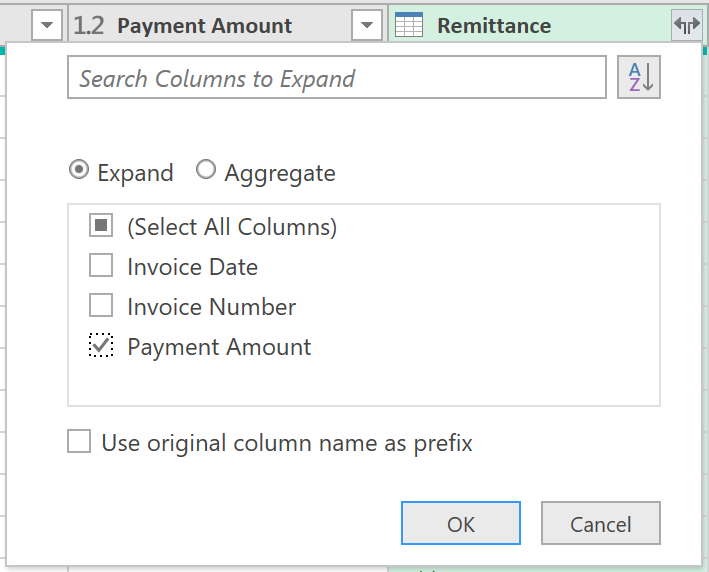
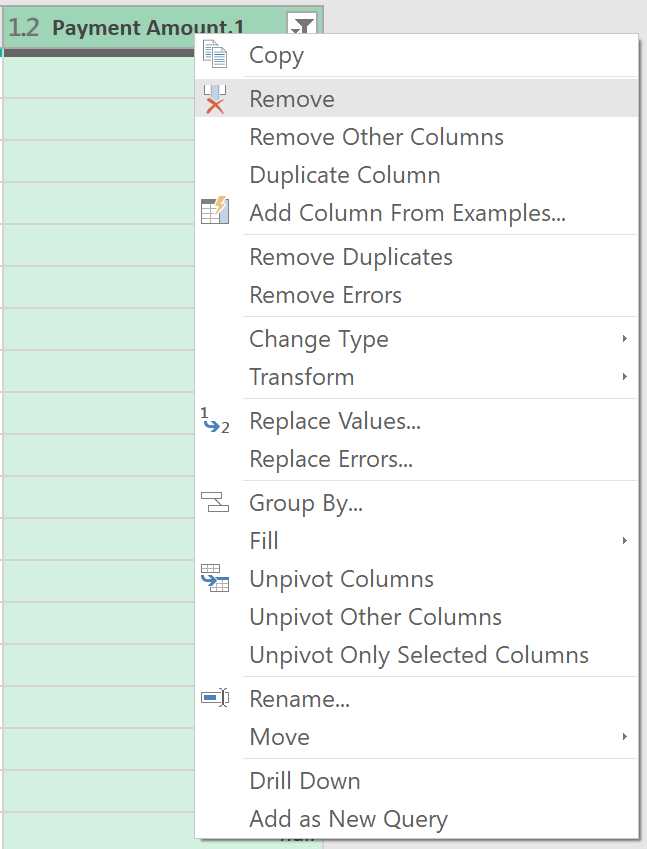
- Now select the “expand” button and deselect all columns other than ‘Payment Amount’. Also, deselect the “original column name”
- Click OK
Anywhere there is a “null” in this new column, it means there was no payment to match the AR master list of invoices. These invoices shown as “null” therefore have not been paid.
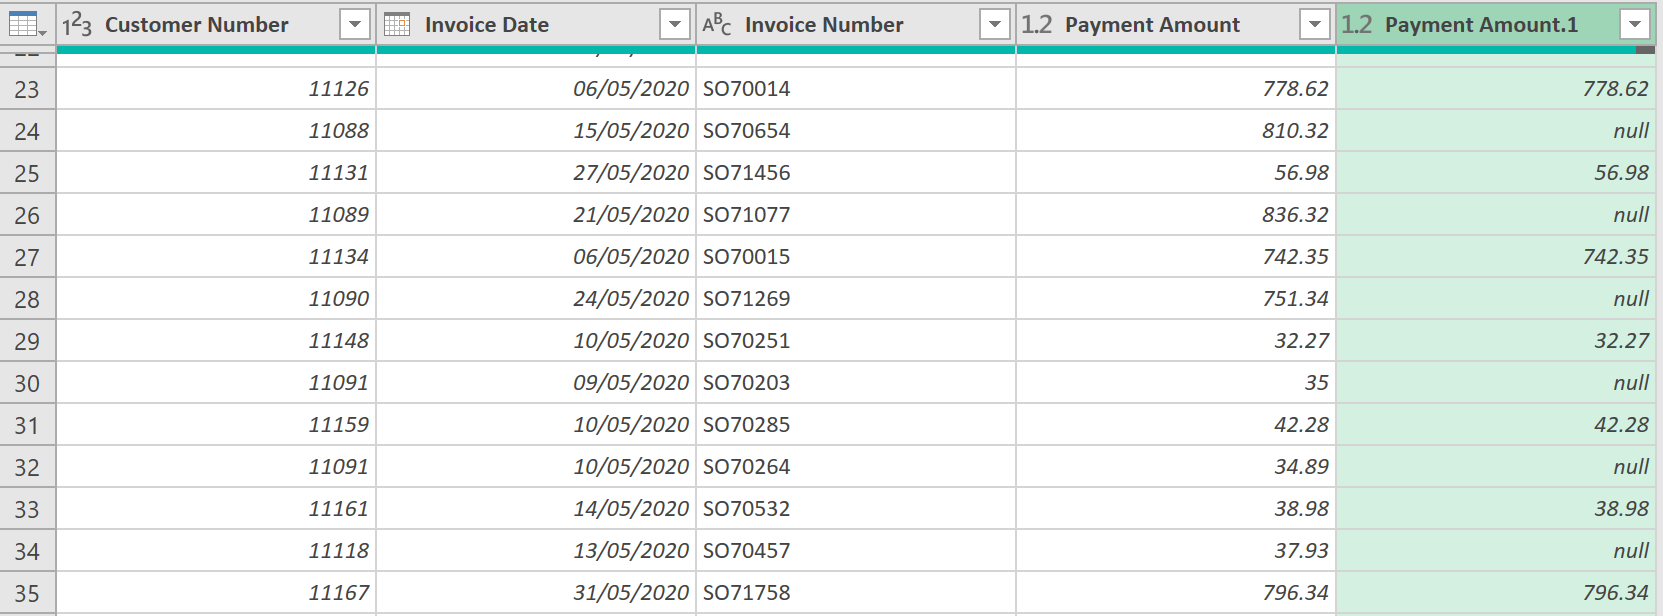
- So, filter out all the rows in the table except for the “nulls” as shown below.
- You are finished with this column now, so right click on it and then remove it
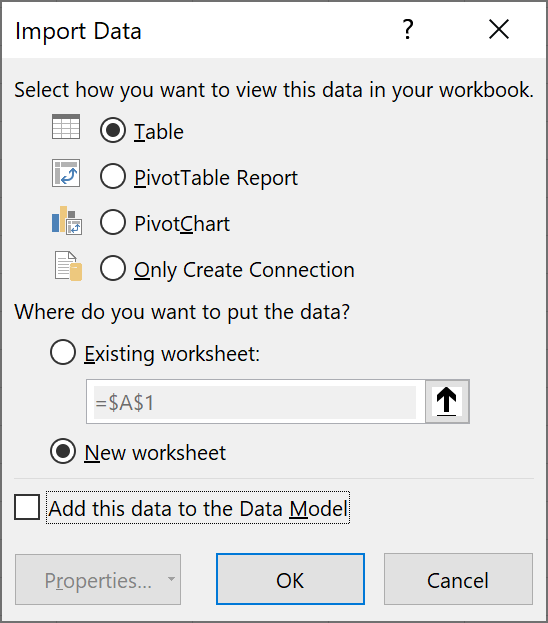
- Now give the query a name, Close & Load the query, but this time load it to a table in your workbook as shown below:
- Now move this new query to a new Group called “reports” (just like earlier).
Query 2. Invoices paid but not on original statement
- To create this next report, create a new query just like the one above, but swap the tables around so the remittance table is first.
Almost every other step is identical to the previous query, so follow the process above to get a new table that shows all the payments made that were not on the original statement.
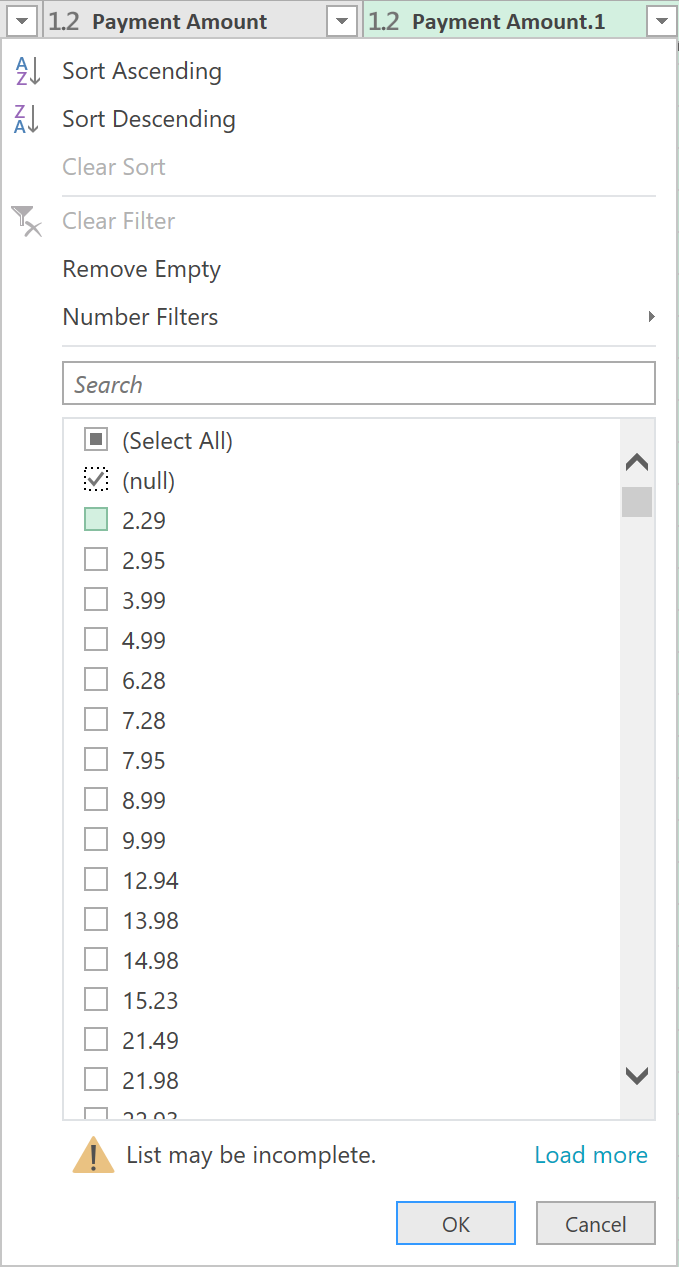
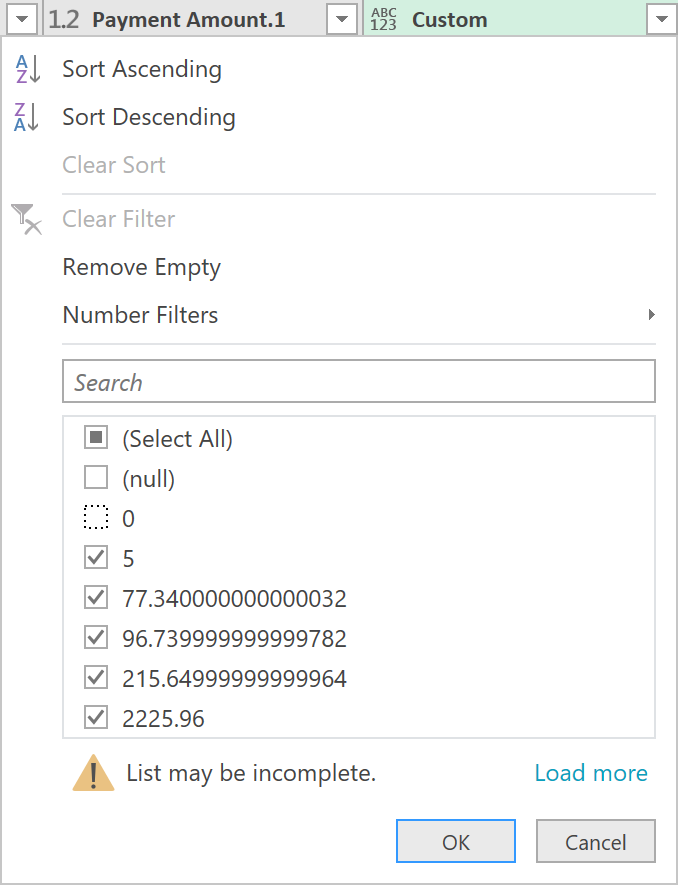
This time when you apply the filter for “nulls”, you might not see “null” as an option in the list. There might be a message saying “List may be incomplete” (shown below), so click on “load more” so you select just the null values as before.
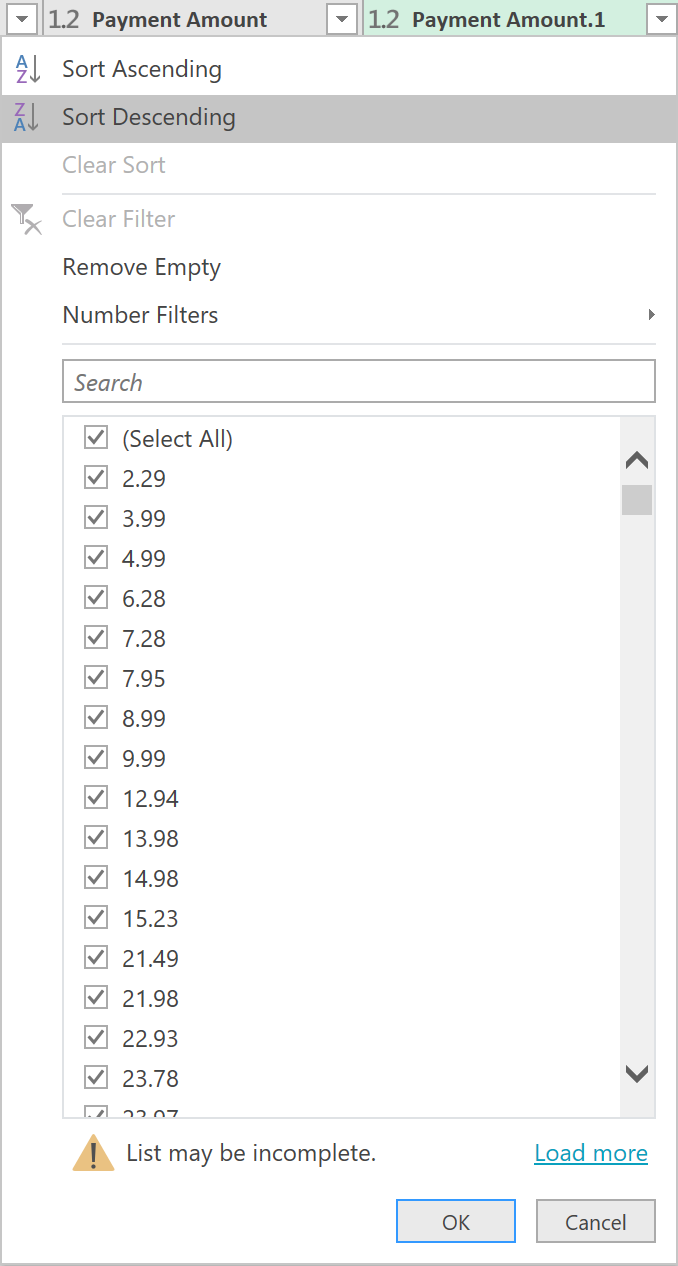
- After clicking “load more” complete the last steps as shown above in the first query. Give the new query a suitable name and load it to a table only (as before). Then move the query to the Reports Group.
Query 3. Invoices paid with payment variance
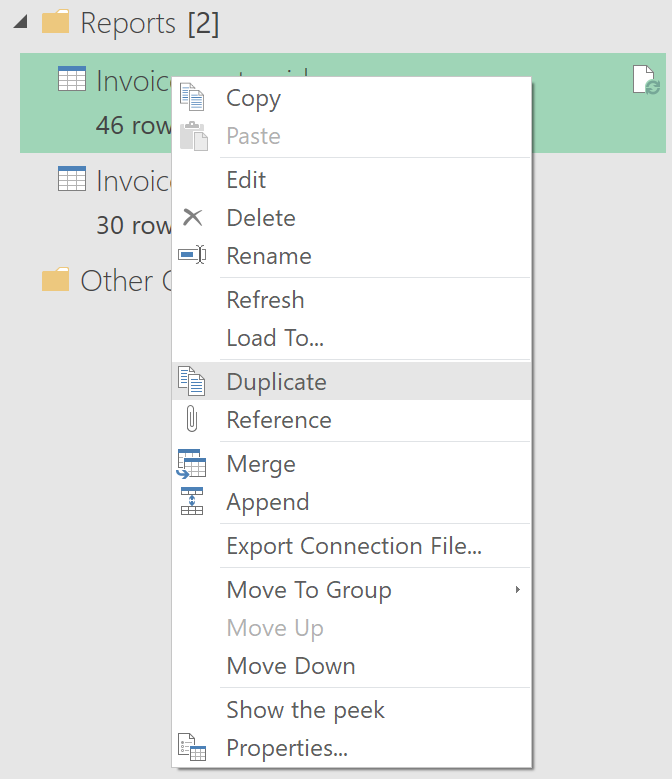
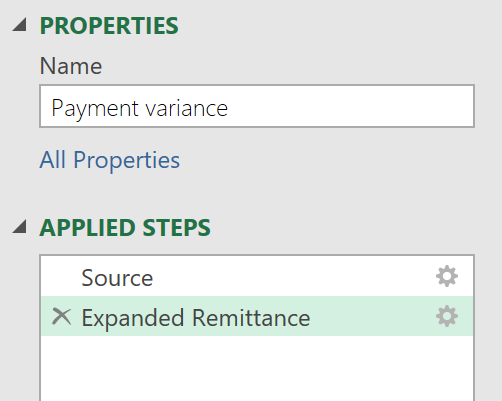
The last step is to check which invoices were paid with a different amount than was on the invoice (i.e. short paid, over paid). This time copy the first query and make some changes to the copy.
- To do this, right click on the query and select “duplicate”.
- Give the new query a suitable new name and delete the last 2 steps by clicking the “cross” next to each of the last 2 steps.
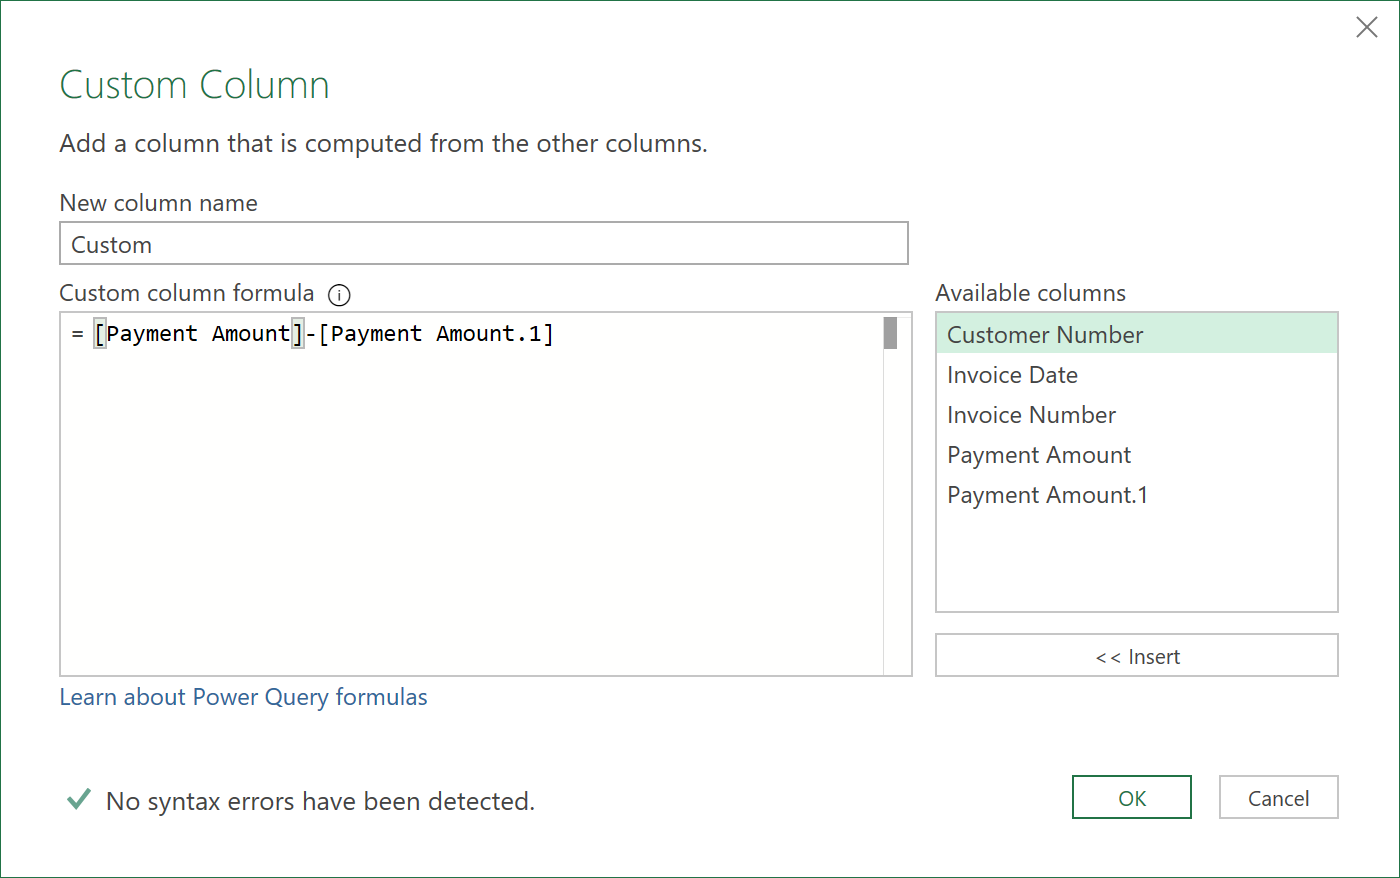
- Now add a new custom column as shown below. This new column is the amount expected to be paid minus the amount actually paid.
- Now all you need to do is apply a filter to this new column and deselect the zero and null options from the list. All the values that are left will be those that have a variance.
- It is a good idea to give the column headings a new name so that the resulting table makes sense.

And that is it!
All you need to do to reuse the tools is re-point the first 2 queries to another set of files and refresh the workbook.
Feedback
Submit and view feedback