
Excel Form to Excel Sheet
Background
Sometimes users might not need to have to print out separate forms, but instead just enter data directly into a spreadsheet.
This article explains how to create a User Form in Microsoft Excel itself, that can be used to send data from this Form to any WorkSheet or Table in the same Excel WorkBook. This is useful particularly with large WorkBooks with lots of WorkSheets, where it can be difficult and time-consuming to navigate across several sheets, just to make sure your data gets to the right place.
Below we outline the various steps needed to create such a Form and Spreadsheet.
Design User Form
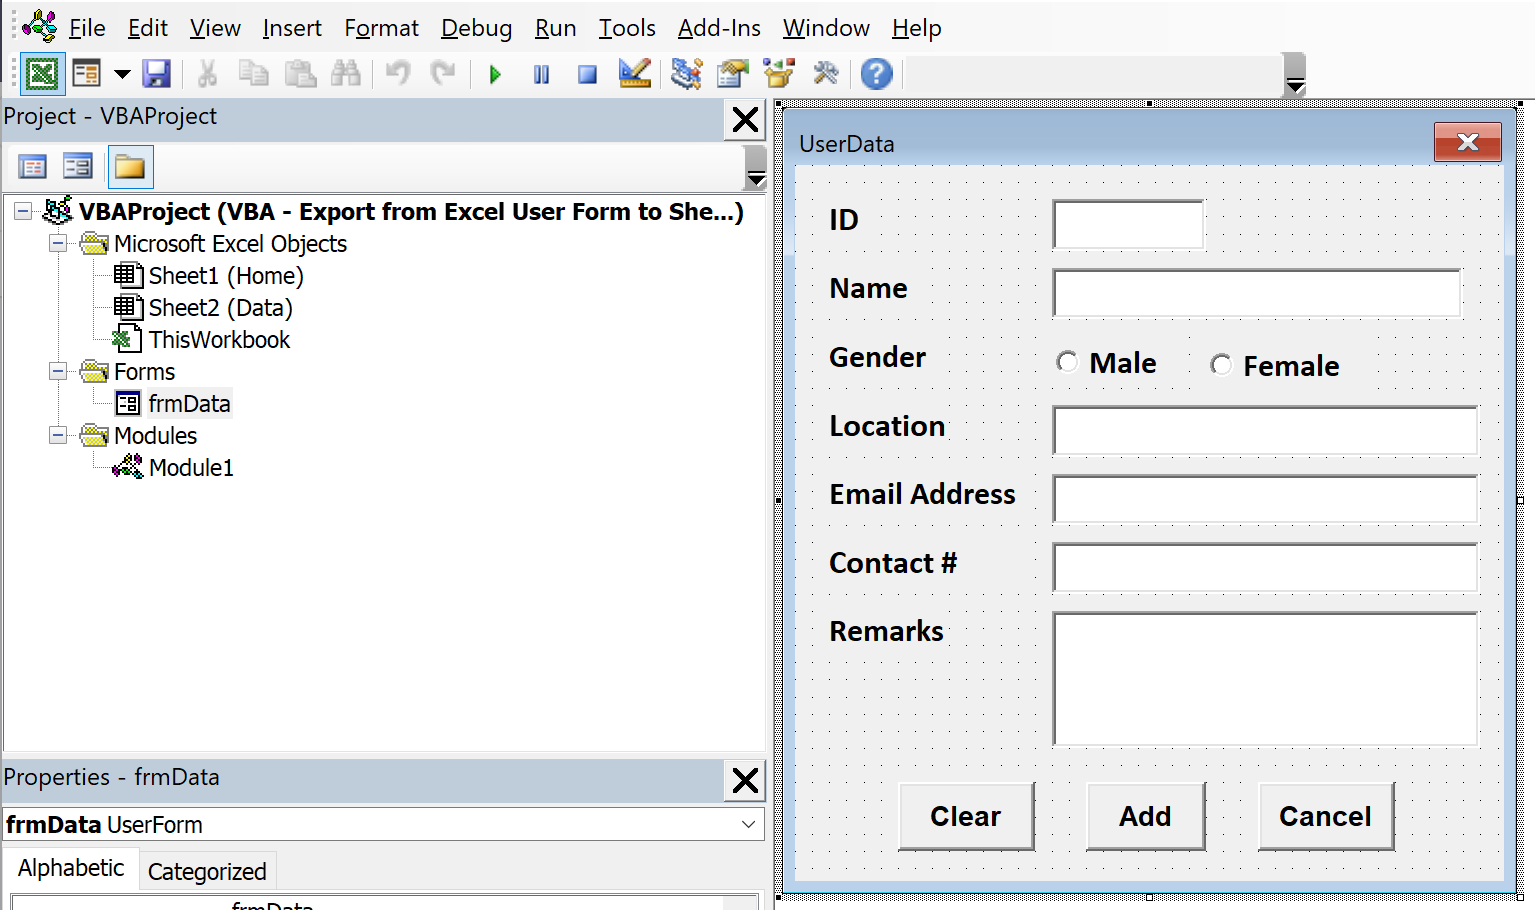
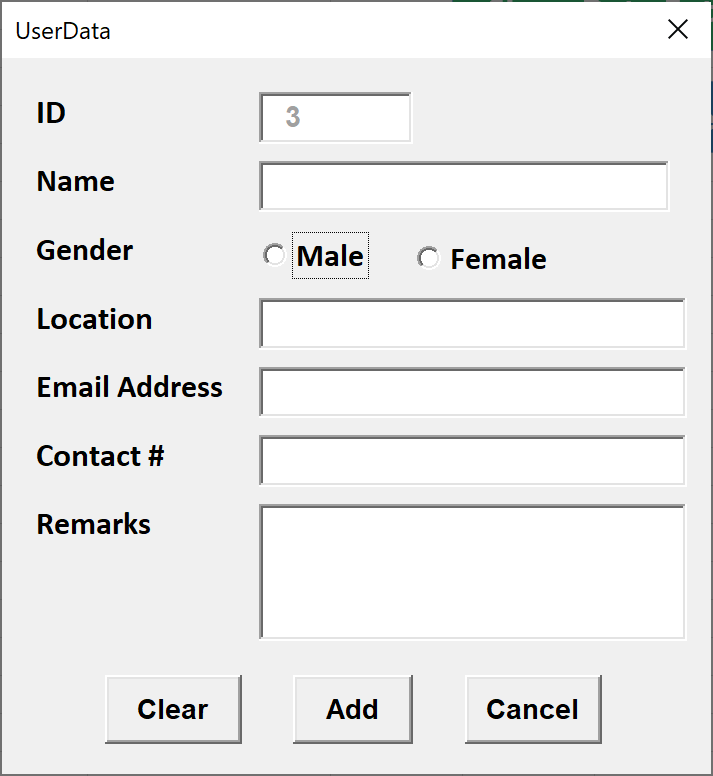
First Create a Form Object in Microsoft Excel by going to the VBA Editor, and design a User Form. Ensure you give each object an appropriate name (by selecting the Properties of that object), as they will need to be referenced in the VBA code.
Here is an example of what a User Form might look like:
Create Form Object VBA
Next, create the following code for the Form Object. It might look something like this:
'Variable Declaration
Dim BlnVal As Boolean

Private Sub UserForm_Initialize()
    'Variable declaration
    Dim IdVal As Integer

    'Finding last row in the Data Sheet
    IdVal = fn_LastRow(Sheets("Data"))

    'Update next available id on the userform
    frmData.txtId = IdVal
End Sub

Sub cmdAdd_Click()
    On Error GoTo ErrOccured
    'Boolean Value
    BlnVal = 0

    'Data Validation
    Call Data_Validation

    'Check validation of all fields are completed are not
    If BlnVal = 0 Then Exit Sub

    'TurnOff screen updating
    With Application
        .ScreenUpdating = False
        .EnableEvents = False
    End With

    'Variable declaration
    Dim txtId, txtName, GenderValue, txtLocation, txtCNum, txtEAddr, txtRemarks
    Dim iCnt As Integer

    'find next available row to update data in the data worksheet
    iCnt = fn_LastRow(Sheets("Data")) + 1

    'Find Gender value
    If frmData.obMale = True Then
       GenderValue = "Male"
    Else
       GenderValue = "Female"
    End If

    'Update userform data to the Data Worksheet
    With Sheets("Data")
        .Cells(iCnt, 1) = iCnt - 1
        .Cells(iCnt, 2) = frmData.txtName
        .Cells(iCnt, 3) = GenderValue
        .Cells(iCnt, 4) = frmData.txtLocation.Value
        .Cells(iCnt, 5) = frmData.txtEAddr
        .Cells(iCnt, 6) = frmData.txtCNum
        .Cells(iCnt, 7) = frmData.txtRemarks


        'Diplay headers on the first row of Data Worksheet
        If .Range("A1") = "" Then
            .Cells(1, 1) = "Id"
            .Cells(1, 2) = "Name"
            .Cells(1, 3) = "Gender"
            .Cells(1, 4) = "Location"
            .Cells(1, 5) = "Email Addres"
            .Cells(1, 6) = "Contact Number"
            .Cells(1, 7) = "Remarks"

            'Formatiing Data
            .Columns("A:G").Columns.AutoFit
            .Range("A1:G1").Font.Bold = True
            .Range("A1:G1").LineStyle = xlDash

        End If
    End With

    'Display next available Id number on the Userform
    'Variable declaration
    Dim IdVal As Integer

    'Finding last row in the Data Sheet
    IdVal = fn_LastRow(Sheets("Data"))

    'Update next available id on the userform
    frmData.txtId = IdVal

ErrOccured:
    'TurnOn screen updating
    Application.ScreenUpdating = True
    Application.EnableEvents = True

End Sub

'In this example we are finding the last Row of specified Sheet
Function fn_LastRow(ByVal Sht As Worksheet)

    Dim lastRow As Long
    lastRow = Sht.Cells.SpecialCells(xlLastCell).Row
    lRow = Sht.Cells.SpecialCells(xlLastCell).Row
    Do While Application.CountA(Sht.Rows(lRow)) = 0 And lRow <> 1
        lRow = lRow - 1
    Loop
    fn_LastRow = lRow

End Function

'Exit from the Userform
Private Sub cmdCancel_Click()
    Unload Me
End Sub

' Check all the data (except remarks field) has been entered on userform
Sub Data_Validation()
     If txtName = "" Then
        MsgBox "Enter Name!", vbInformation, "Name"
        Exit Sub
     ElseIf frmData.obMale = False And frmData.obFMale = False Then
        MsgBox "Select Gender!", vbInformation, "Gender"
        Exit Sub
     ElseIf txtLocation = "" Then
        MsgBox "Enter Location!", vbInformation, "Location"
        Exit Sub
    ElseIf txtEAddr = "" Then
        MsgBox "Enter Address!", vbInformation, "Email Address"
        Exit Sub
    ElseIf txtCNum = "" Then
        MsgBox "Enter Contact Number!", vbInformation, "Contact Number"
        Exit Sub
    Else
        BlnVal = 1
    End If
End Sub

'Clearing data fields of userform
Private Sub cmdClear_Click()
    Application.ScreenUpdating = False
        txtId.Text = ""
        txtName.Text = ""
        obMale.Value = True
        txtLocation = ""
        txtEAddr = ""
        txtCNum = ""
        txtRemarks = ""
    Application.ScreenUpdating = True
End Sub
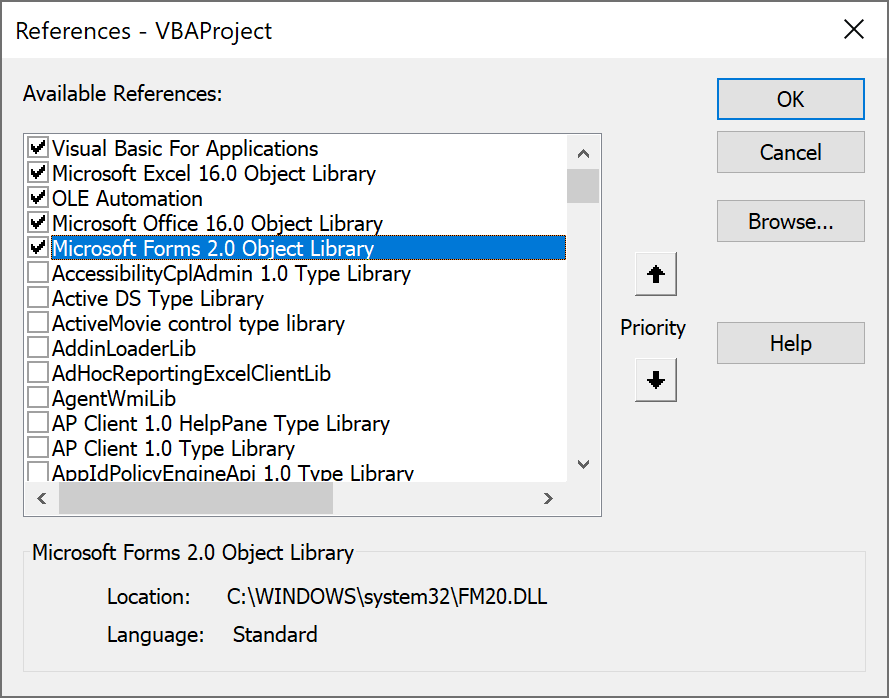
Activate correct VBA Objects (in Excel)
The important one is Microsoft Forms 2.0 Object Library, as shown below:
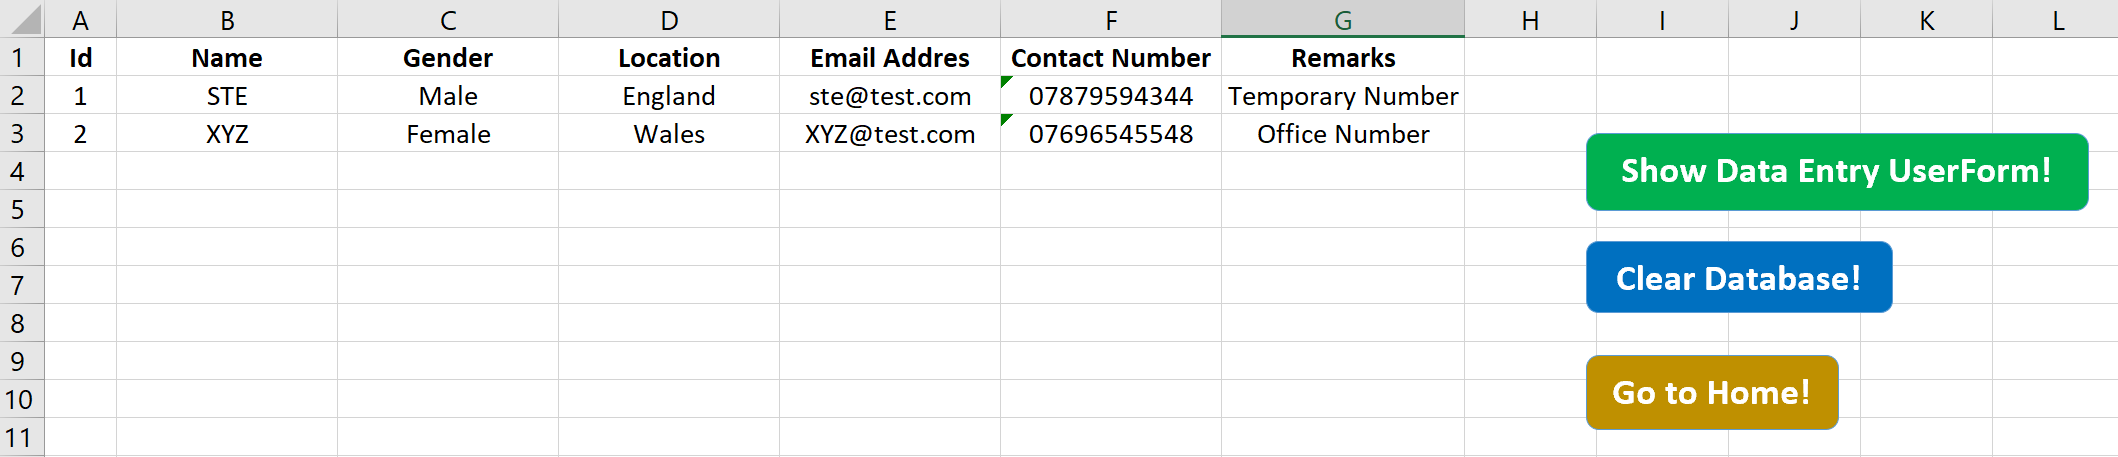
Design Spreadsheet
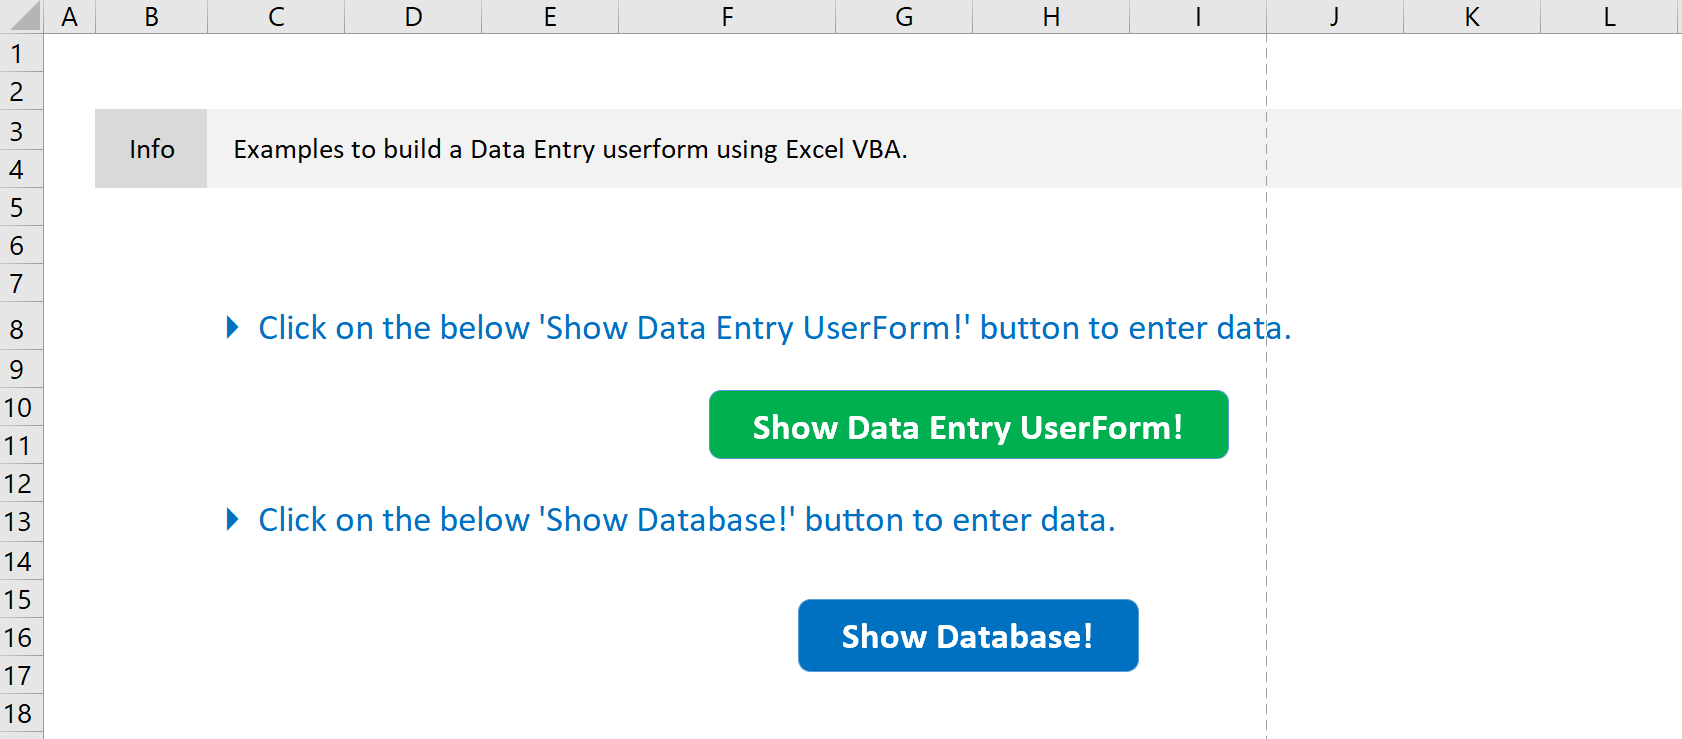
Now design a consistent spreadsheet, according to the User Form created earlier. You will also need to create two buttons, one for Clearing the Table in the Worksheet, and the other for Showing the User Form.
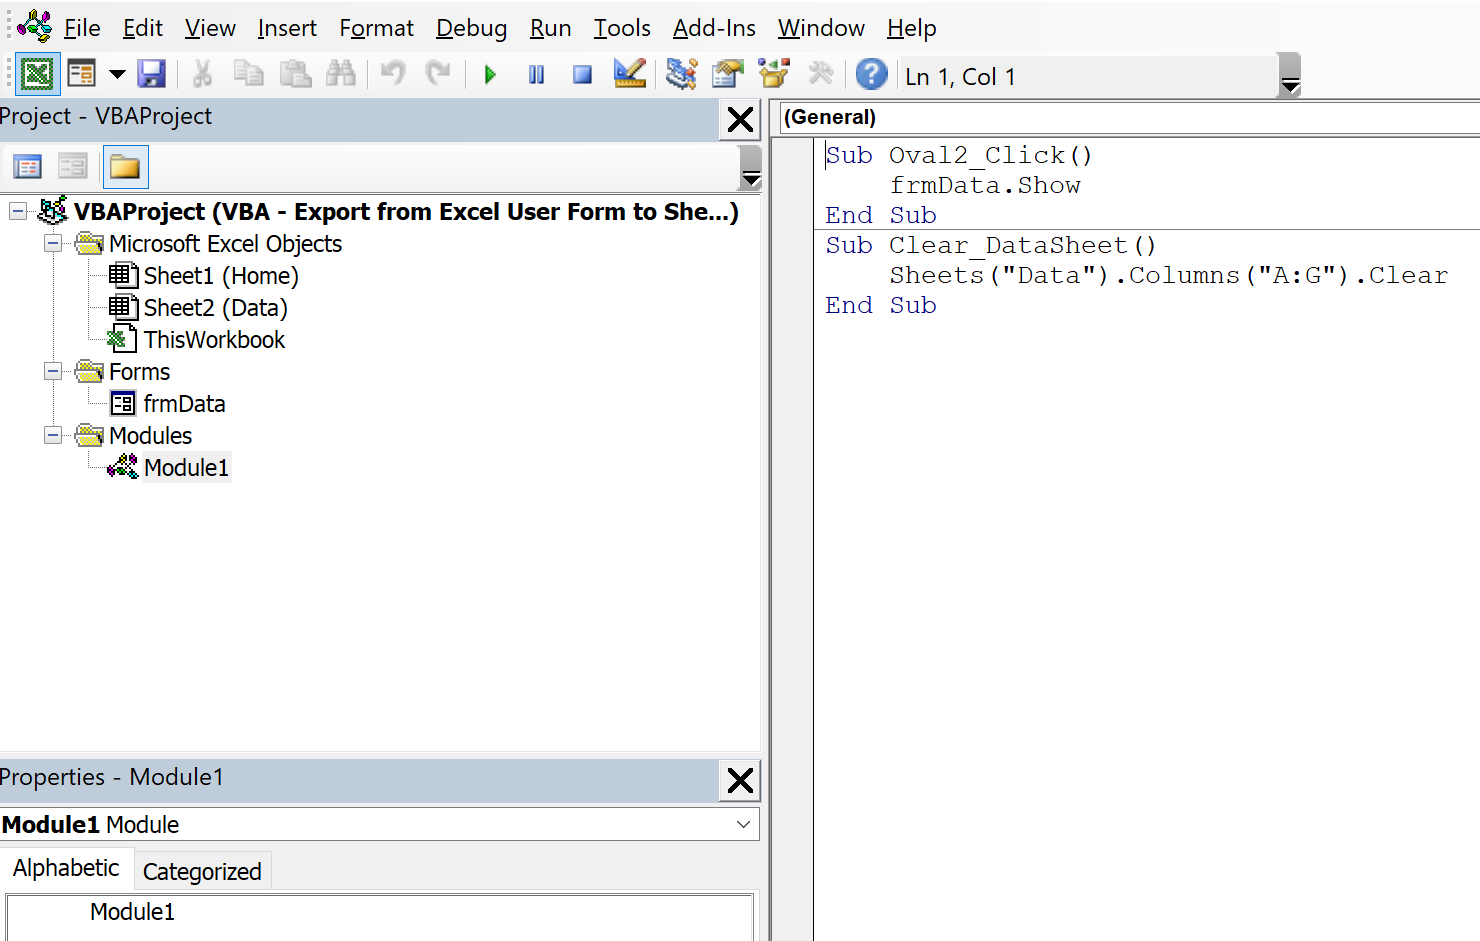
Create VBA Module
Now, create the VBA code that goes into the VBA Module of the WorkBook, and assign each of these macros to the buttons on the WorkSheet (See the spreadsheet pictures earlier with the green and blue buttons.)
Sub Oval2_Click()
    frmData.Show
End Sub
Sub Clear_DataSheet()
    Sheets("Data").Columns("A:G").Clear
End Sub
That’s it! You should be able to send the data from the Excel User Form to anywhere in the WorkBook at the simple click of a button!
Download
The full file can be downloaded here:
Feedback
Submit and view feedback